Before You Start
- Make sure you know whether this contact will be a Customer, Supplier, or Both.
- Have the basic details ready: name, phone number, email, and address.
Steps to Add a Contact
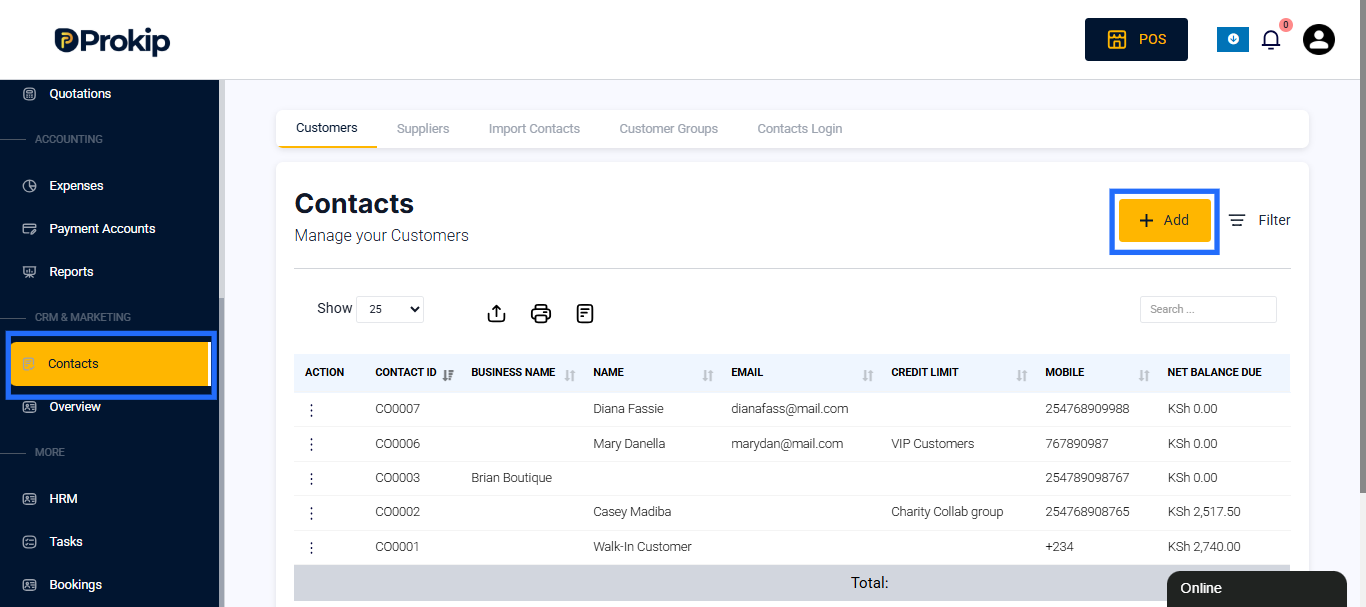
- Go to Contacts: From the Prokip dashboard, click on Contacts in the sidebar.
- Add a New Contact: Click on the + Add button.
- Fill in Contact Details
Select Contact Type: Choose whether the new contact is a:
- Customer – If the person buys from you.
- Supplier – If the person sells to you.
- Both – If they buy from you and sell to you.
- Both Name – Enter the person’s or business’s names.
- Phone Number – Enter their mobile/phone number.
- Email – Add their email address (optional but useful).
- Date of Birth(optional) – Enter the person’s date of birth.
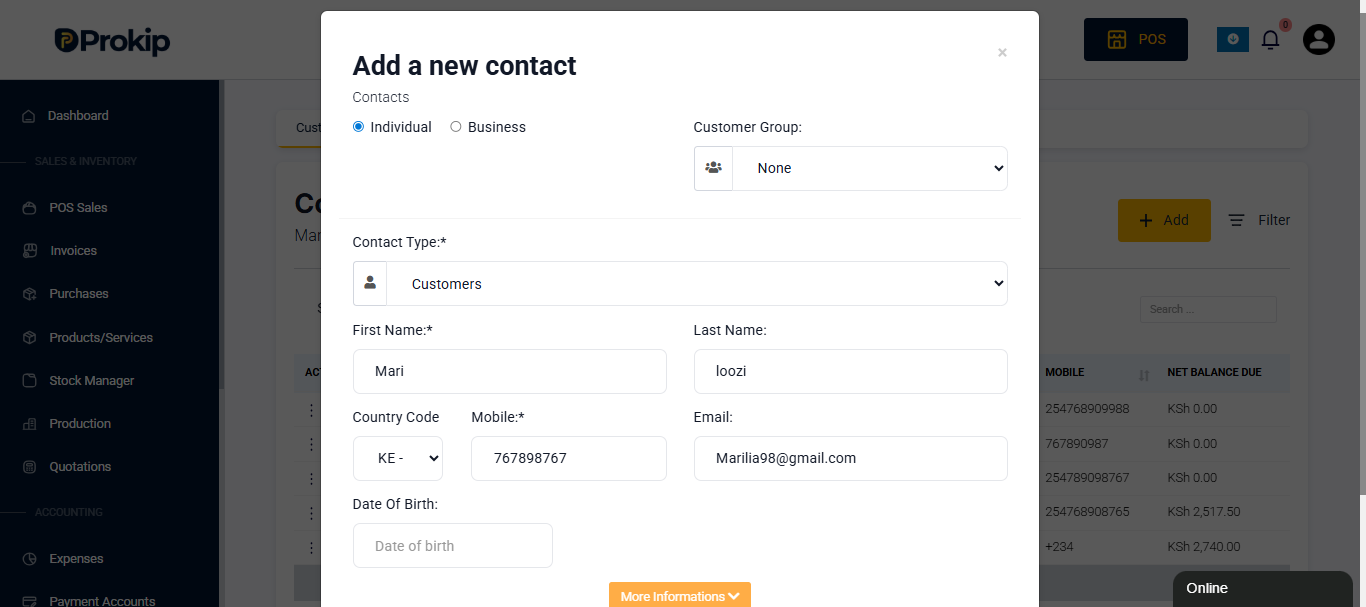
More Information: You can click on more information to open the dropdown and add more information.
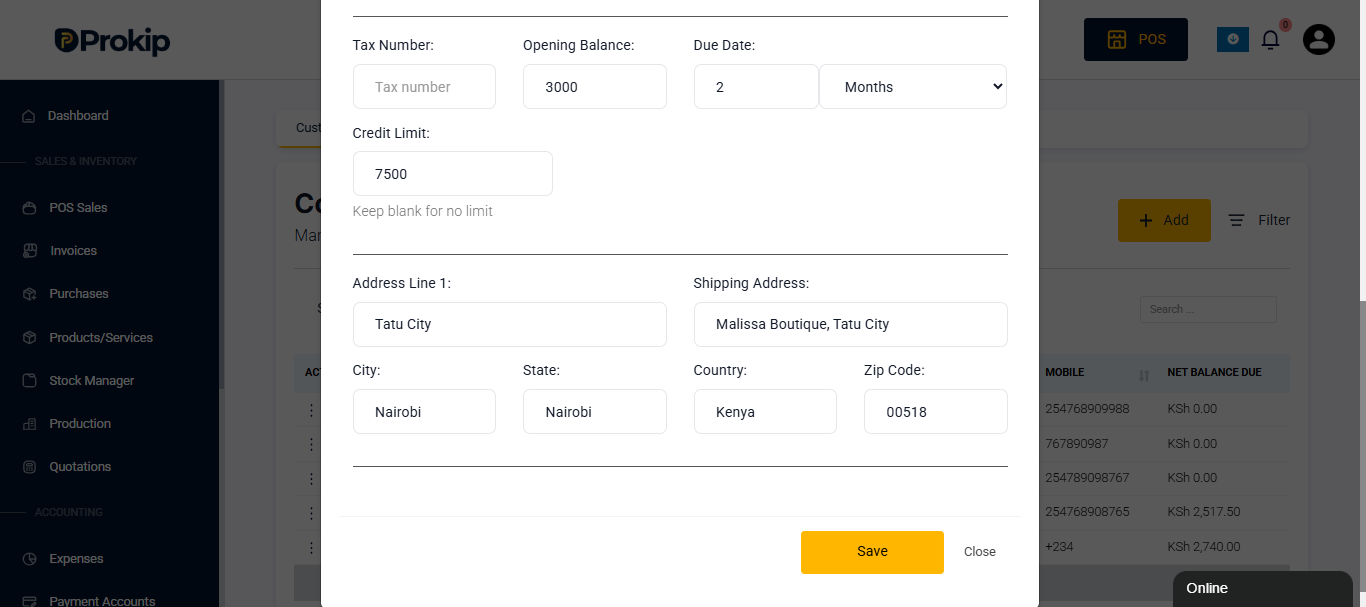
- Tax Number – You can add the customer’s tax number if you know it.
- Opening Balance – If the customer owes the business, you can add the debt amount here.
- Due Date – You can add the debt’s due date, number of days or months, by selecting from the dropdown next to the due date feature.
- Credit Limit – You can add the customer’s credit limit, or leave blank for no limit.
- Address – You can add the customer’s address, including the city, state, country and shipping address on this last section.
- Click Save at the bottom of the form.
- The new contact will now appear in your Contacts list.
Best Practices
- Always choose the correct type (Customer, Supplier, or Both) so transactions are tracked correctly.
- Use the full business name if it’s a company (e.g., “Okoro Supermarket Ltd”).
- Double-check phone and email for accuracy — this is how Prokip links invoices, payments, and receipts.
- If the contact plays both roles, select “Both” to avoid creating duplicates.