Before You Start
- Confirm that at least one Customer Contact exists (or be ready to create one).
- Make sure your Products or Services are already listed in your catalog for easy selection.
Steps
- Log in to your Prokip account.
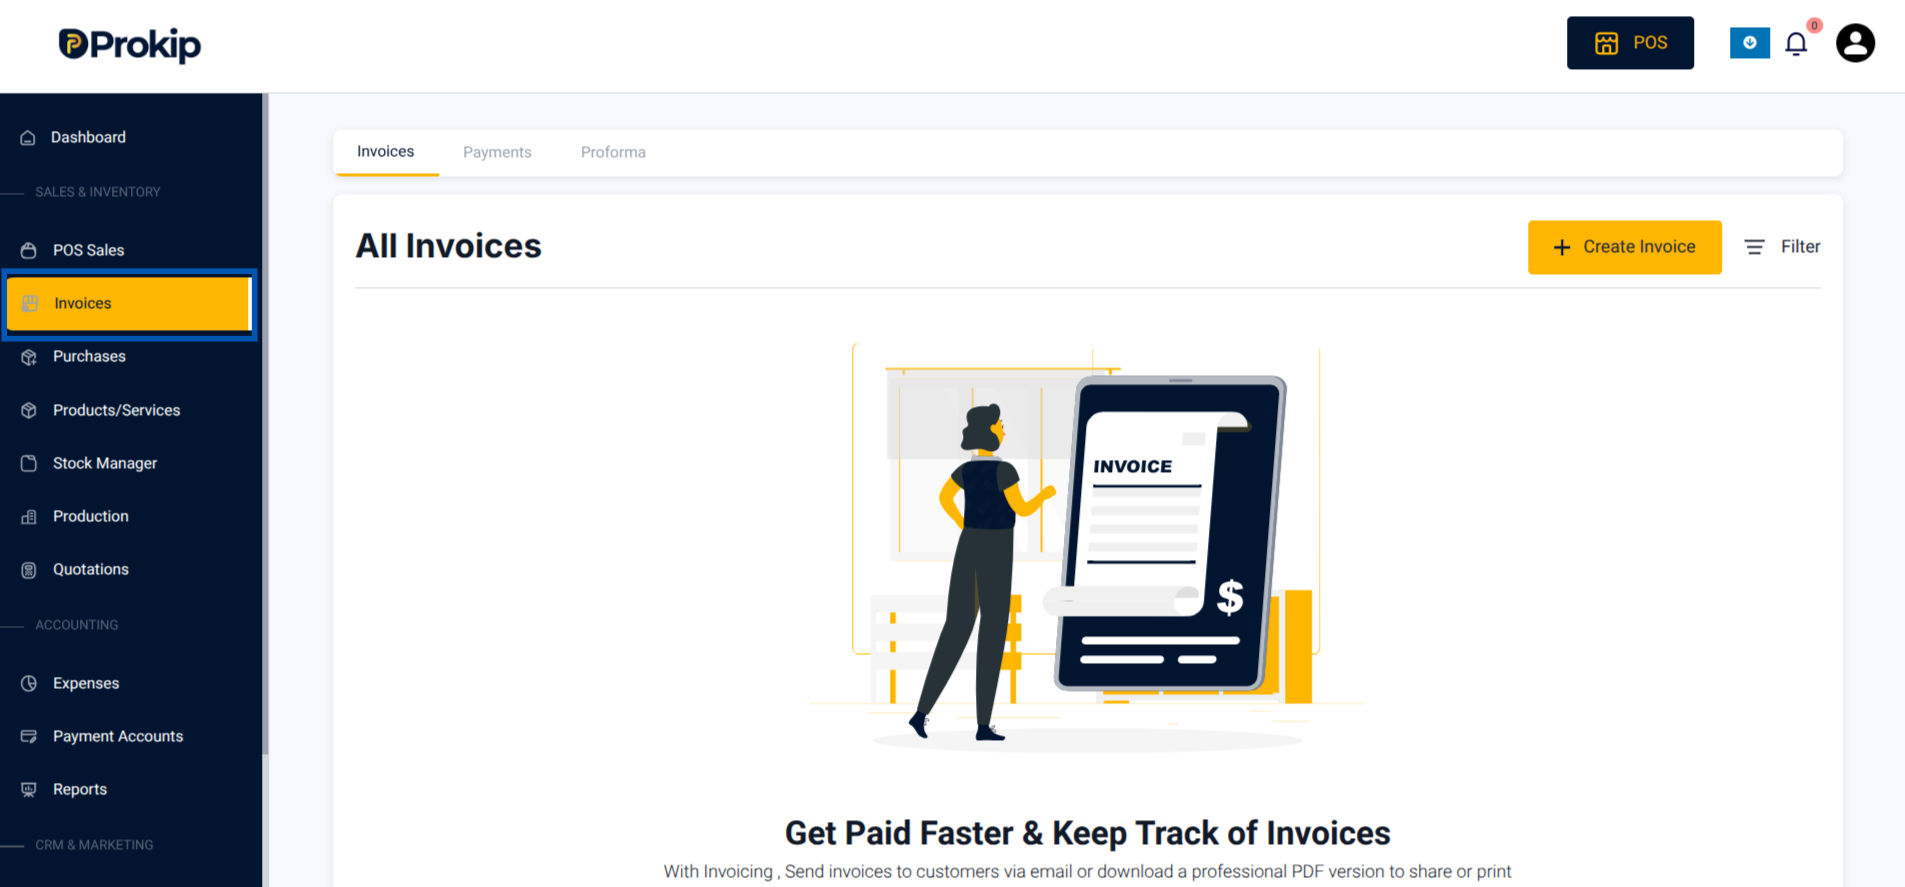
- Click on Invoices on the left bar.
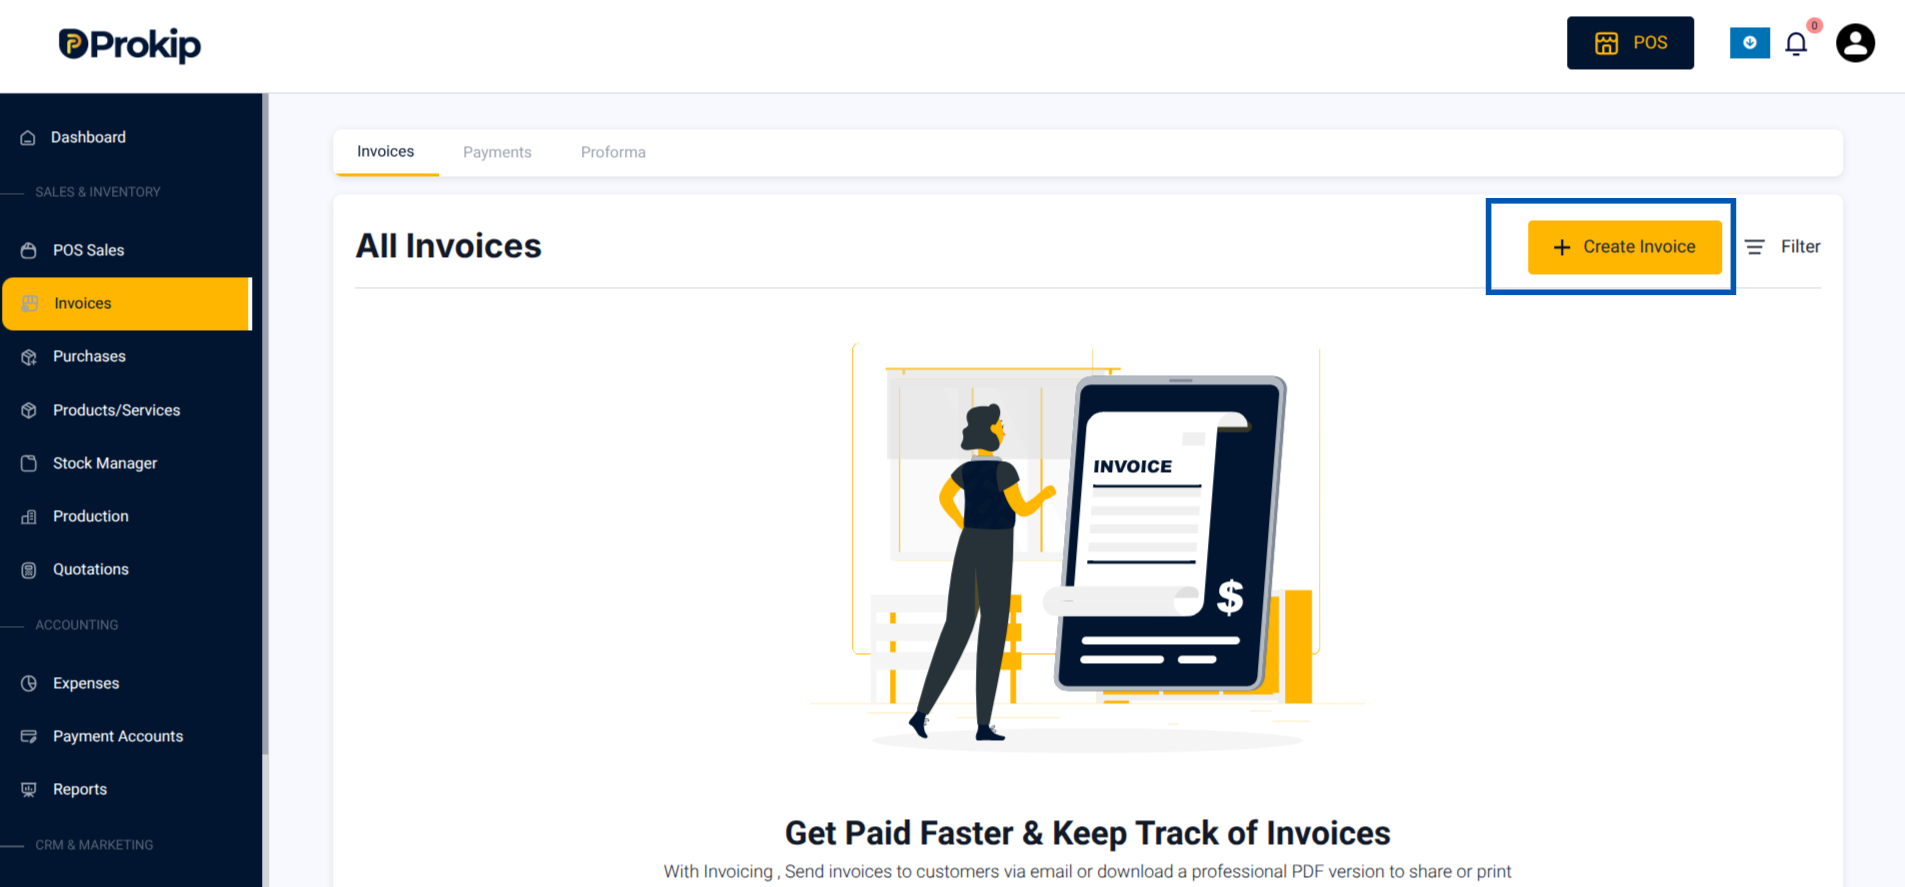
3. Click Create Invoice.
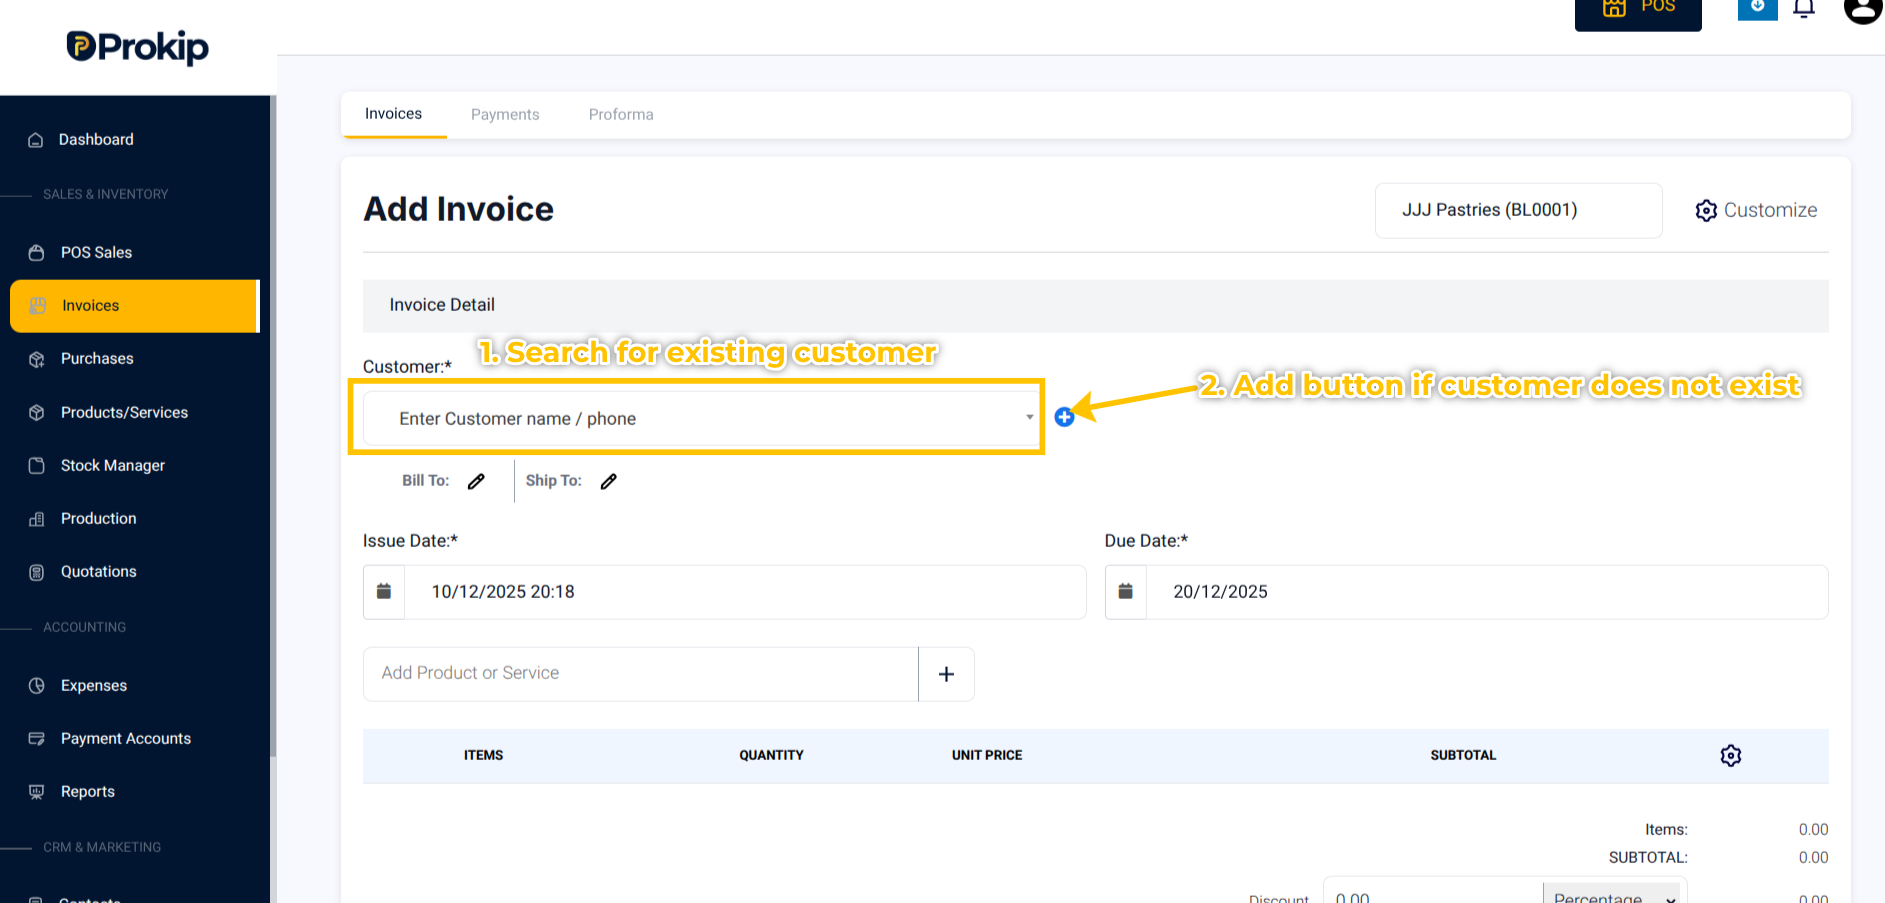
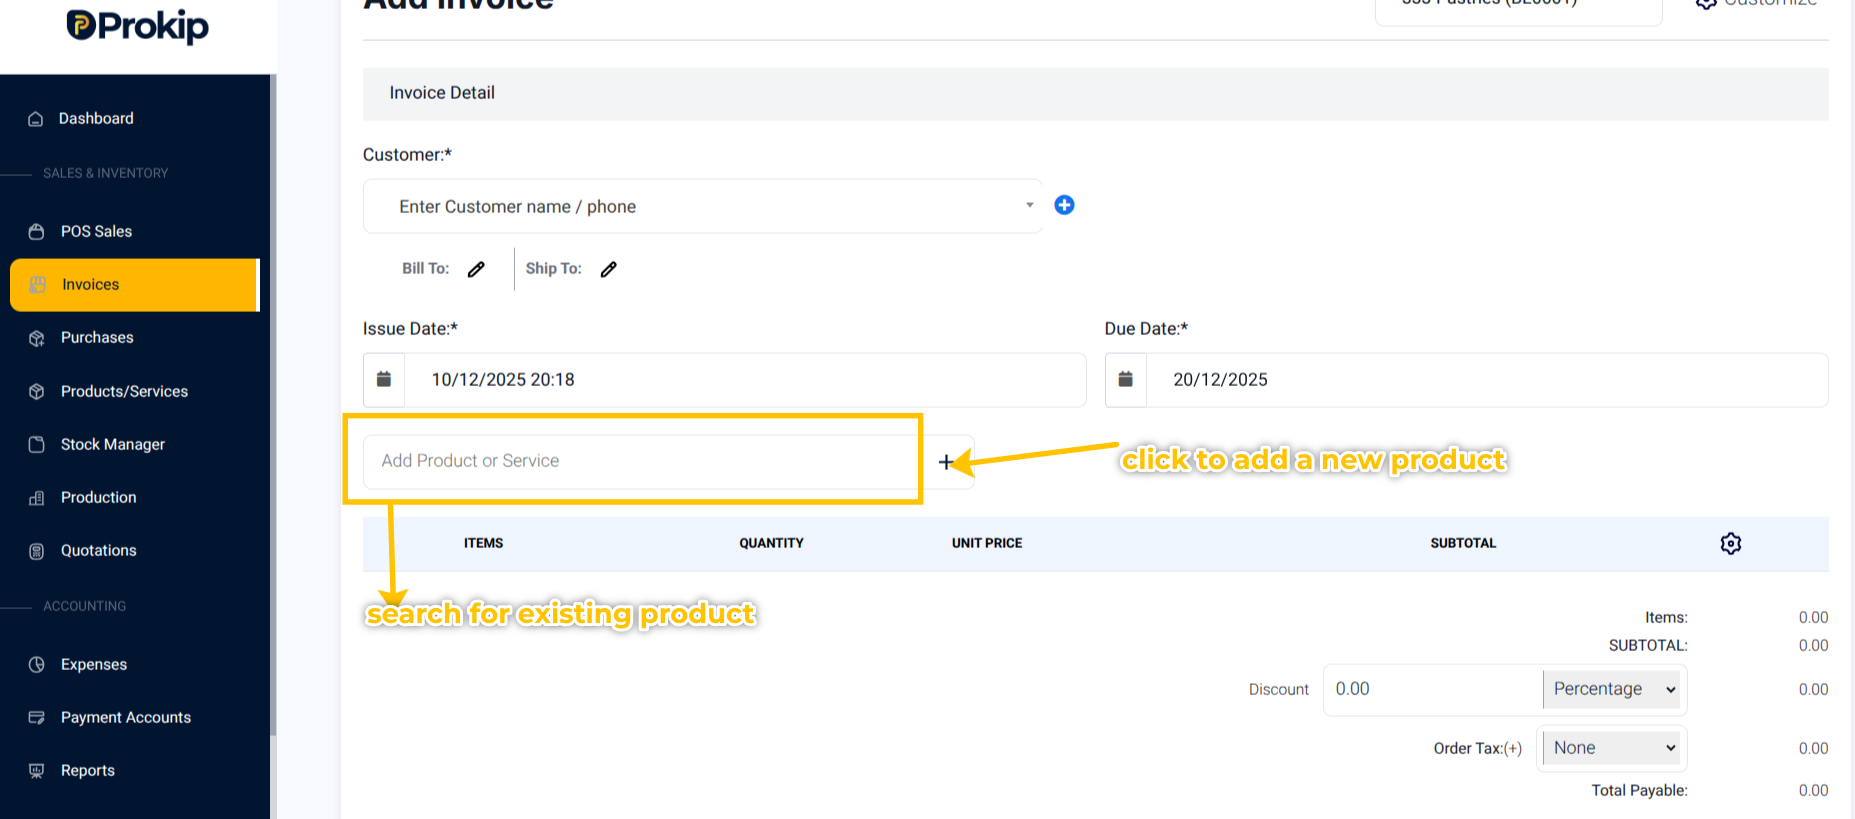
4. In the contact field, select an existing customer.
If the contact doesn’t exist, click the blue “+” button to add a new one.
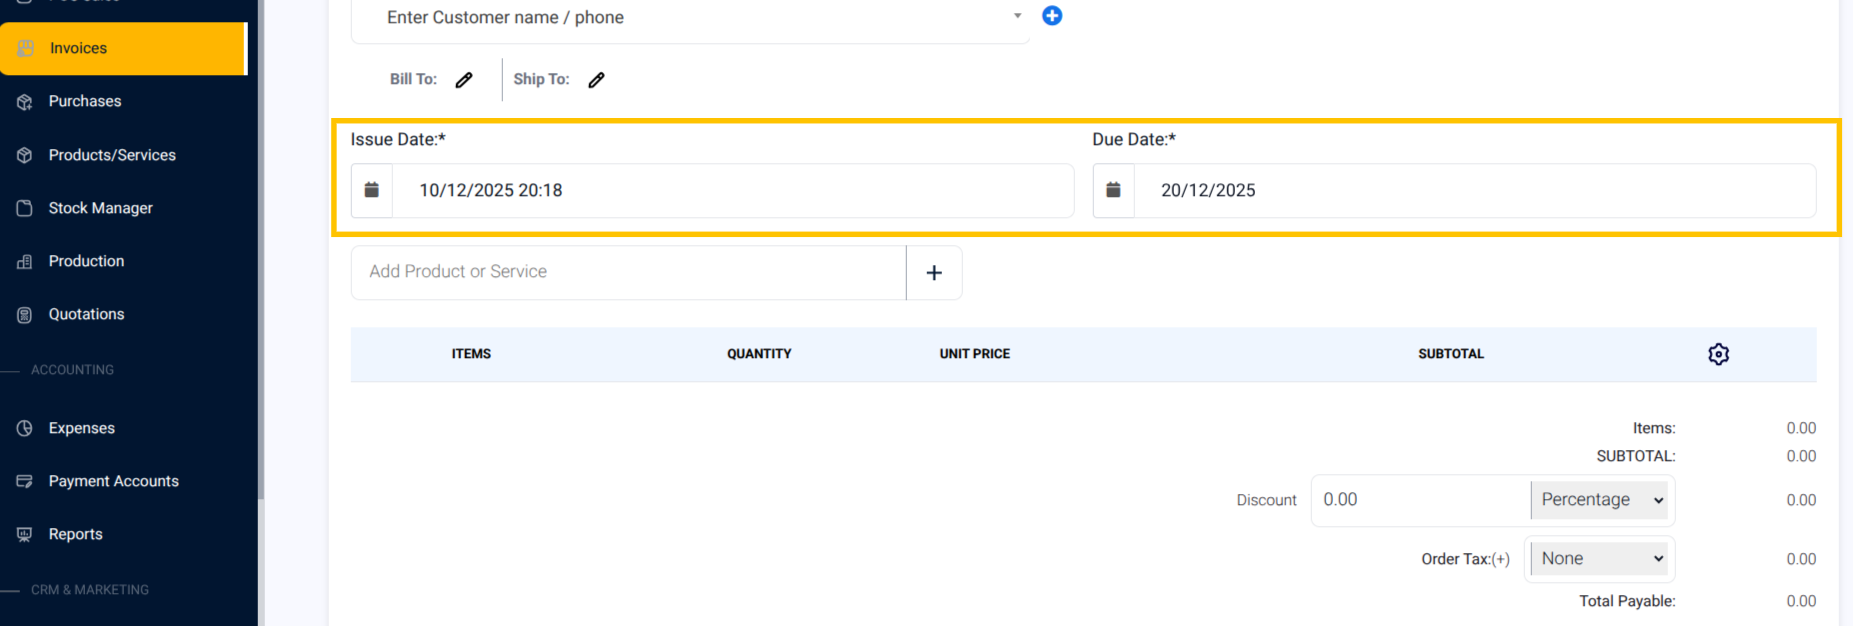
5. Fill in the Issue Date and Due Date
6. Scroll down and:
a) Choose from your product or service list if an existing product on the search bar indicated “Add Product/Service”
b) click on + button for a new product to add a new product not yet created in the system.
You can add multiple items to the same invoice.
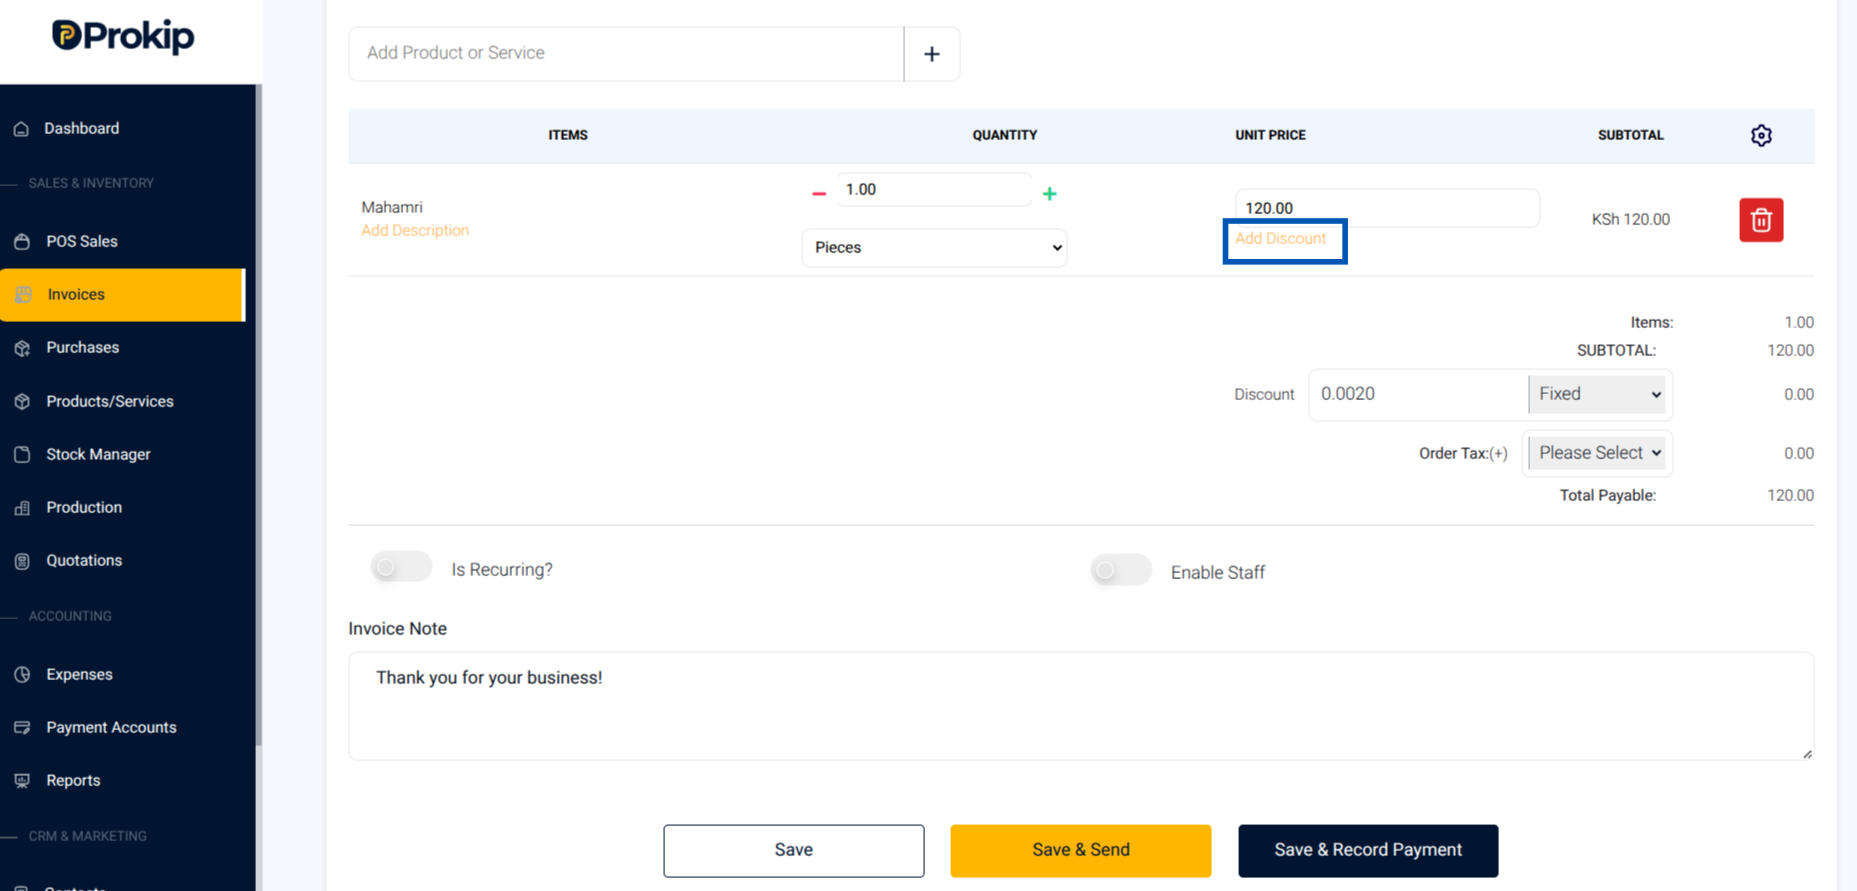
7. Input the quantity of the products, the subtotal auto calculates.
8. You can apply discount by clicking on “Add Discount” Button.
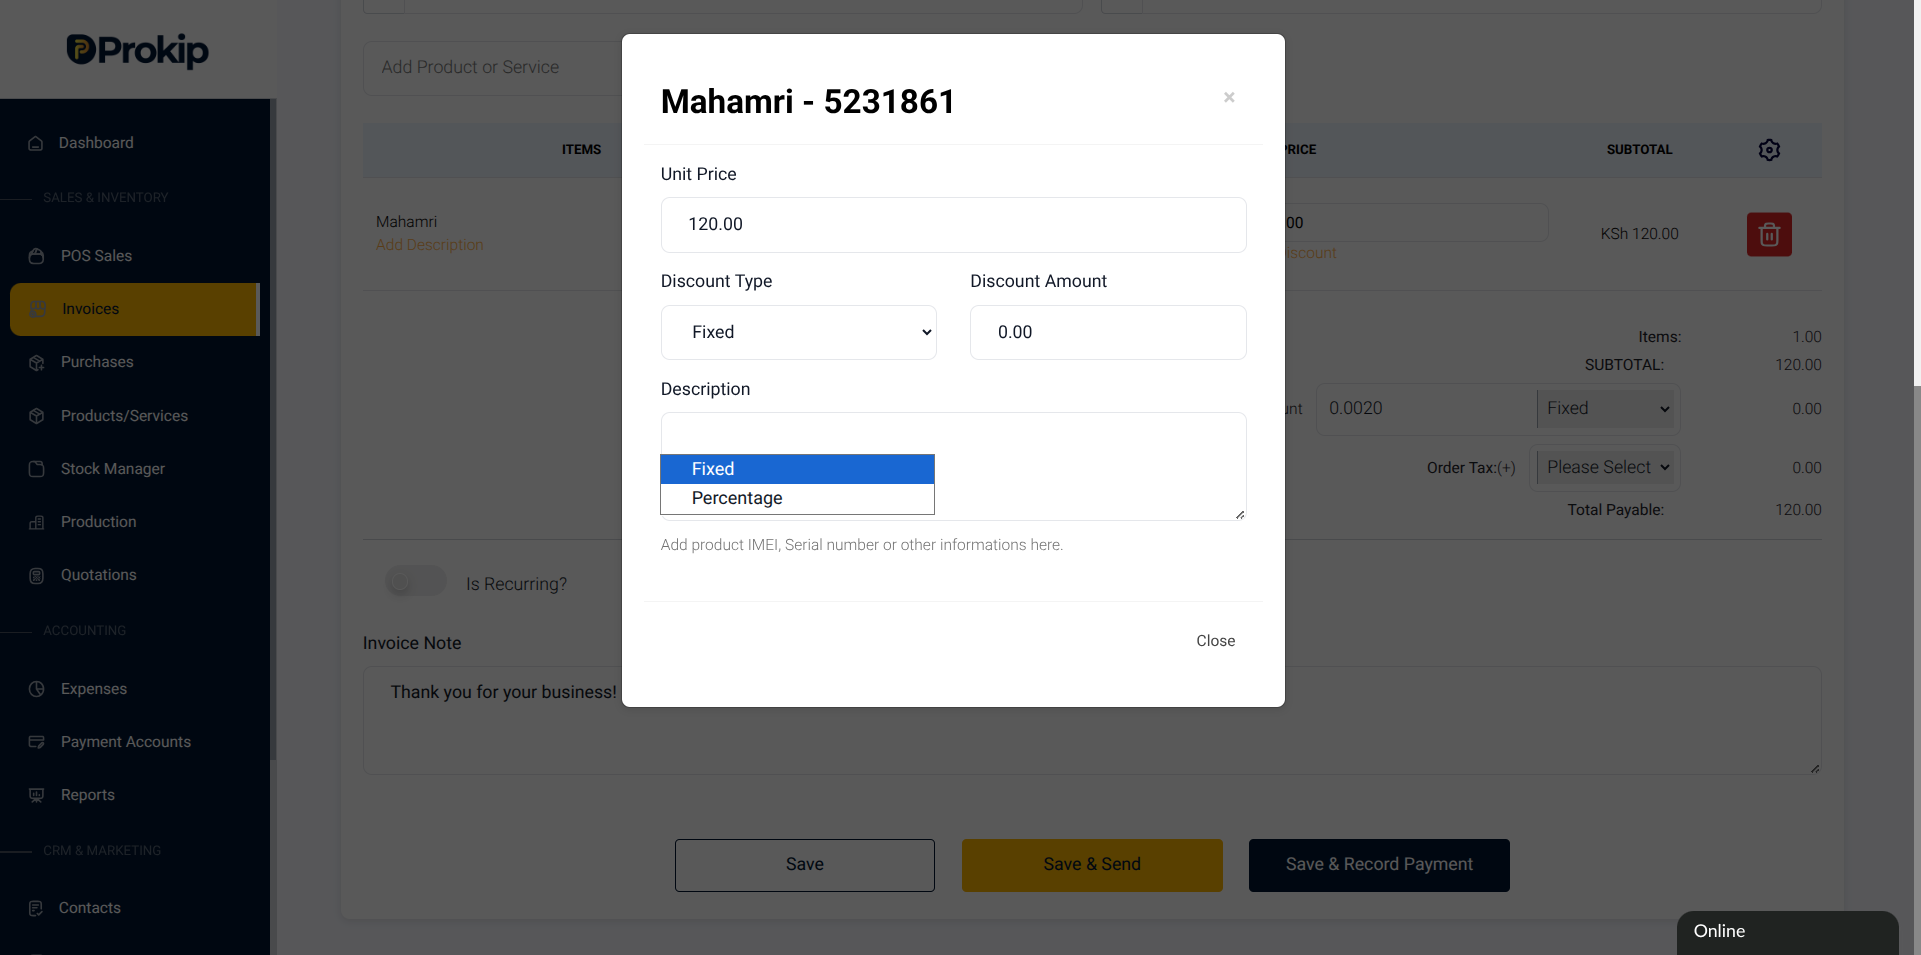
9. The Discount page pops up, fill in the discount type Fixed or Percentage and the amount to be applied and close.
The Discount amount will be applied to the Unit Price.
10. Scroll down to apply VAT rates if applicable.
11. Toggle ON “Is Recurring” if it is a recurring invoice.
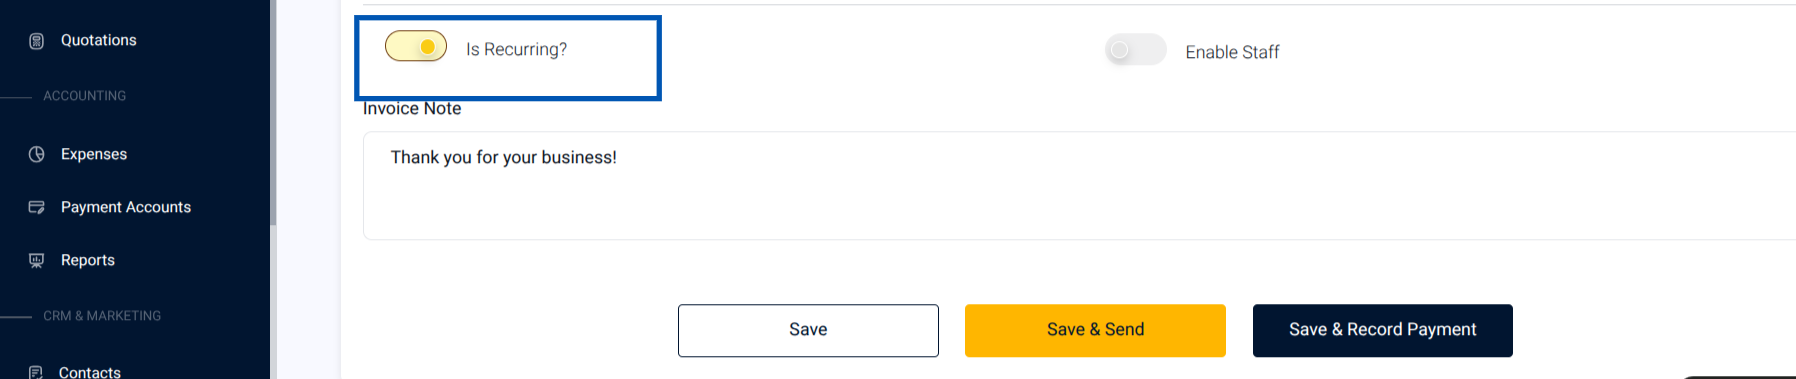
12. Toggle ON “Enable Staff” to select the Commission Agent attached to the invoice.
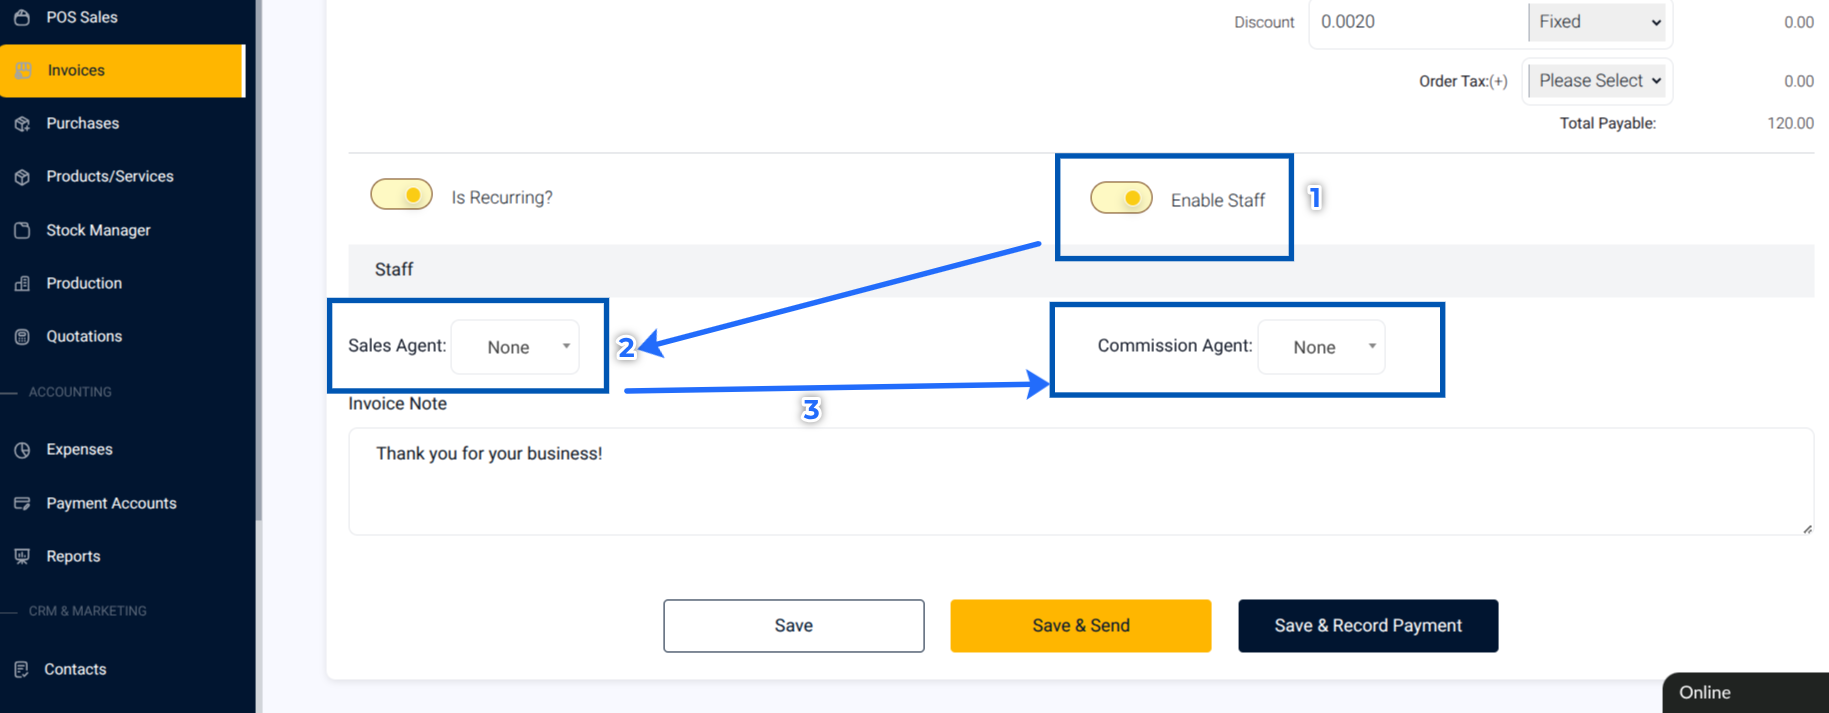
13. Choose one of the save options:
- Save – Keeps it as Unpaid
- Save & Send – Emails or texts the invoice to your client
- Save & Record Payment – Marks the invoice as Paid immediately
What Happens Next
After saving:
- The invoice appears under Invoices → All Invoices.
- Paid invoices show a “ Paid” label.
- Unpaid ones will display “ Unpaid” until payment is recorded.
Tips & Troubleshooting
- If the “Create Invoice” button is missing . Check that your Invoicing Module is active.
- If an item doesn’t appear in the product list. Make sure it’s added under Inventory → Products/Services.
Common Errors & Fixes
- “Invalid price”: Remove any symbols (₦, $, etc.) and use numbers only.
- Customer not found: Add the customer first using the blue “+” button.