How to Customize Your Invoice in Prokip
This article explains how to customize your invoice in Prokip, so it reflects your brand, contains the right information, and meets your business or client requirements.
Why Customize Your Invoice?
Customizing your invoice allows you to:
- Display your company branding (logo, name, contact details)
- Control what information clients see
- Add notes, payment instructions, or terms
- Maintain a professional and consistent appearance
Accessing Invoice Layout Settings
To customize your invoice layout in Prokip:
- Log in to your Prokip account user profile.
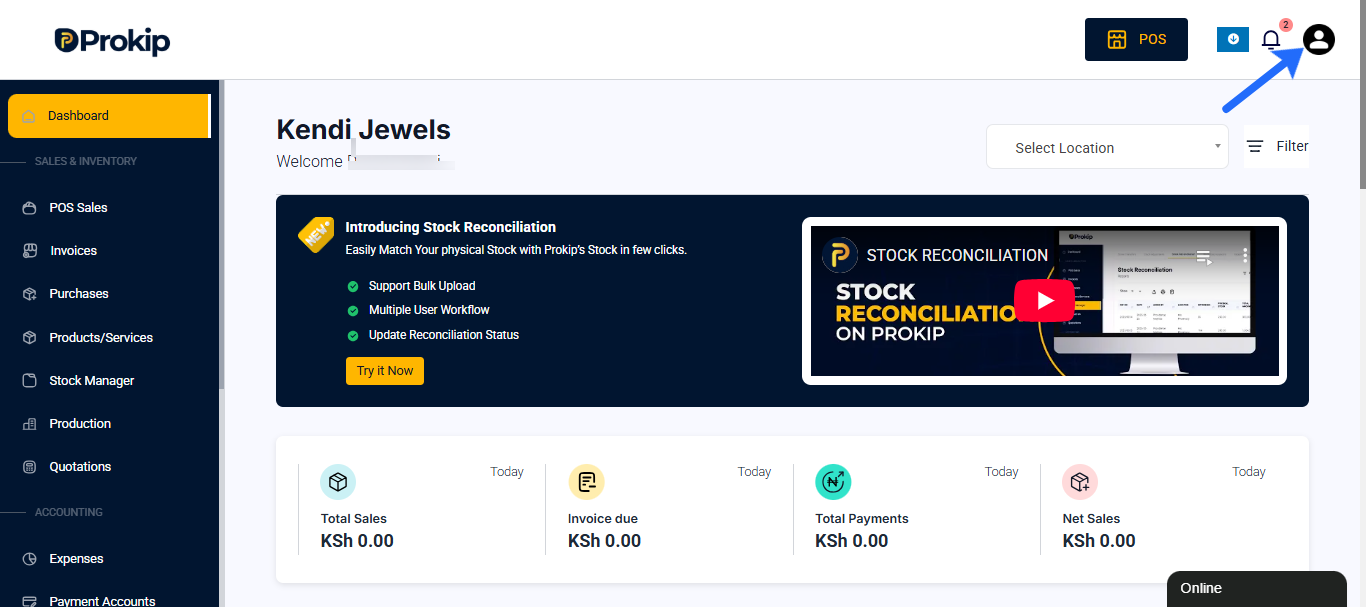
- Go to Settings from the main menu.
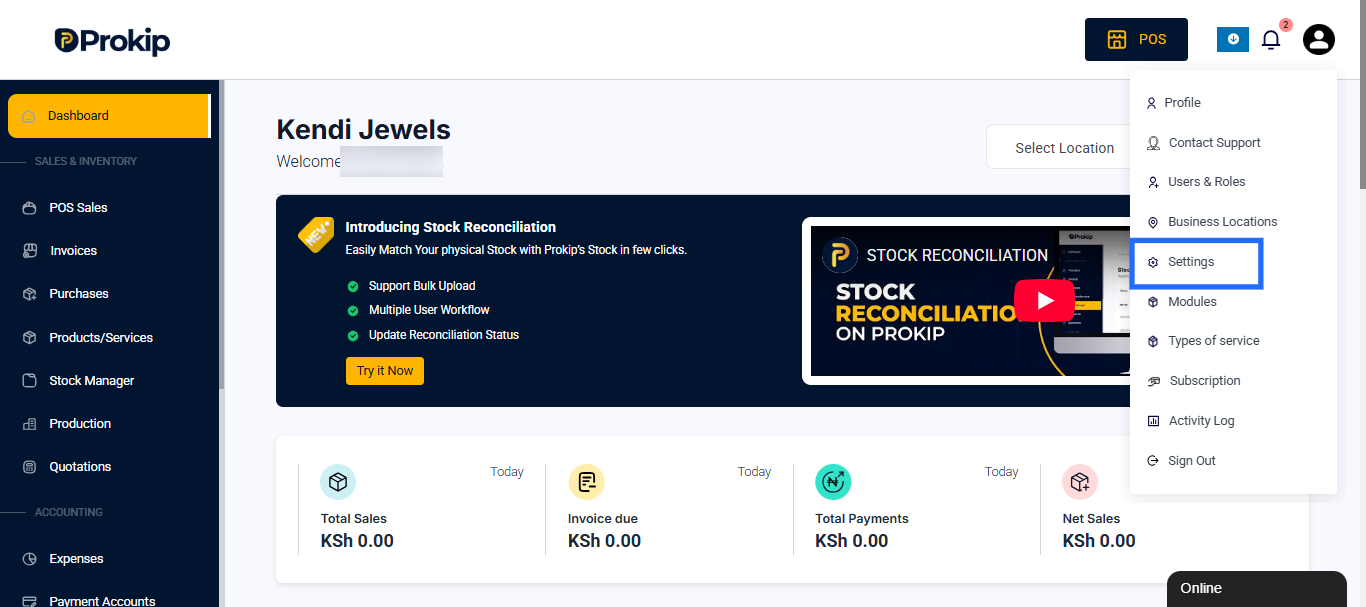
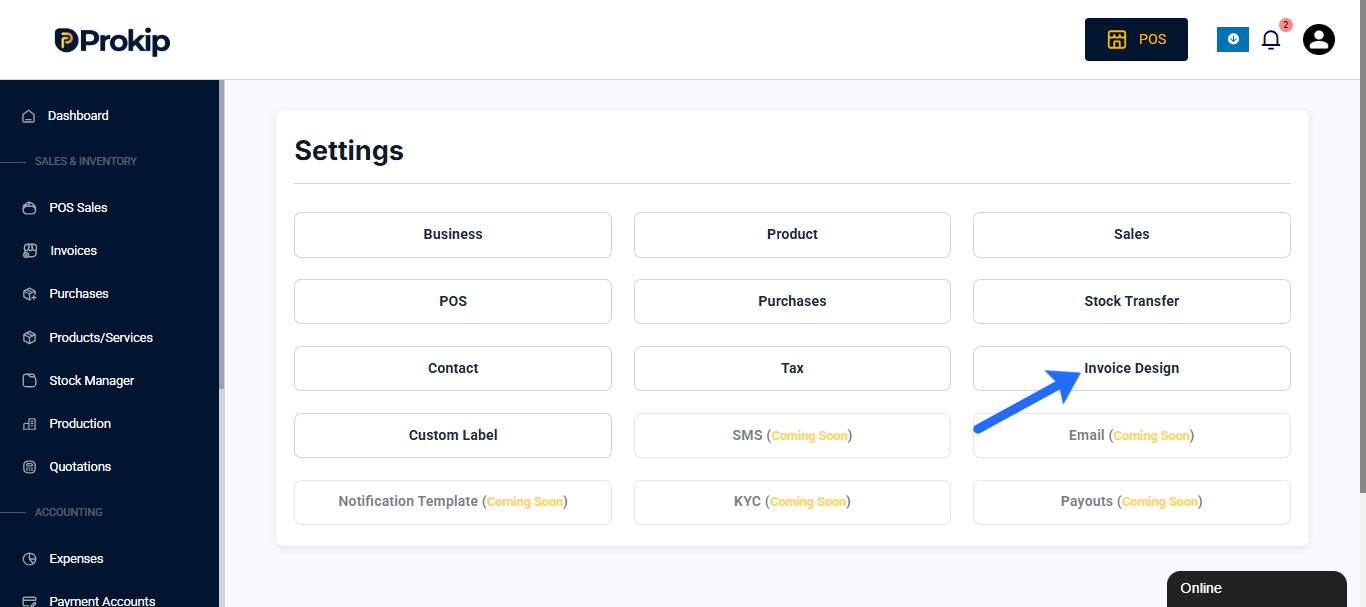
- Select Invoice Layouts.
- Click Add New Invoice Layout or edit an existing one.
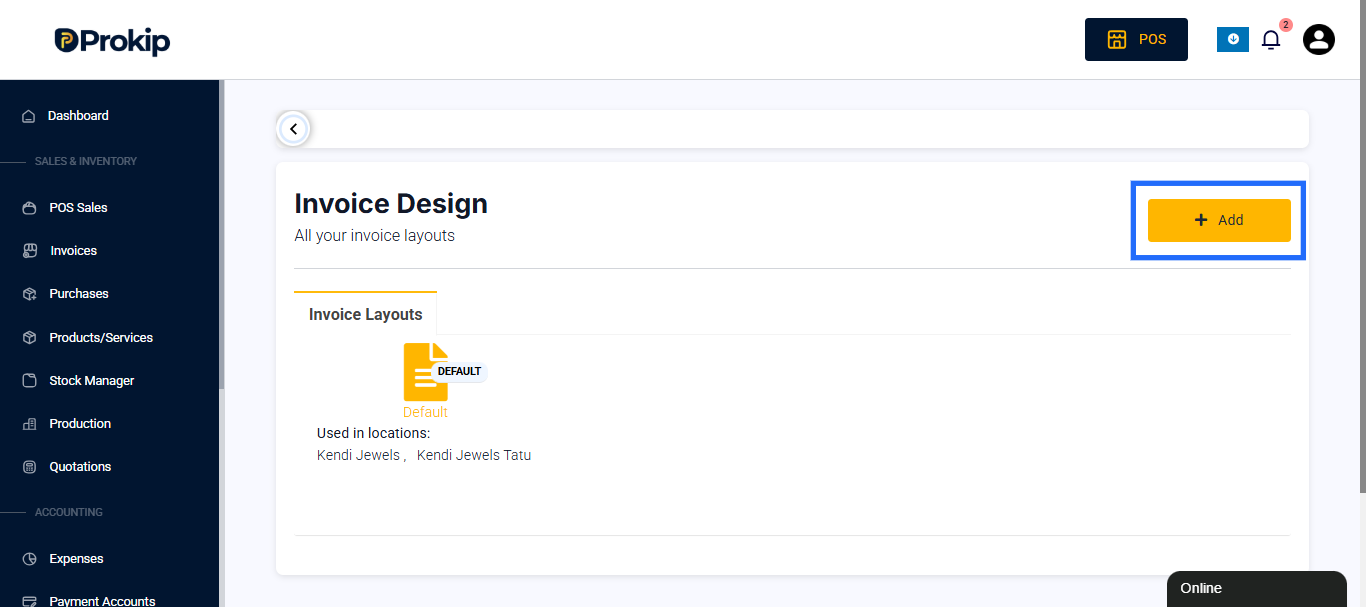
This opens the Manage Invoice Settings page where you can control every part of the invoice design.
Invoice Logo and Basic Layout Settings
Show Invoice Logo
- Enable Show Invoice Logo to display your company logo on invoices.
- Upload an image file (PNG or JPG recommended).
Layout Name
- Enter a Layout Name to help you identify this invoice design internally.
Design
- Choose Classic (For normal printer) for standard invoice printing.
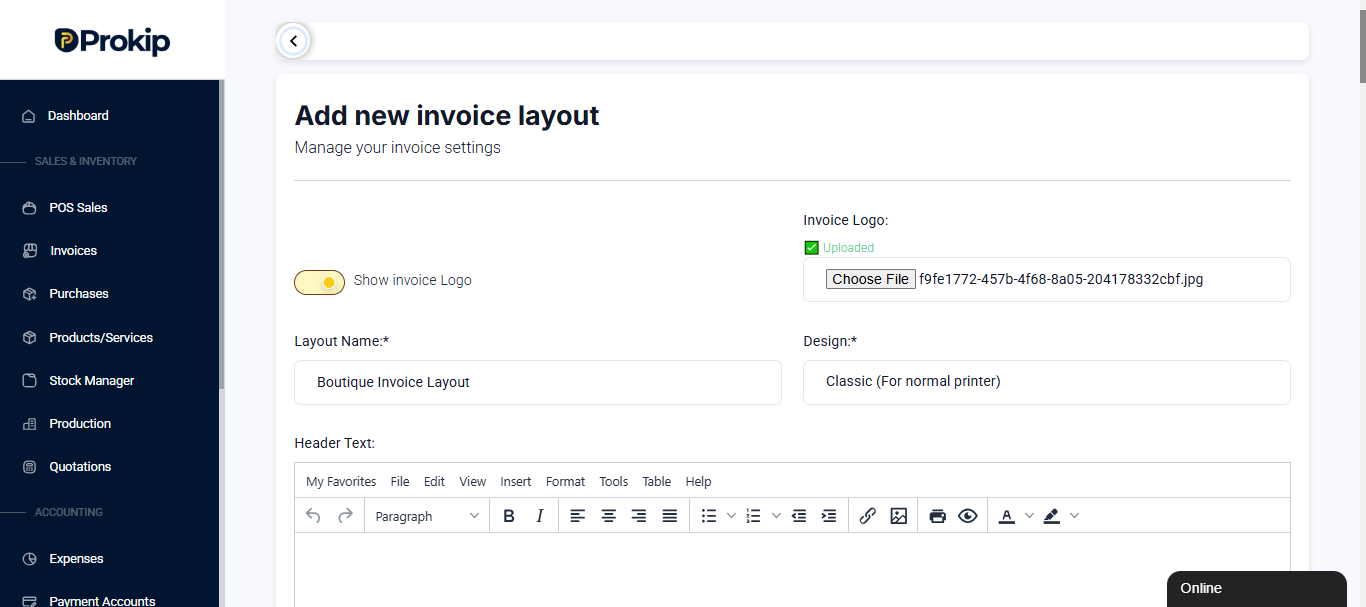
Header and Subheading Customization
Header Text
- Add custom text that appears at the top of the invoice.
- This section supports rich text editing.
Sub Heading Lines (1–5)
You can add up to five subheading lines, commonly used for:
- Business registration details
- Taglines or slogans
- Contact information
Each line is optional and can be customized independently.
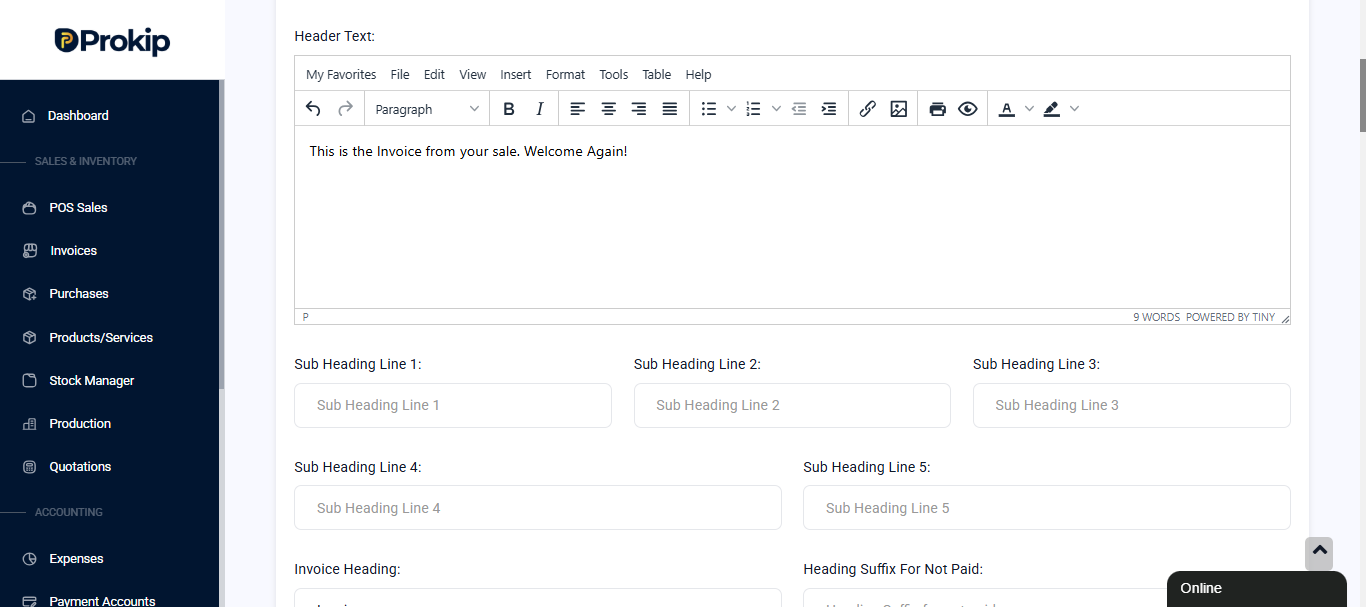
Invoice Headings and Labels
You can customize the main headings used across different document types:
- Invoice Heading (e.g. Invoice)
- Heading Suffix for Not Paid
- Heading Suffix for Paid
- Proforma Invoice Heading
- Quotation Heading
- Sales Order Heading
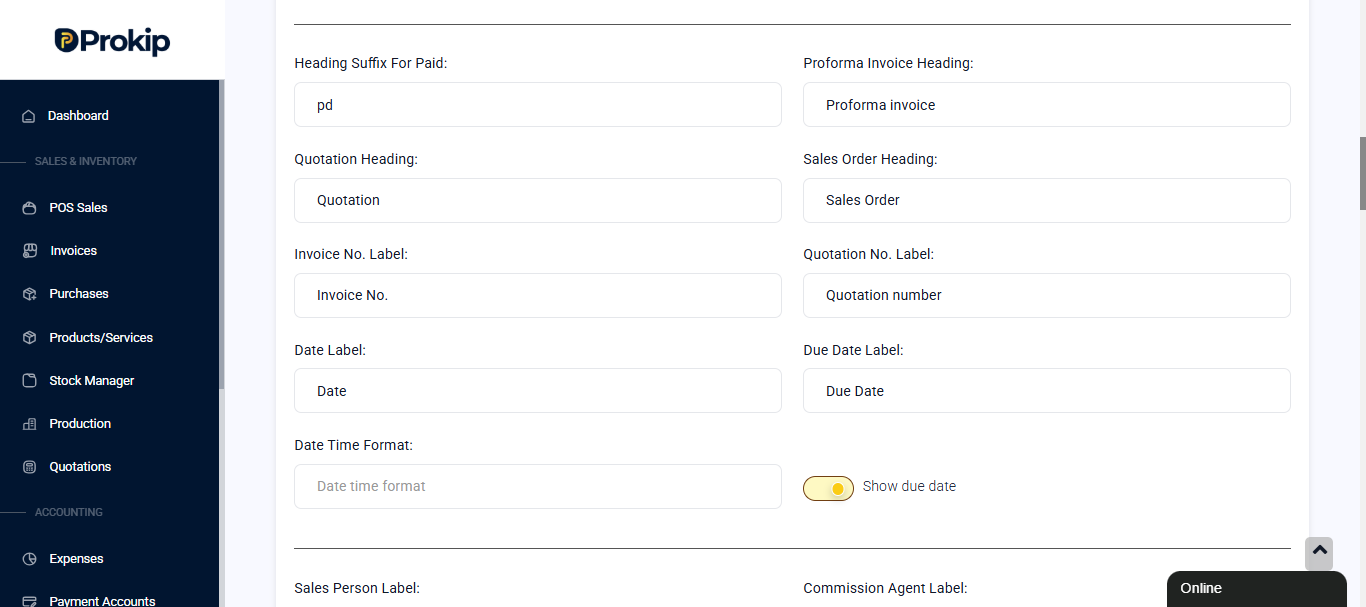
Number and Date Labels
Customize labels shown on the invoice:
- Invoice No. Label
- Quotation No. Label
- Date Label
- Due Date Label
- Date Time Format
- Enable or disable Show Due Date
Sales, Business, and Location Information
You can choose whether to display the following:
- Business name
- Location name
- Sales person
- Commission agent
You may also customize labels for:
- Sales Person
- Commission Agent
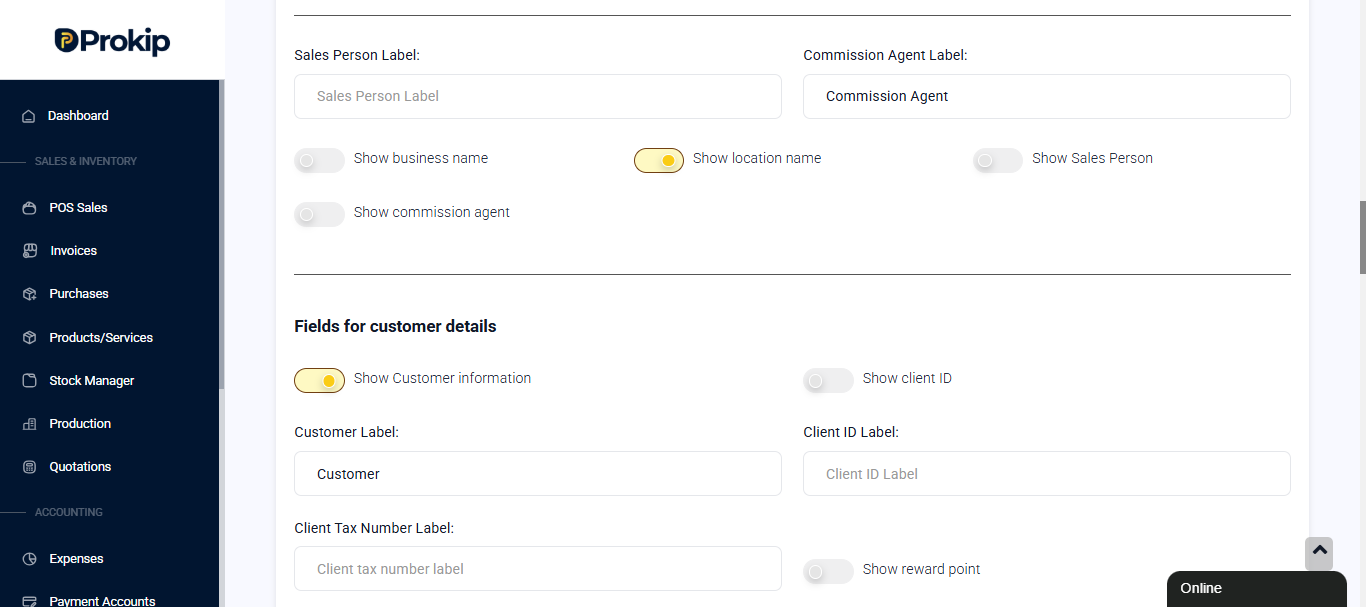
Customer Information Fields
Customer Details
Enable Show Customer Information and choose which fields appear:
- Customer name
- Client ID
- Client tax number
- Reward points
You can also customize:
- Customer Label
- Client ID Label
Address, Communication, and Tax Fields
Location Address Fields
Choose which address details are shown:
- Landmark
- City
- State
- Country
- Zip Code
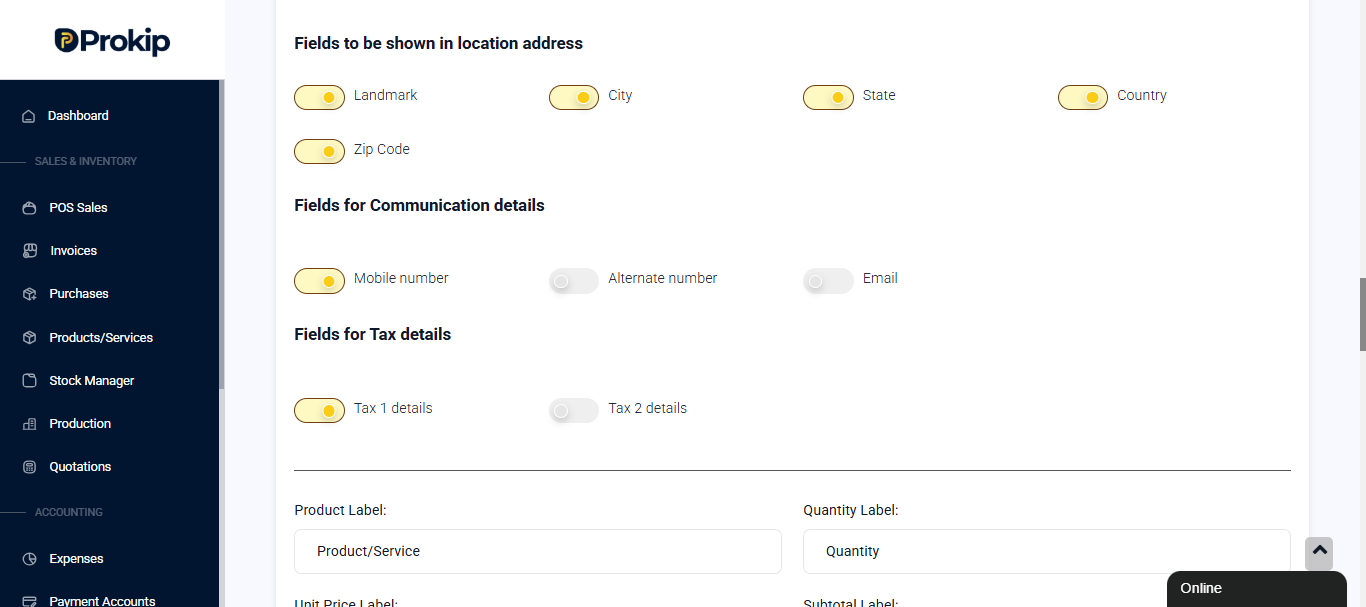
Communication Details
Select fields to display:
- Mobile number
- Alternate number
Tax Details
- Tax 1 details
- Tax 2 details
Product, Pricing, and Item Details
Product Table Labels
Customize product-related labels:
- Product/Service
- Quantity
- Unit Price
- Subtotal
- HSN / Category code
- Total Quantity
- Item Discount
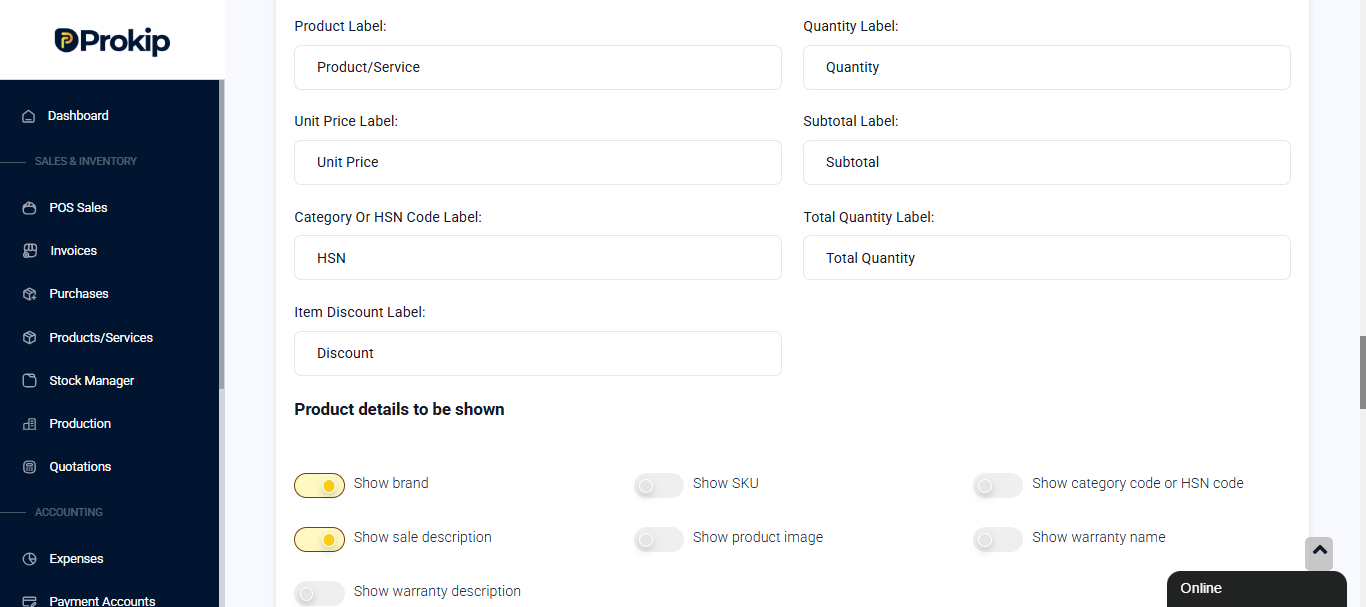
Product Details to Show
You can enable or disable:
- Brand
- SKU
- Category code / HSN
- Sale description
- Product image
- Warranty name and description
Totals, Payments, and Footer
Totals Section Labels
Customize financial labels:
- Subtotal
- Discount
- Tax
- Total
- Round Off
- Due (Current Sale)
- Total Paid
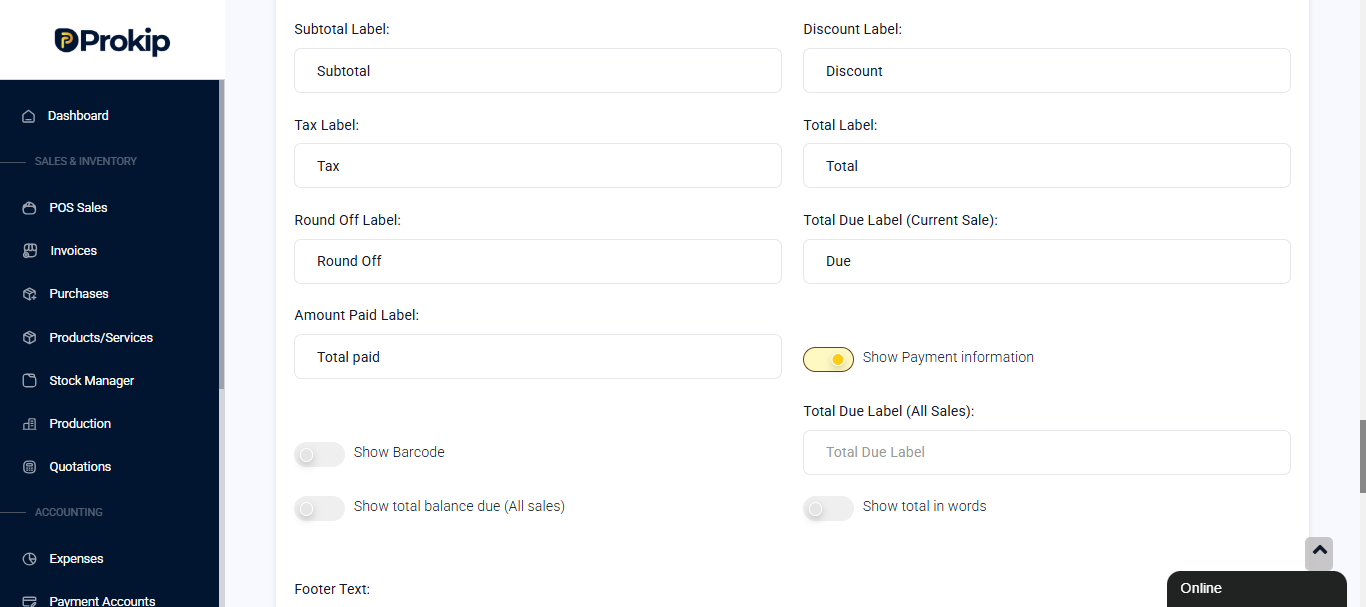
Enable additional options:
- Show payment information
- Show barcode
- Show total balance due (all sales)
- Show total in words
Footer Text
Add custom footer content such as:
- Payment instructions
- Terms and conditions
- Thank-you notes
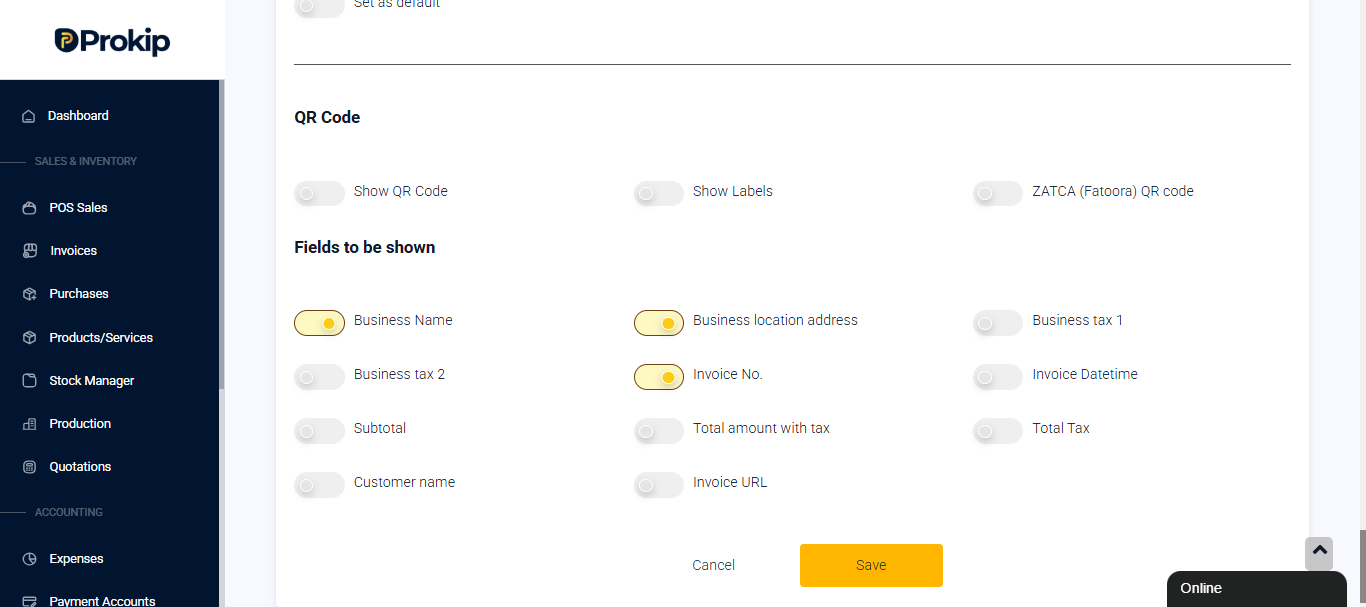
QR Code Options
You may enable:
- QR Code
- Show labels
- ZATCA (Fatoora) QR Code
Choose which details appear in the QR code, including:
- Business name
- Business location address
- Business taxes
- Invoice number
- Invoice date & time
- Subtotal
- Total amount with tax
- Total tax
- Customer name
- Invoice URL
Saving and Setting as Default
- Click Save to apply your changes.
- Enable Set as Default to make this layout the default for all new invoices.
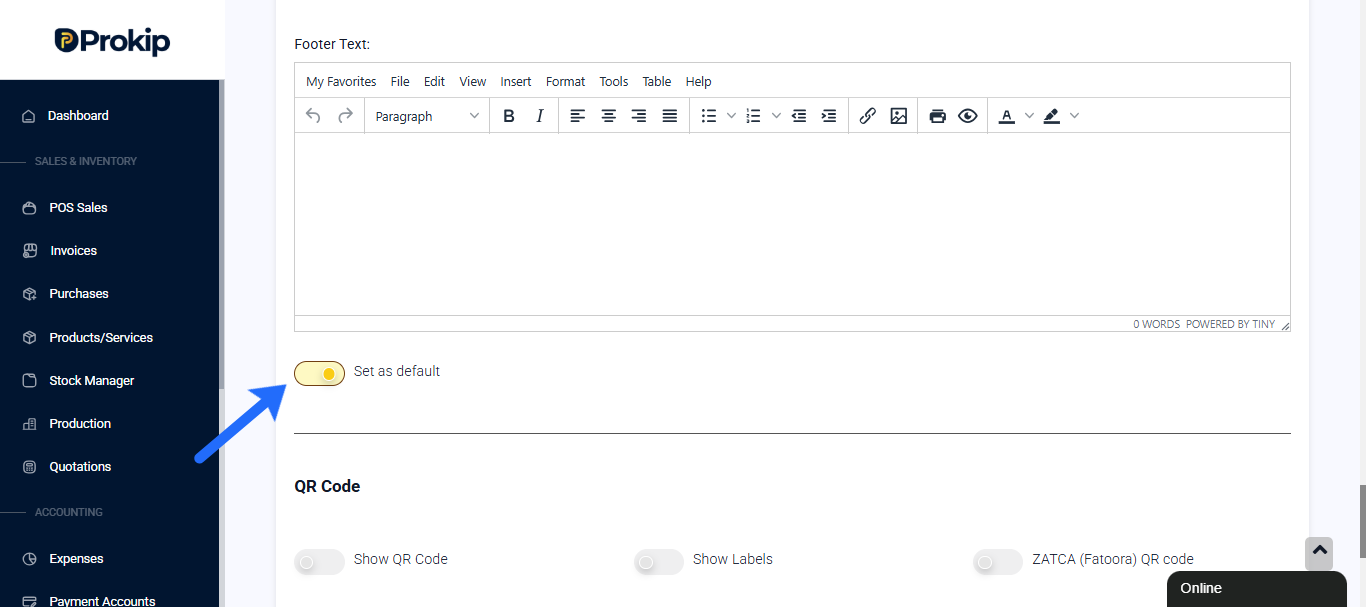
Existing invoices will not be affected.
Need Help?
If you need help setting up your invoice layout or understanding specific fields, please contact Prokip Support or explore other articles in the Prokip Knowledge Base.