Purpose
This guide explains how to record a service sale in Prokip when the customer is paying later, while still tracking the transaction correctly.
Before You Start
Ensure that:
-
The service already exists under Products & Services
-
The Invoices Module is enabled
-
You have permission to create invoices
-
The customer profile exists (or can be added)
Steps
Step 1: Click Invoices from the sidebar.
Step 2: Click Create Invoice.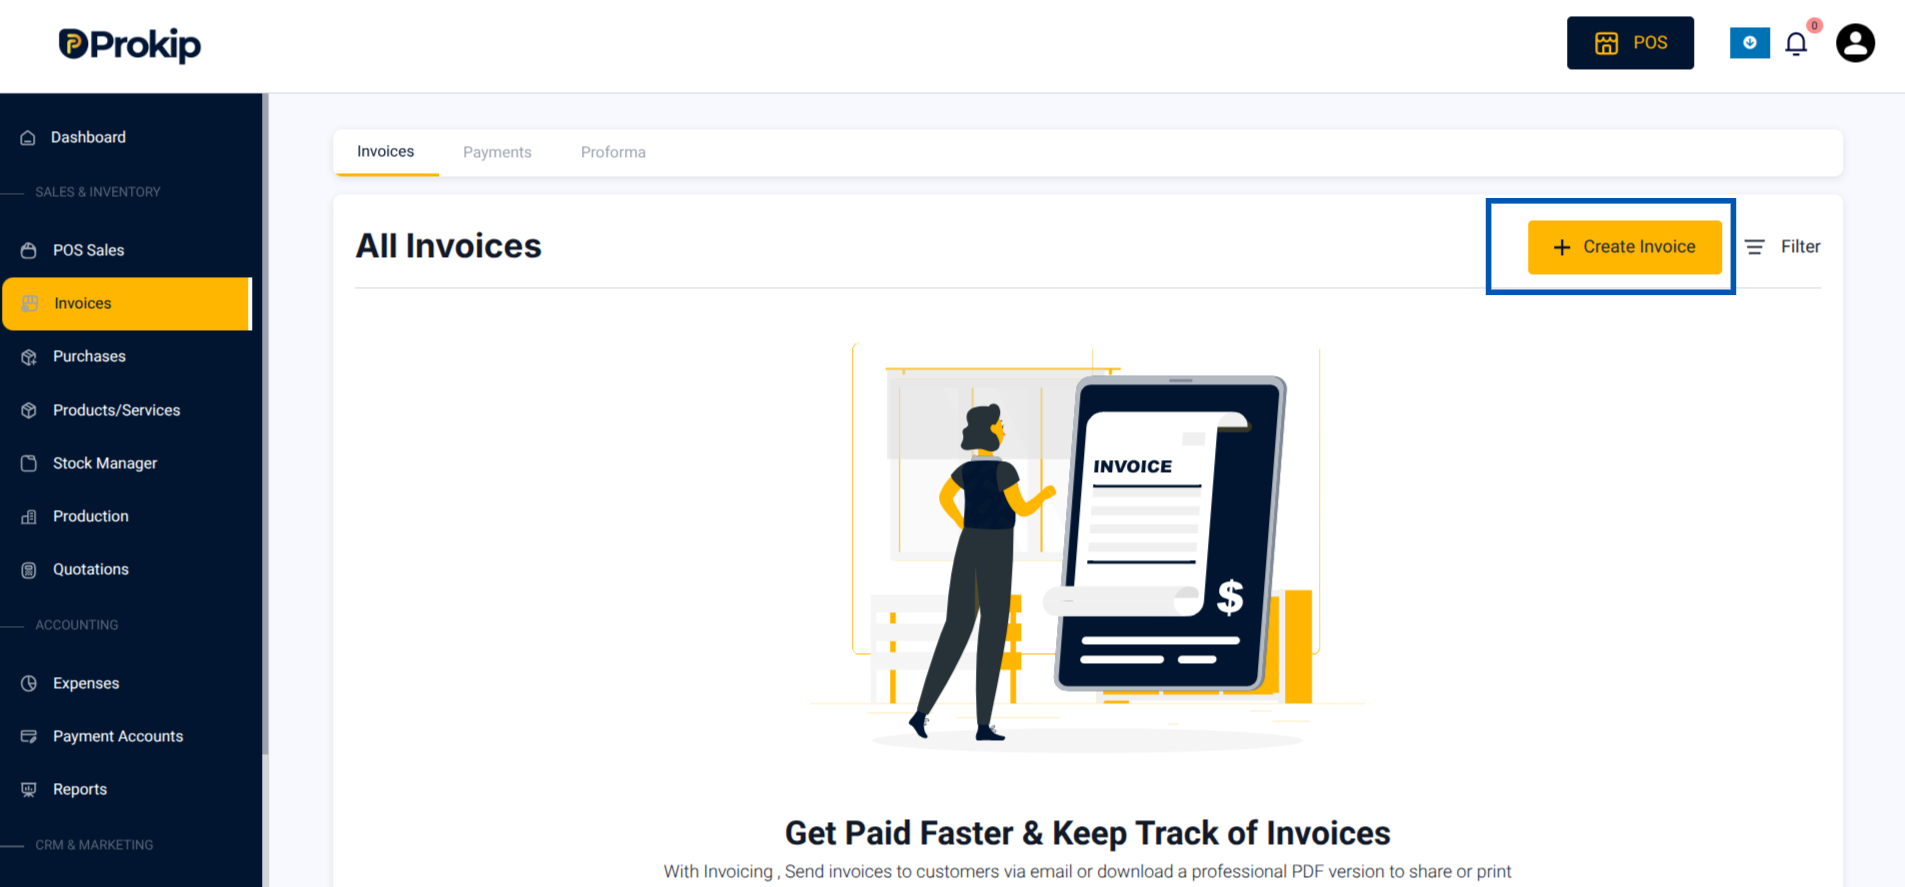
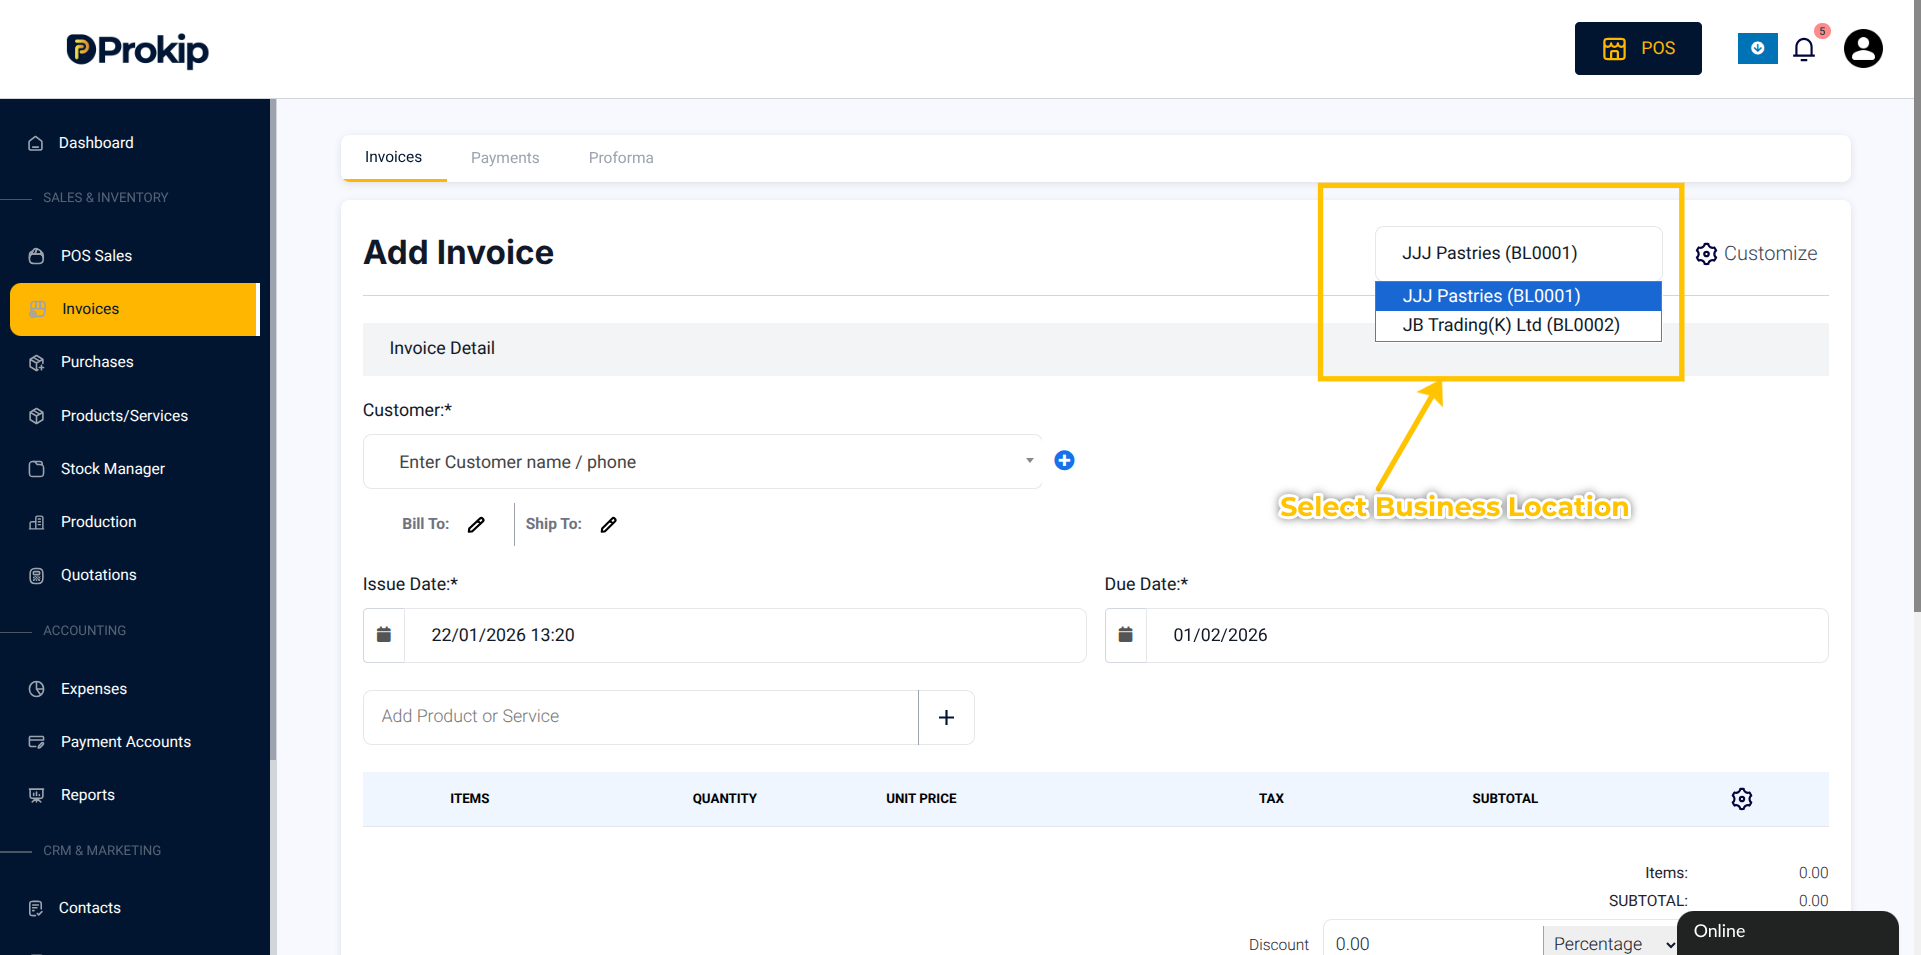
Step 3: Select the Business Location.
If your business has more than one location, you must choose where the service was provided.
If you only have one location, leave the default selection unchanged
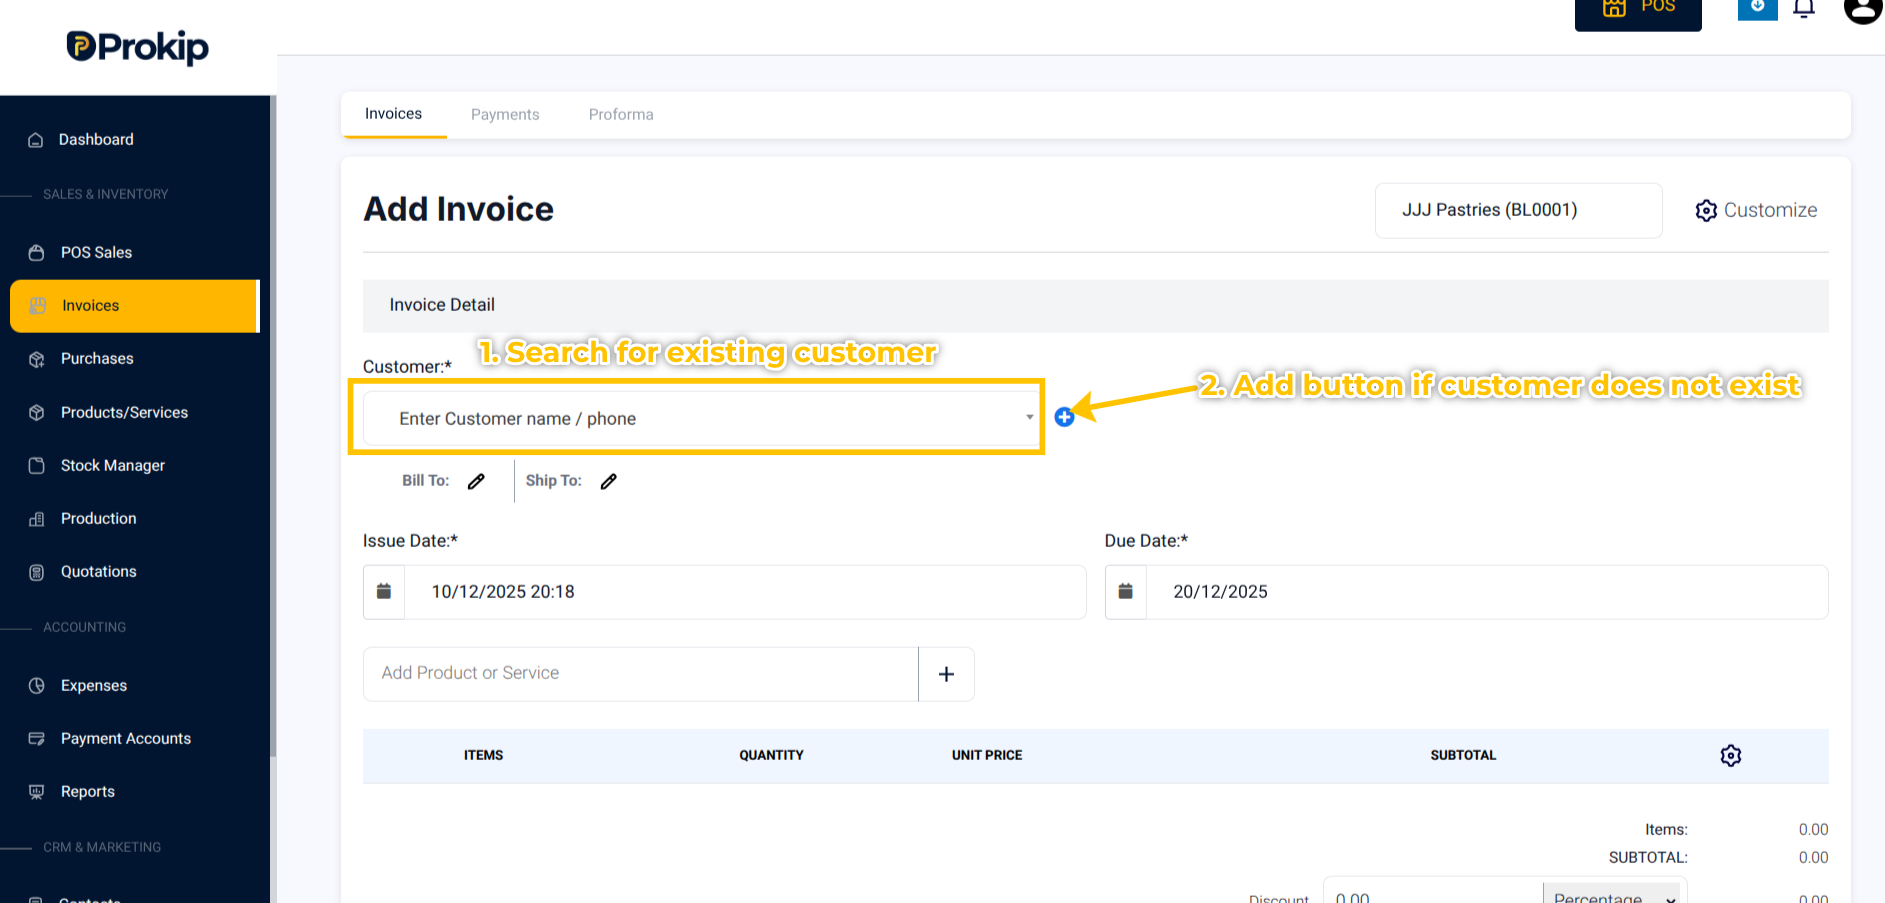
Step 4: Search for or add the Customer.
If the customer is not in your system:
1. Click the Add (+) button Enter the customer’s First Name, Last Name, and Mobile Number.
2. Click Save The customer will automatically appear in the invoice form.
Step 5: Confirm Invoice Dates
Review the Issue Date (defaults to today).
Review or update the Due Date if the customer will pay later.
Setting a future due date helps the system remind you about unpaid invoices.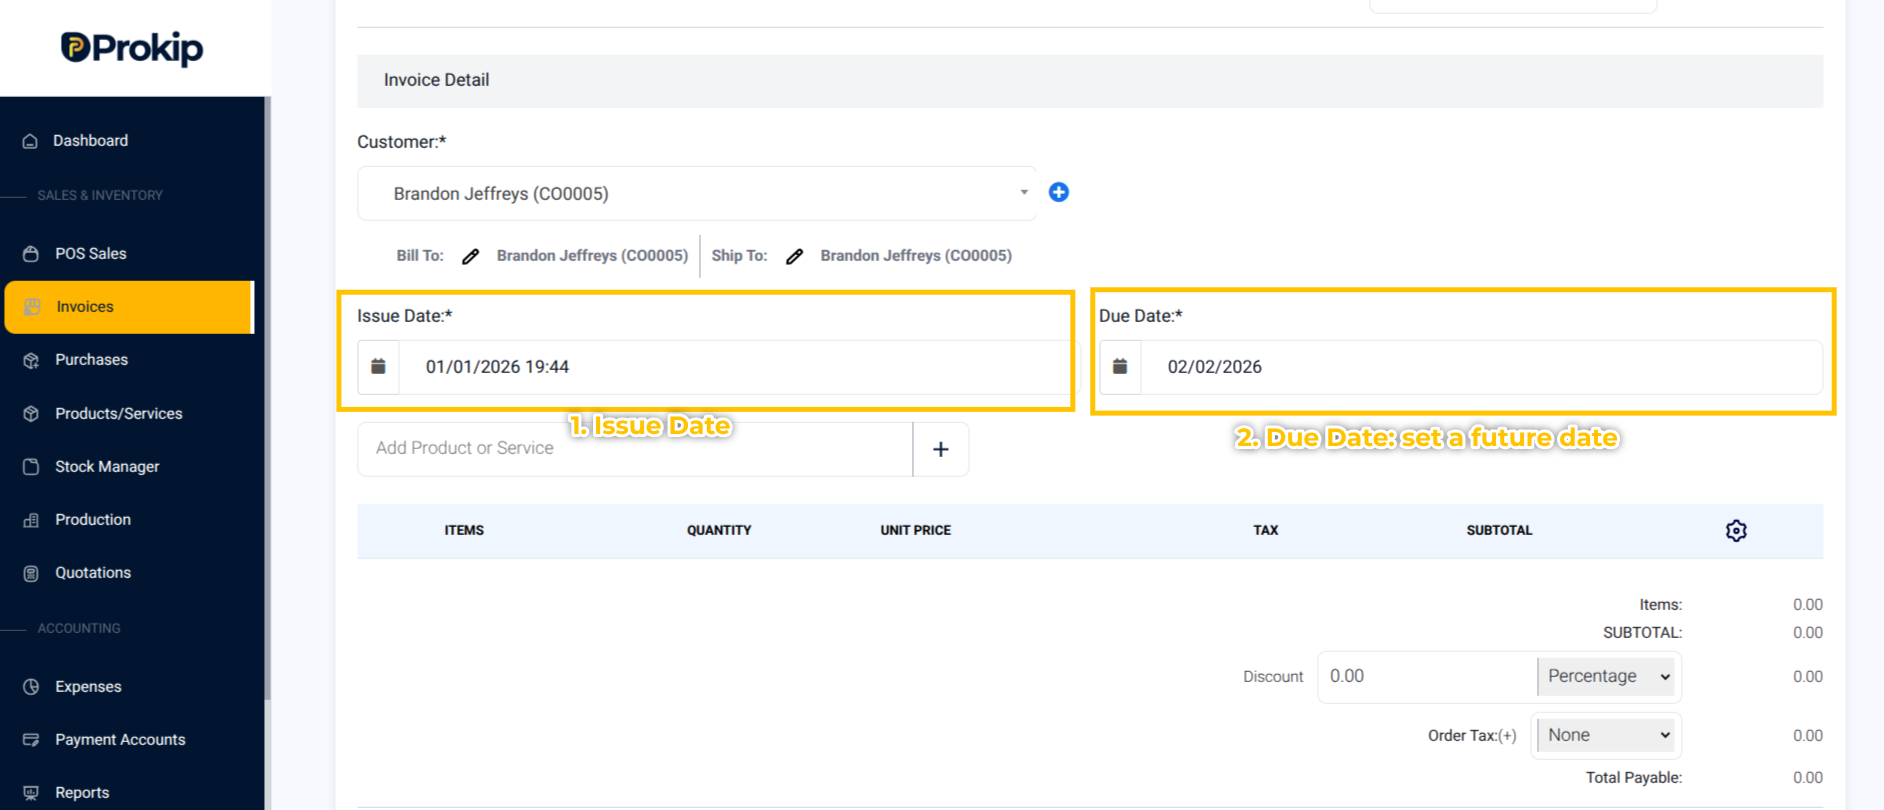
Step 6: Add the Service to the invoice.
In the product/service search field, type the service name, (for example, “Photocopy,” “Rent,” or “Consulting”).
Click the service to add it to the invoice.
You can add multiple services to the same invoice if the customer received more than one service.
Step 7: Adjust the Quantity if needed.
(for example, number of photocopies made or hours worked).
You can add multiple services to the same invoice if the customer received more than one service.
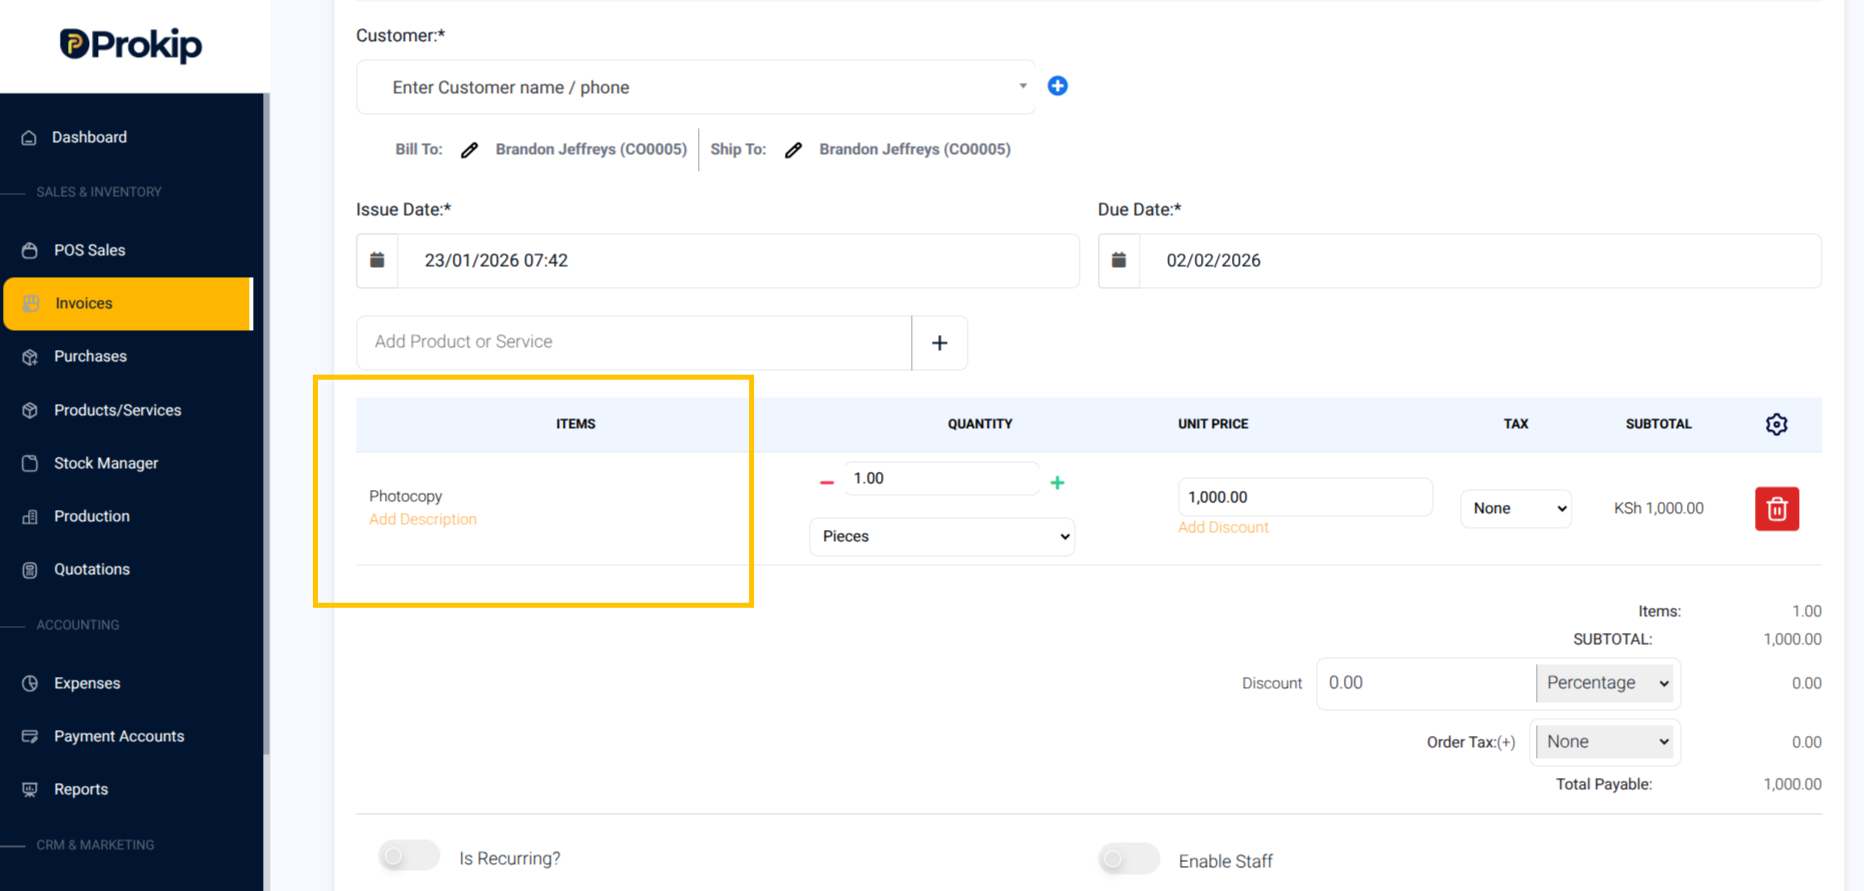
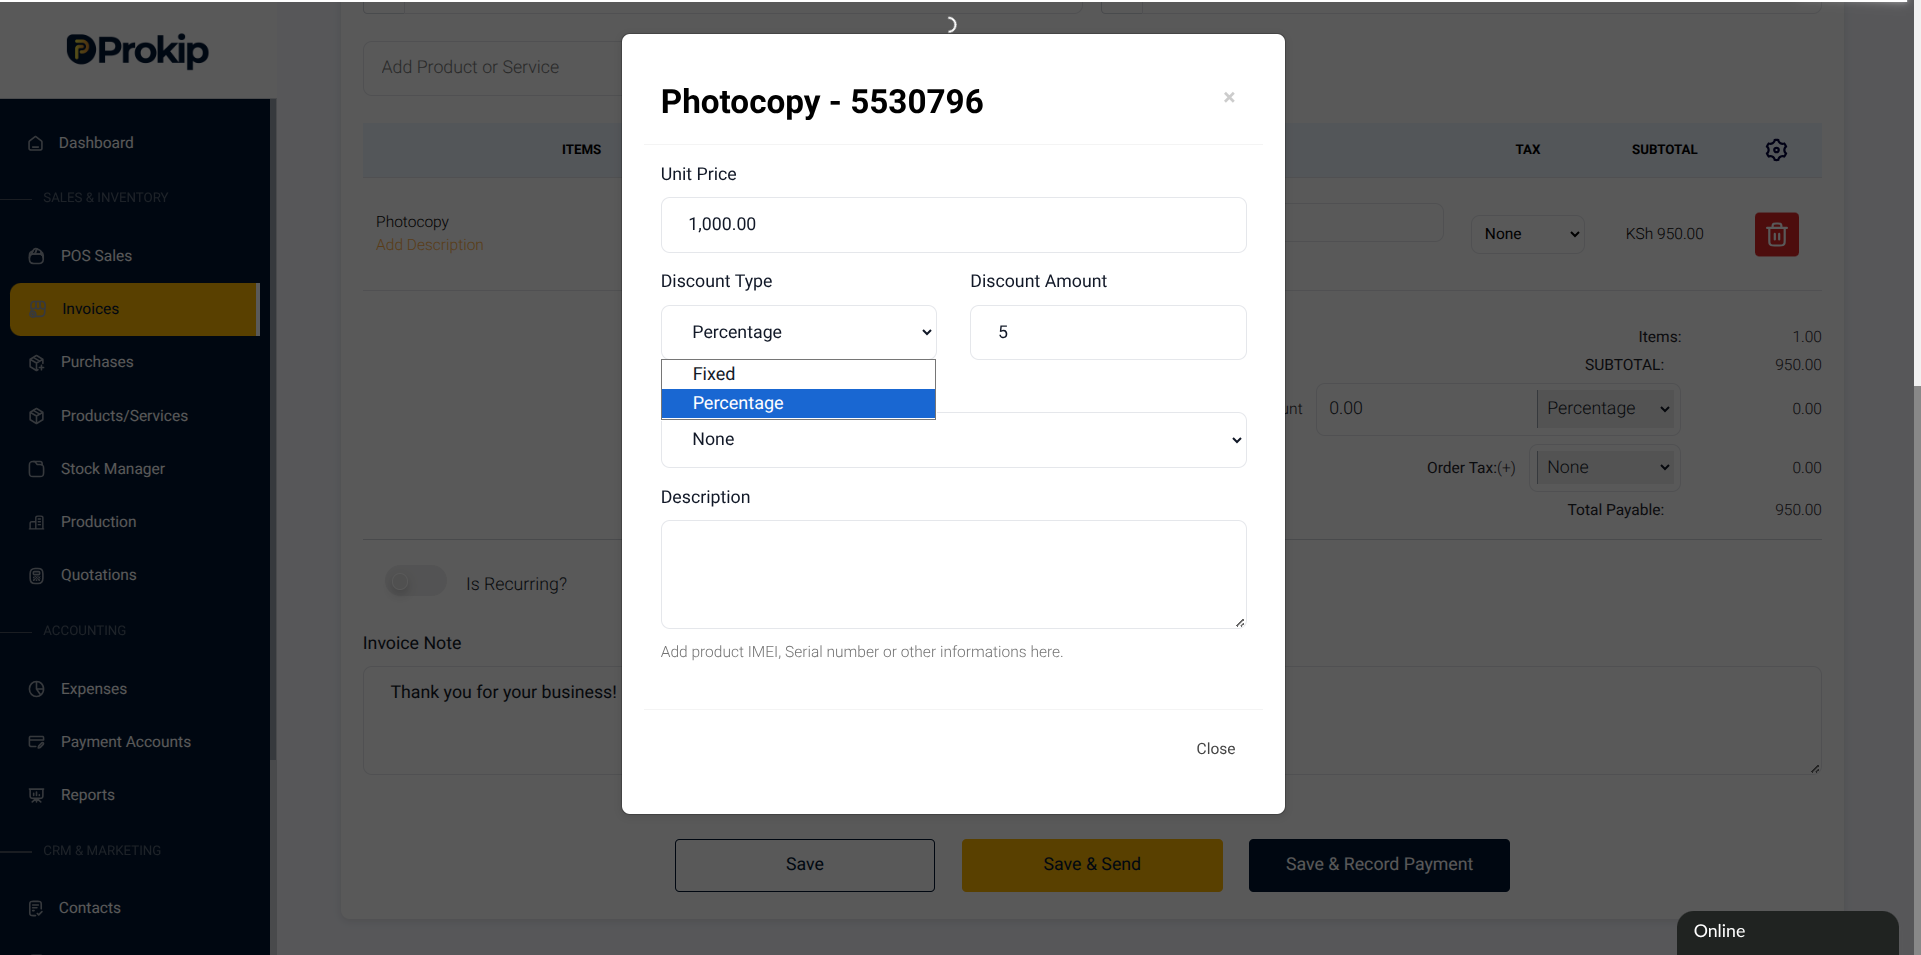
Step 8: Apply Discounts (Optional)
Click on Add Discount
If offering a discount, choose:
- Percentage discount (for example, ten percent), or
- Fixed amount discount (for example, five thousand naira).
The Total payable amount will update to include the inputted discount.
Step 9: Click Save or Save and Send(do not click Save & Record Payment).
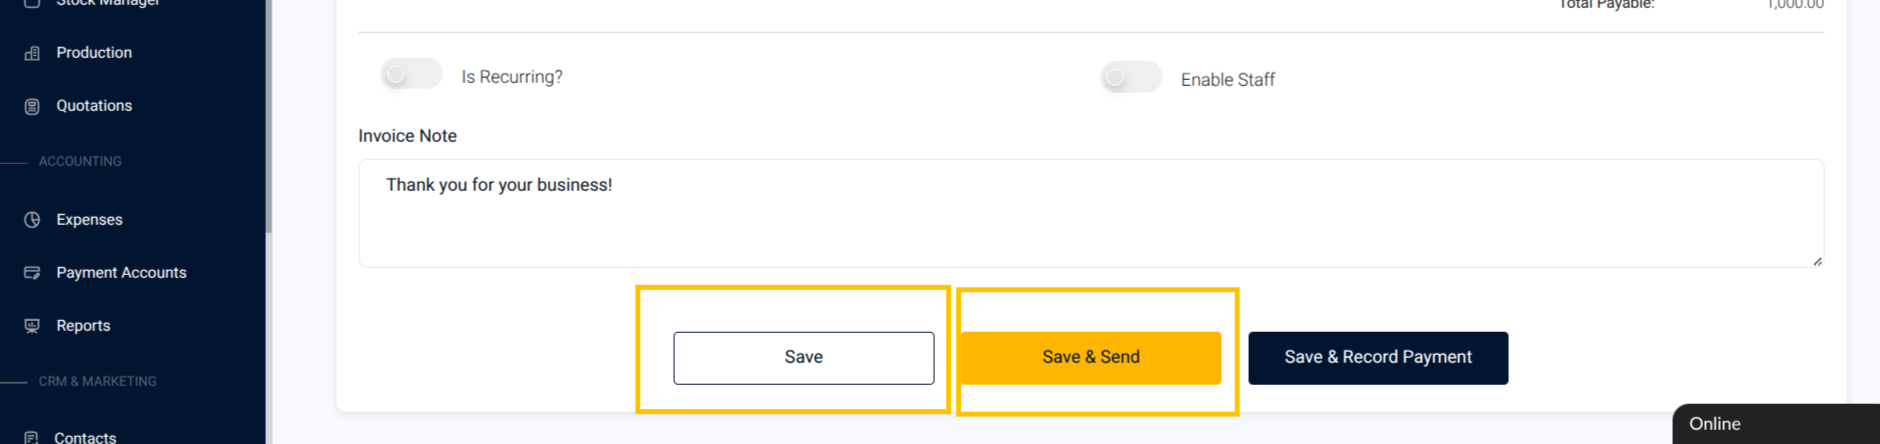
What Happens Next
-
The invoice is saved as Unpaid
-
The amount reflects in the customer’s outstanding balance
-
You can record payment later from Invoices → All Invoices, click the Action (⋮) button on the invoice, then select Add Payment.
Tips & Troubleshooting
-
Use this method for credit sales, delayed payments, or corporate billing
-
If payment is received later, always update the invoice to keep reports accurate
-
If the invoice is missing, check that the correct business location is selected