Overview
This guide explains how to use Prokip’s Sub-Unit feature together with Selling Price Groups to manage products sold in multiple units (e.g., bottles, pairs, crates) and assign different pricing structures.
This setup allows you to:
-
Sell the same product in different units
-
Maintain consistent and automated pricing
-
Apply different prices for different customer groups or sales channels.
Key Concept
Base Unit vs Sub-Unit
-
The Base Unit is the smallest unit of sale (e.g., bottle, piece)
-
A Sub-Unit is a larger unit derived from the base unit (e.g., crate, pair, box)
Important Note on Selling Price Entry
When adding a product in Prokip, you can only enter the selling price for the smallest (base) unit.
This ensures that pricing remains consistent across all units and prevents manual pricing errors.
For example:
-
Base unit: Bottle
-
Sub-unit: Crate (1 crate = 24 bottles)
At the Point of Sale (POS), the seller can choose to sell:
-
A single bottle, or
-
A crate,
and the system will automatically calculate and apply the correct pricing based on:
-
The defined sub-unit conversion
-
The assigned Selling Price Group
This approach ensures pricing consistency and eliminates the need to manually set prices for every unit.
Step-by-Step Instructions
1. Add Sub-Units
-
Go to the Products/Services → Units section
-
Click Add Unit
Fill in the form as follows:
Add Unit Modal:
| Field | Example |
|---|---|
| Name* | pair |
| Short Name* | pr |
| Allow decimal* | Yes |
| Add as multiple of other unit | Enabled |
| 1 pair = … times base unit | e.g., 2 |
| Select base unit | e.g., piece |
-
Click Save
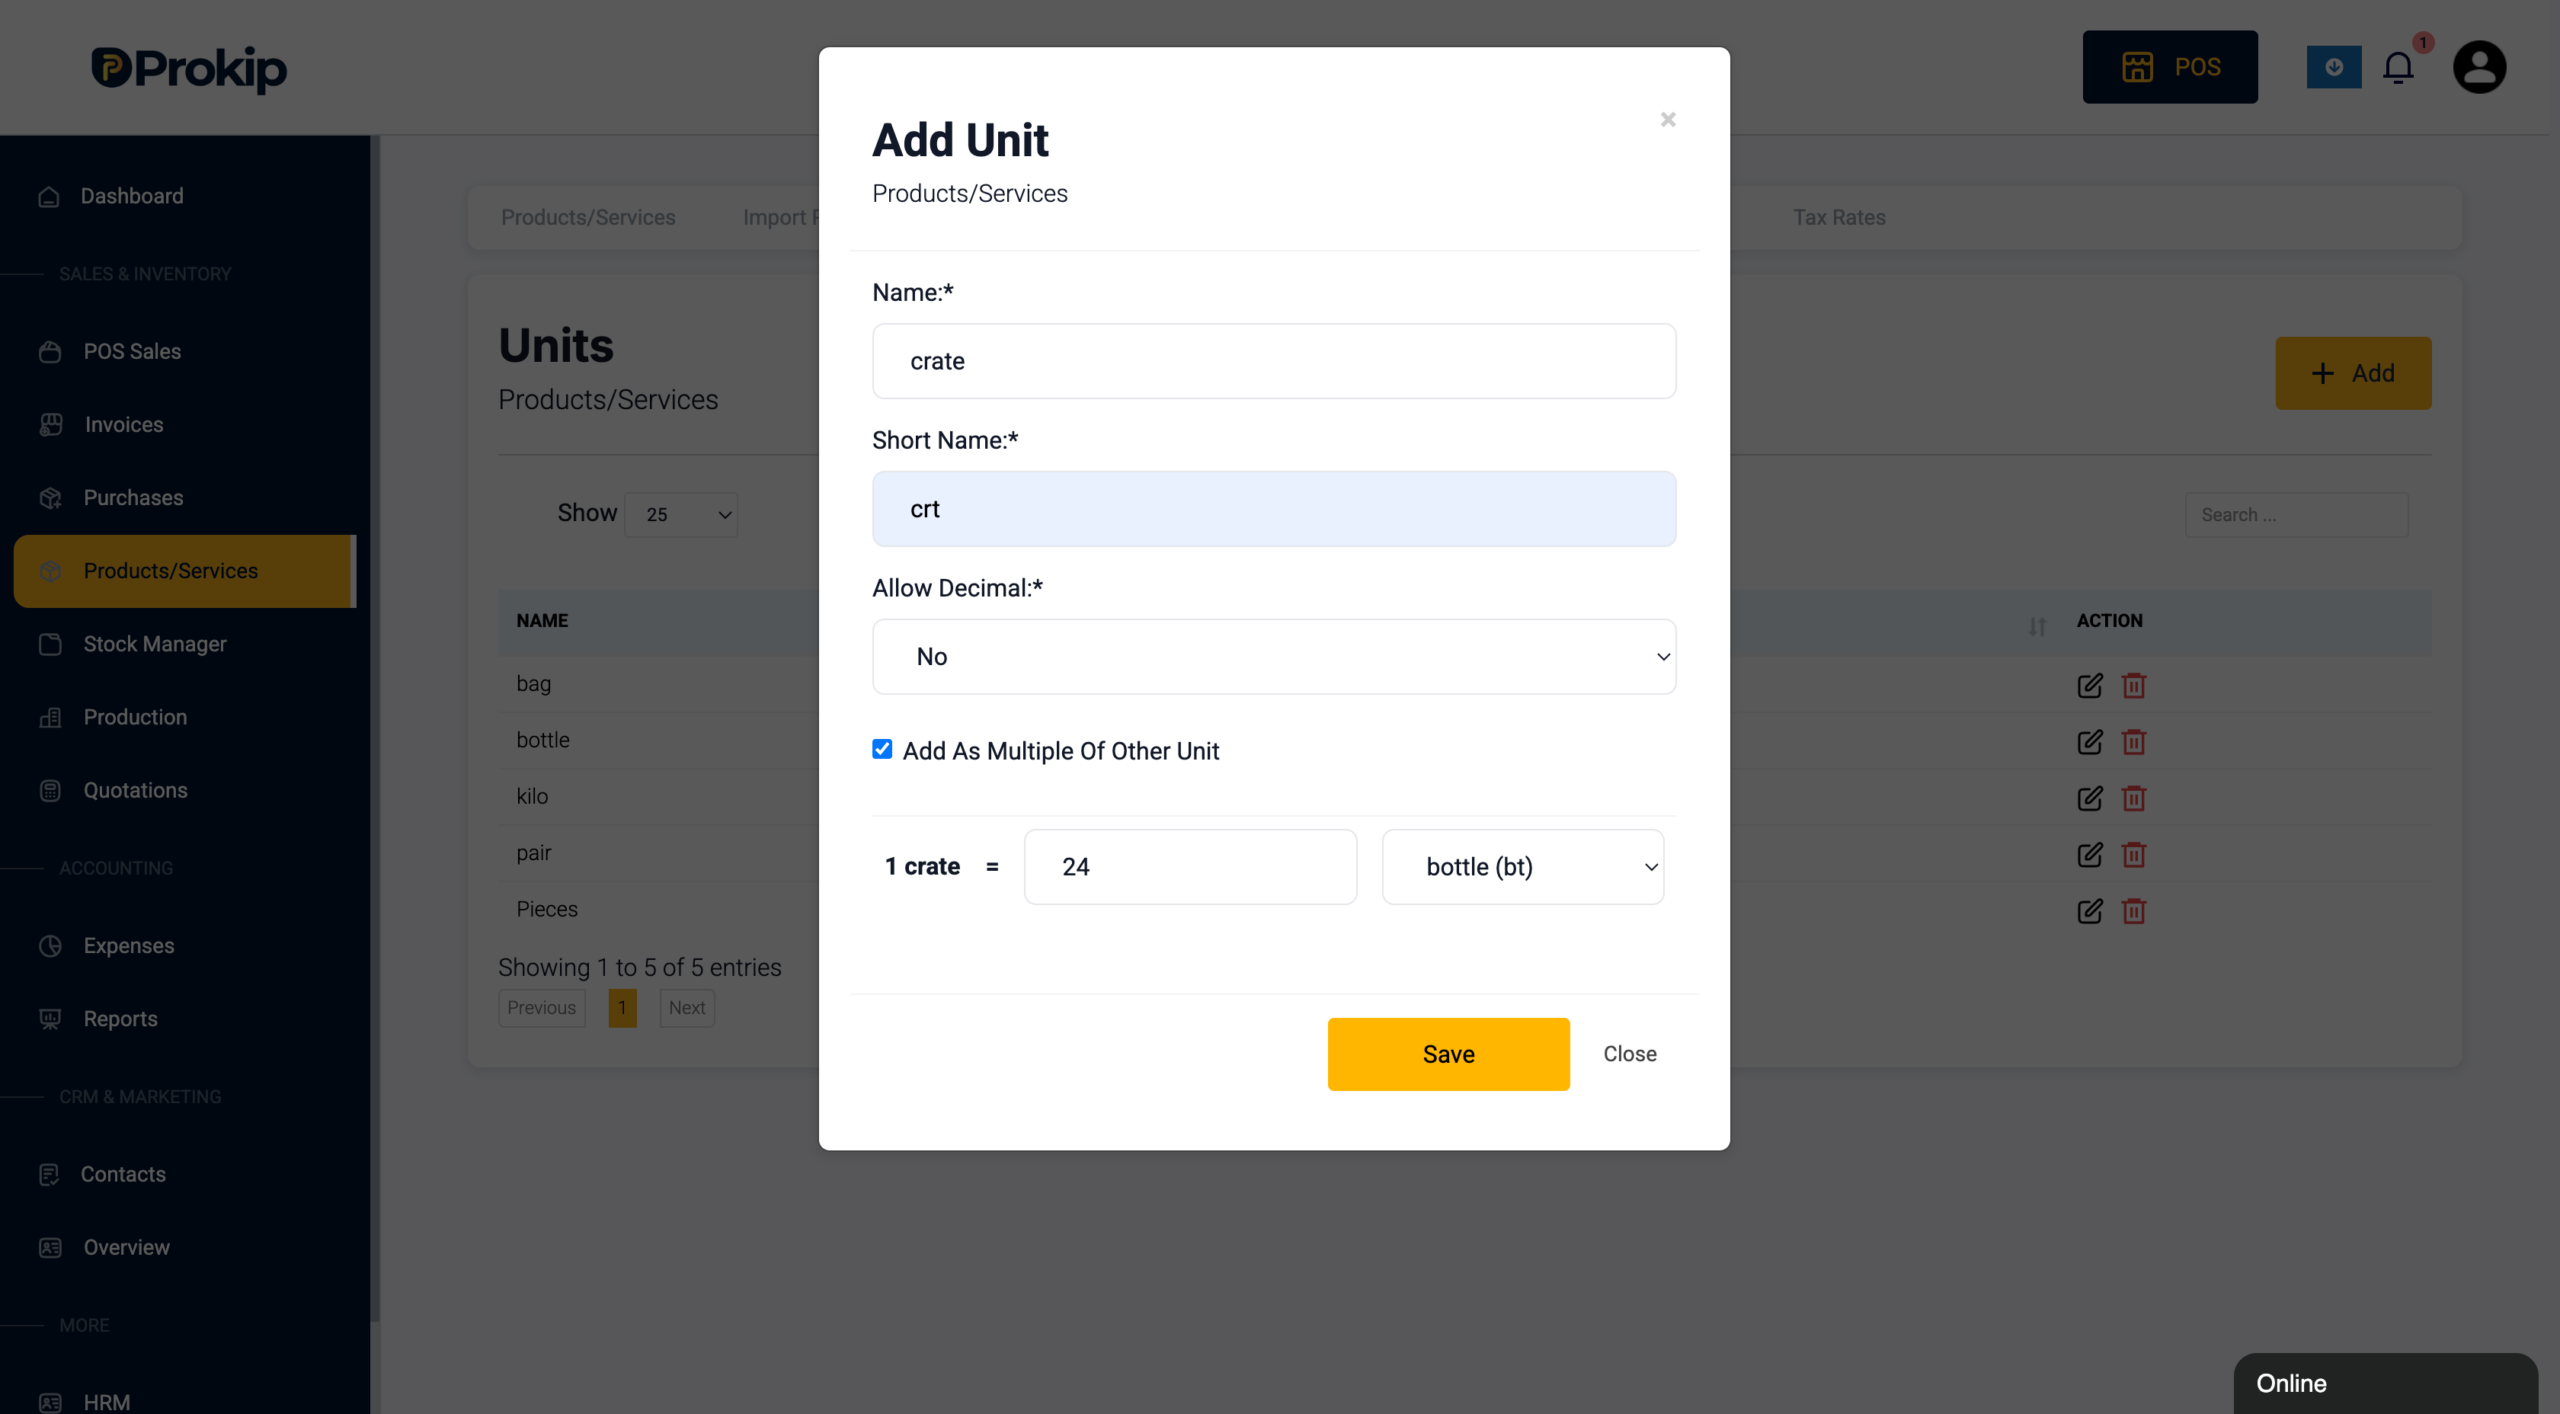
Ensure the conversion rate is accurate, as it directly affects pricing and stock calculations.
2. Create Selling Price Groups
-
Navigate to Pricing → Selling Price Groups
-
Click Add Selling Price Group
Fill in the form:
Add Selling Price Group Modal:
| Field | Example |
|---|---|
| Name* | Retail Price |
| Description | Standard customer pricing |
-
Click Save
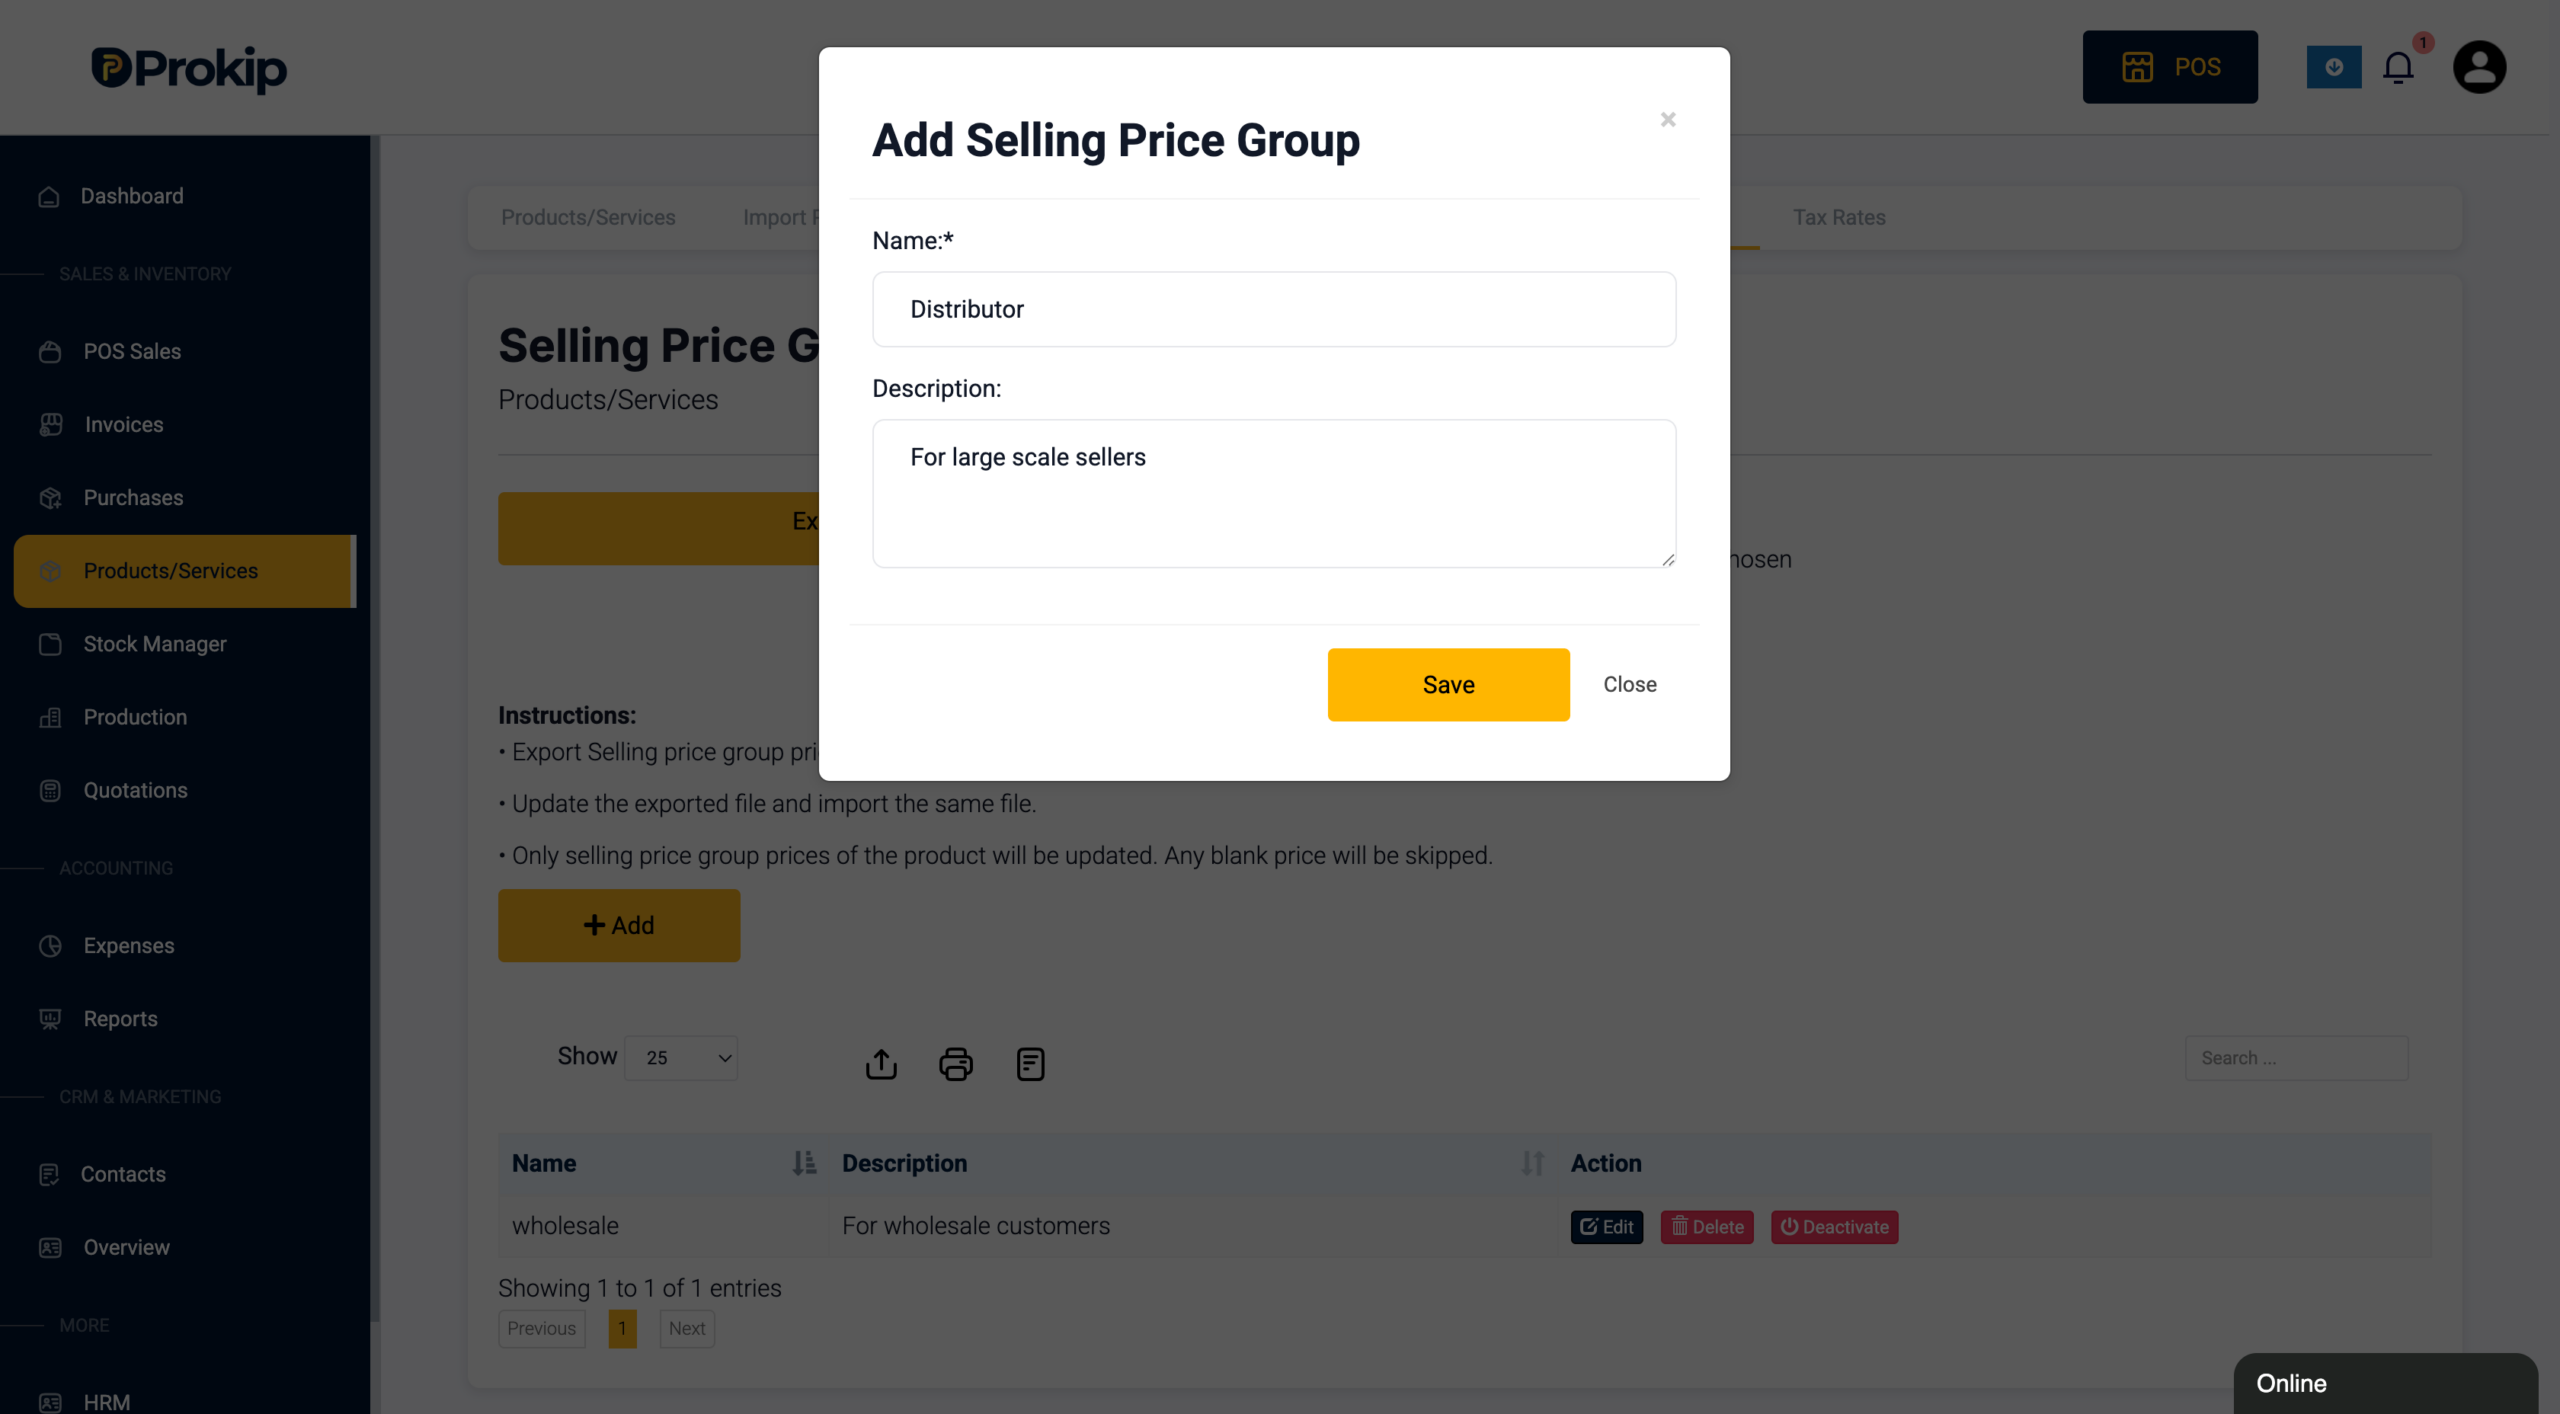
-
You can create multiple price groups (e.g., Retail, Wholesale, Distributor) to support different pricing strategies.
3. Add New Product
Go to Products → Add New Product and fill in the required fields (e.g., Product Name, Product Type, Purchase Price).
Set the Base Unit
-
In the Unit* field, select the base unit (smallest unit)
(e.g., bottle, piece)
All pricing is based on this unit.
Add Sub-Units
-
In Related Sub Units, select the sub-unit(s)
(e.g., crate, pair)
Sub-units must already be created with:
-
A conversion rate (e.g., 1 crate = 24 bottles)
-
A linked base unit
Select also the base unit so they both appear in POS
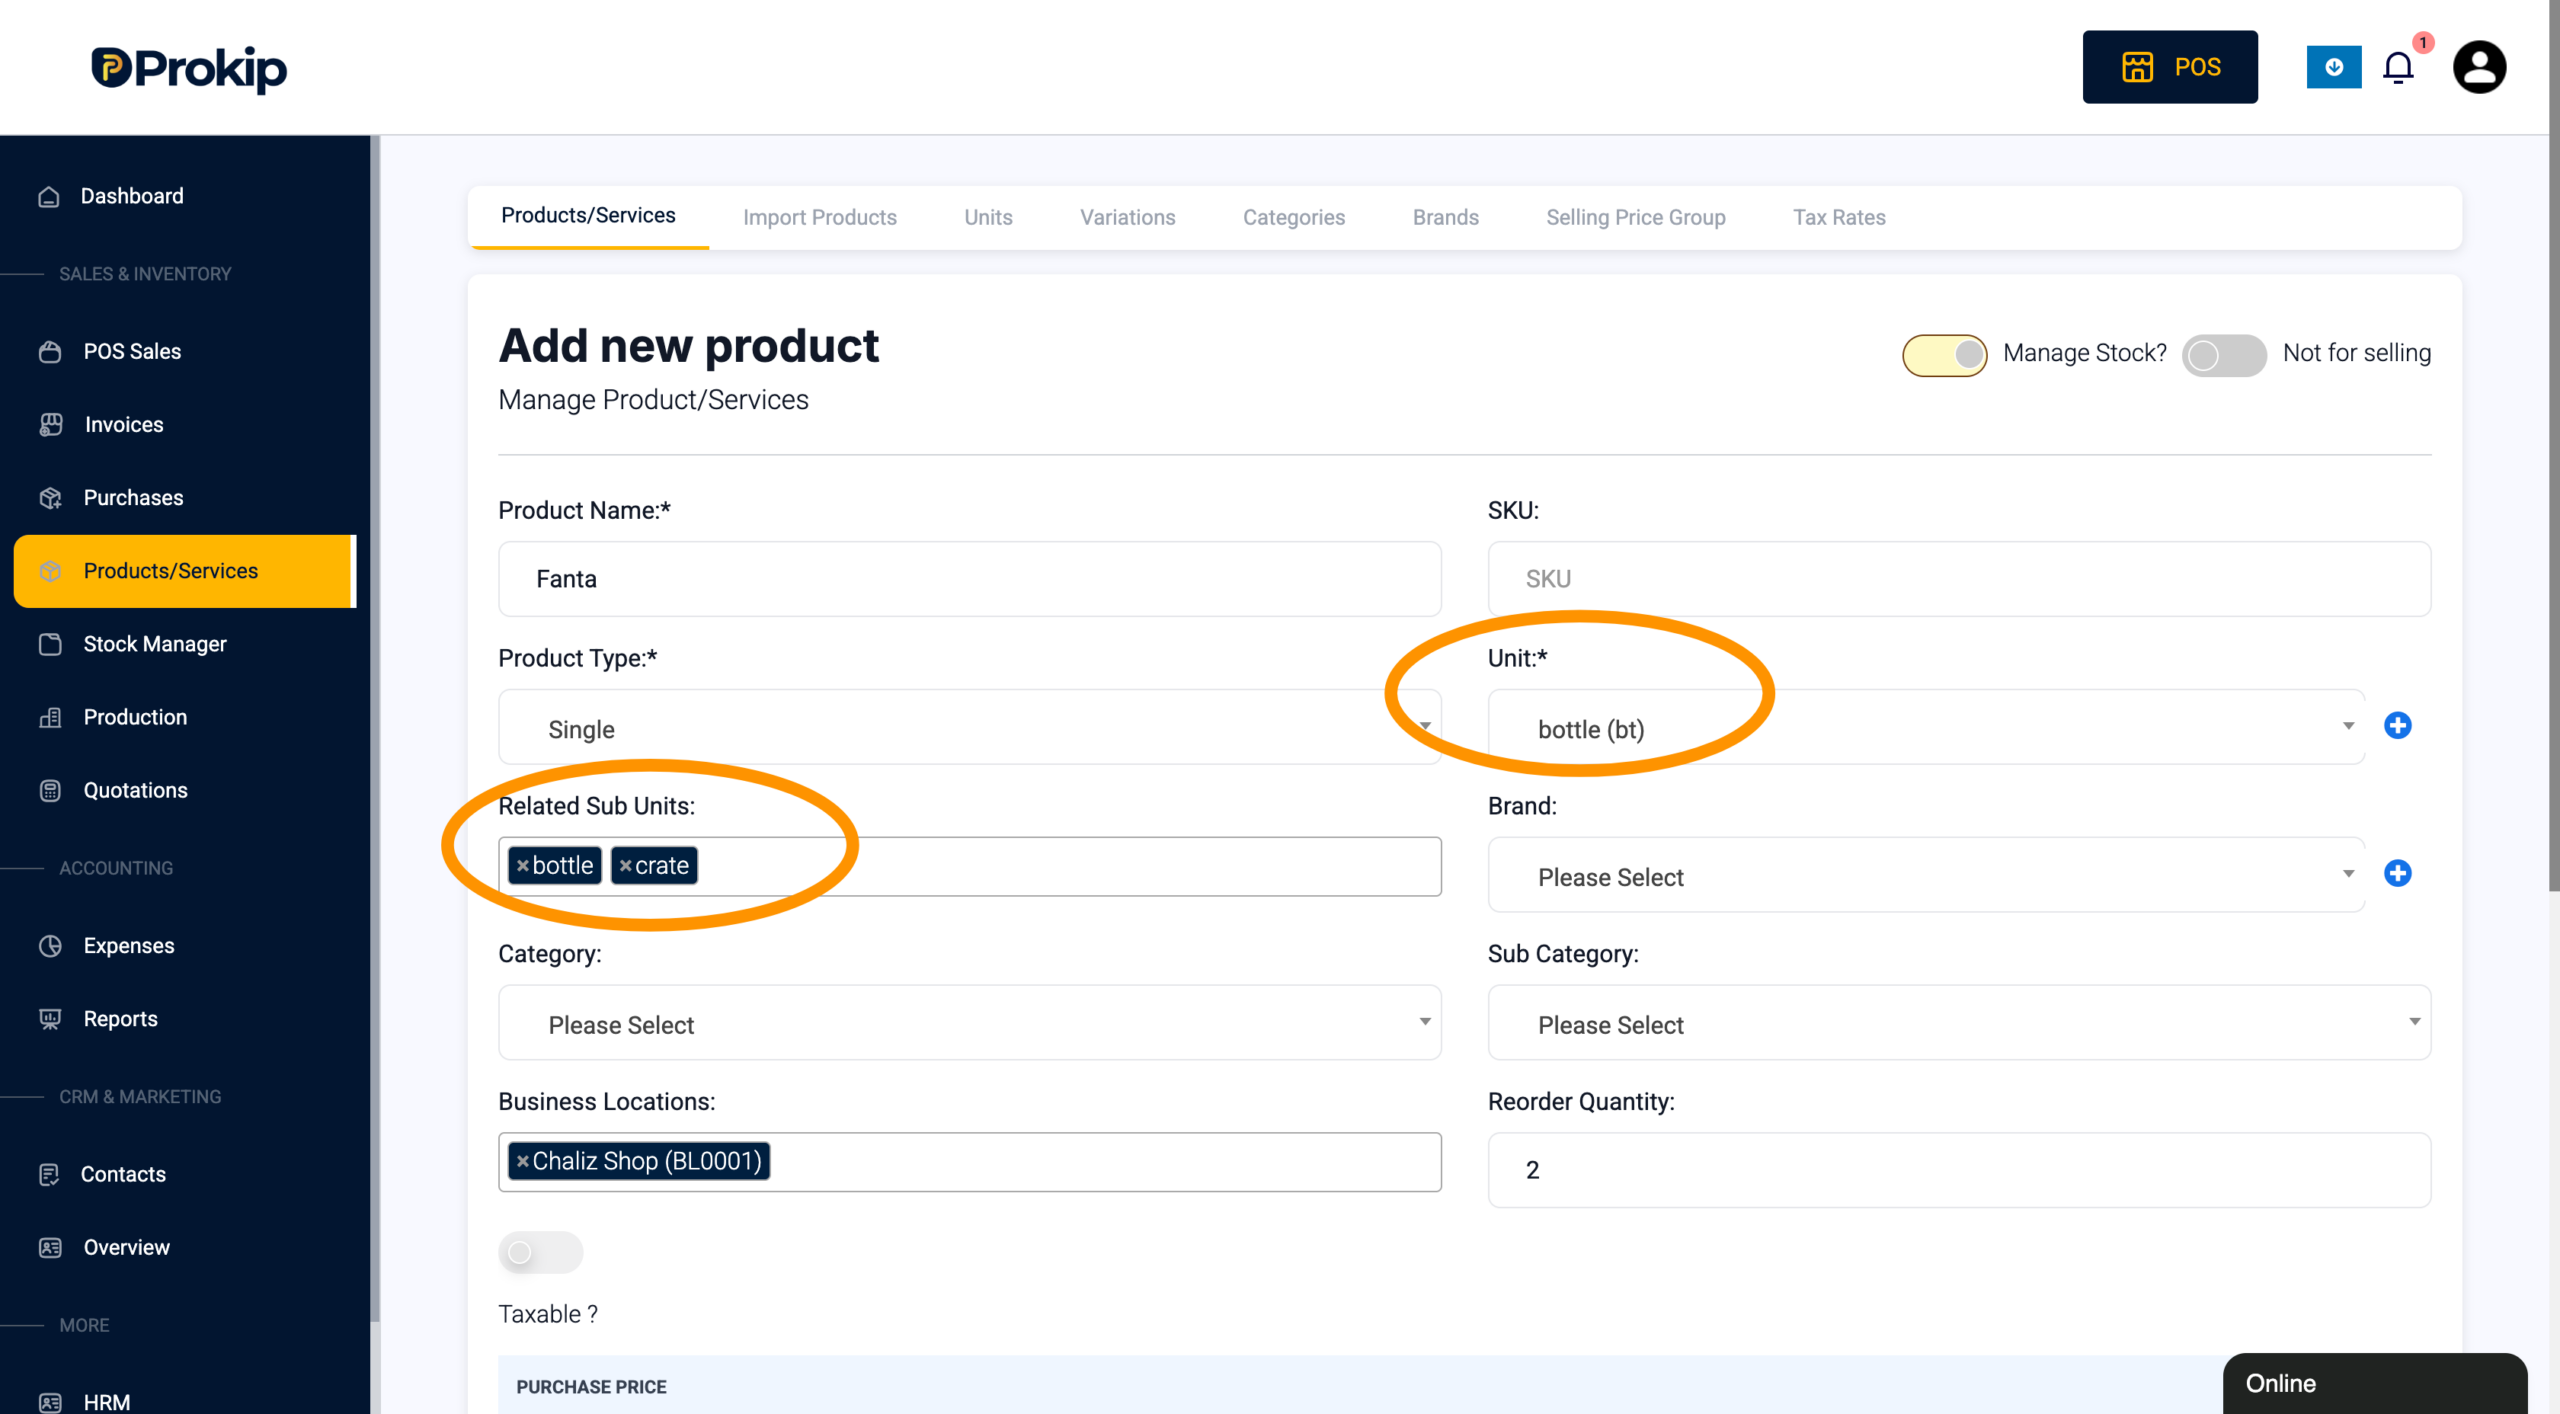
Enter Base Unit Price
-
Set the Default Selling Price for the base unit only
4. Save & Add Group Prices
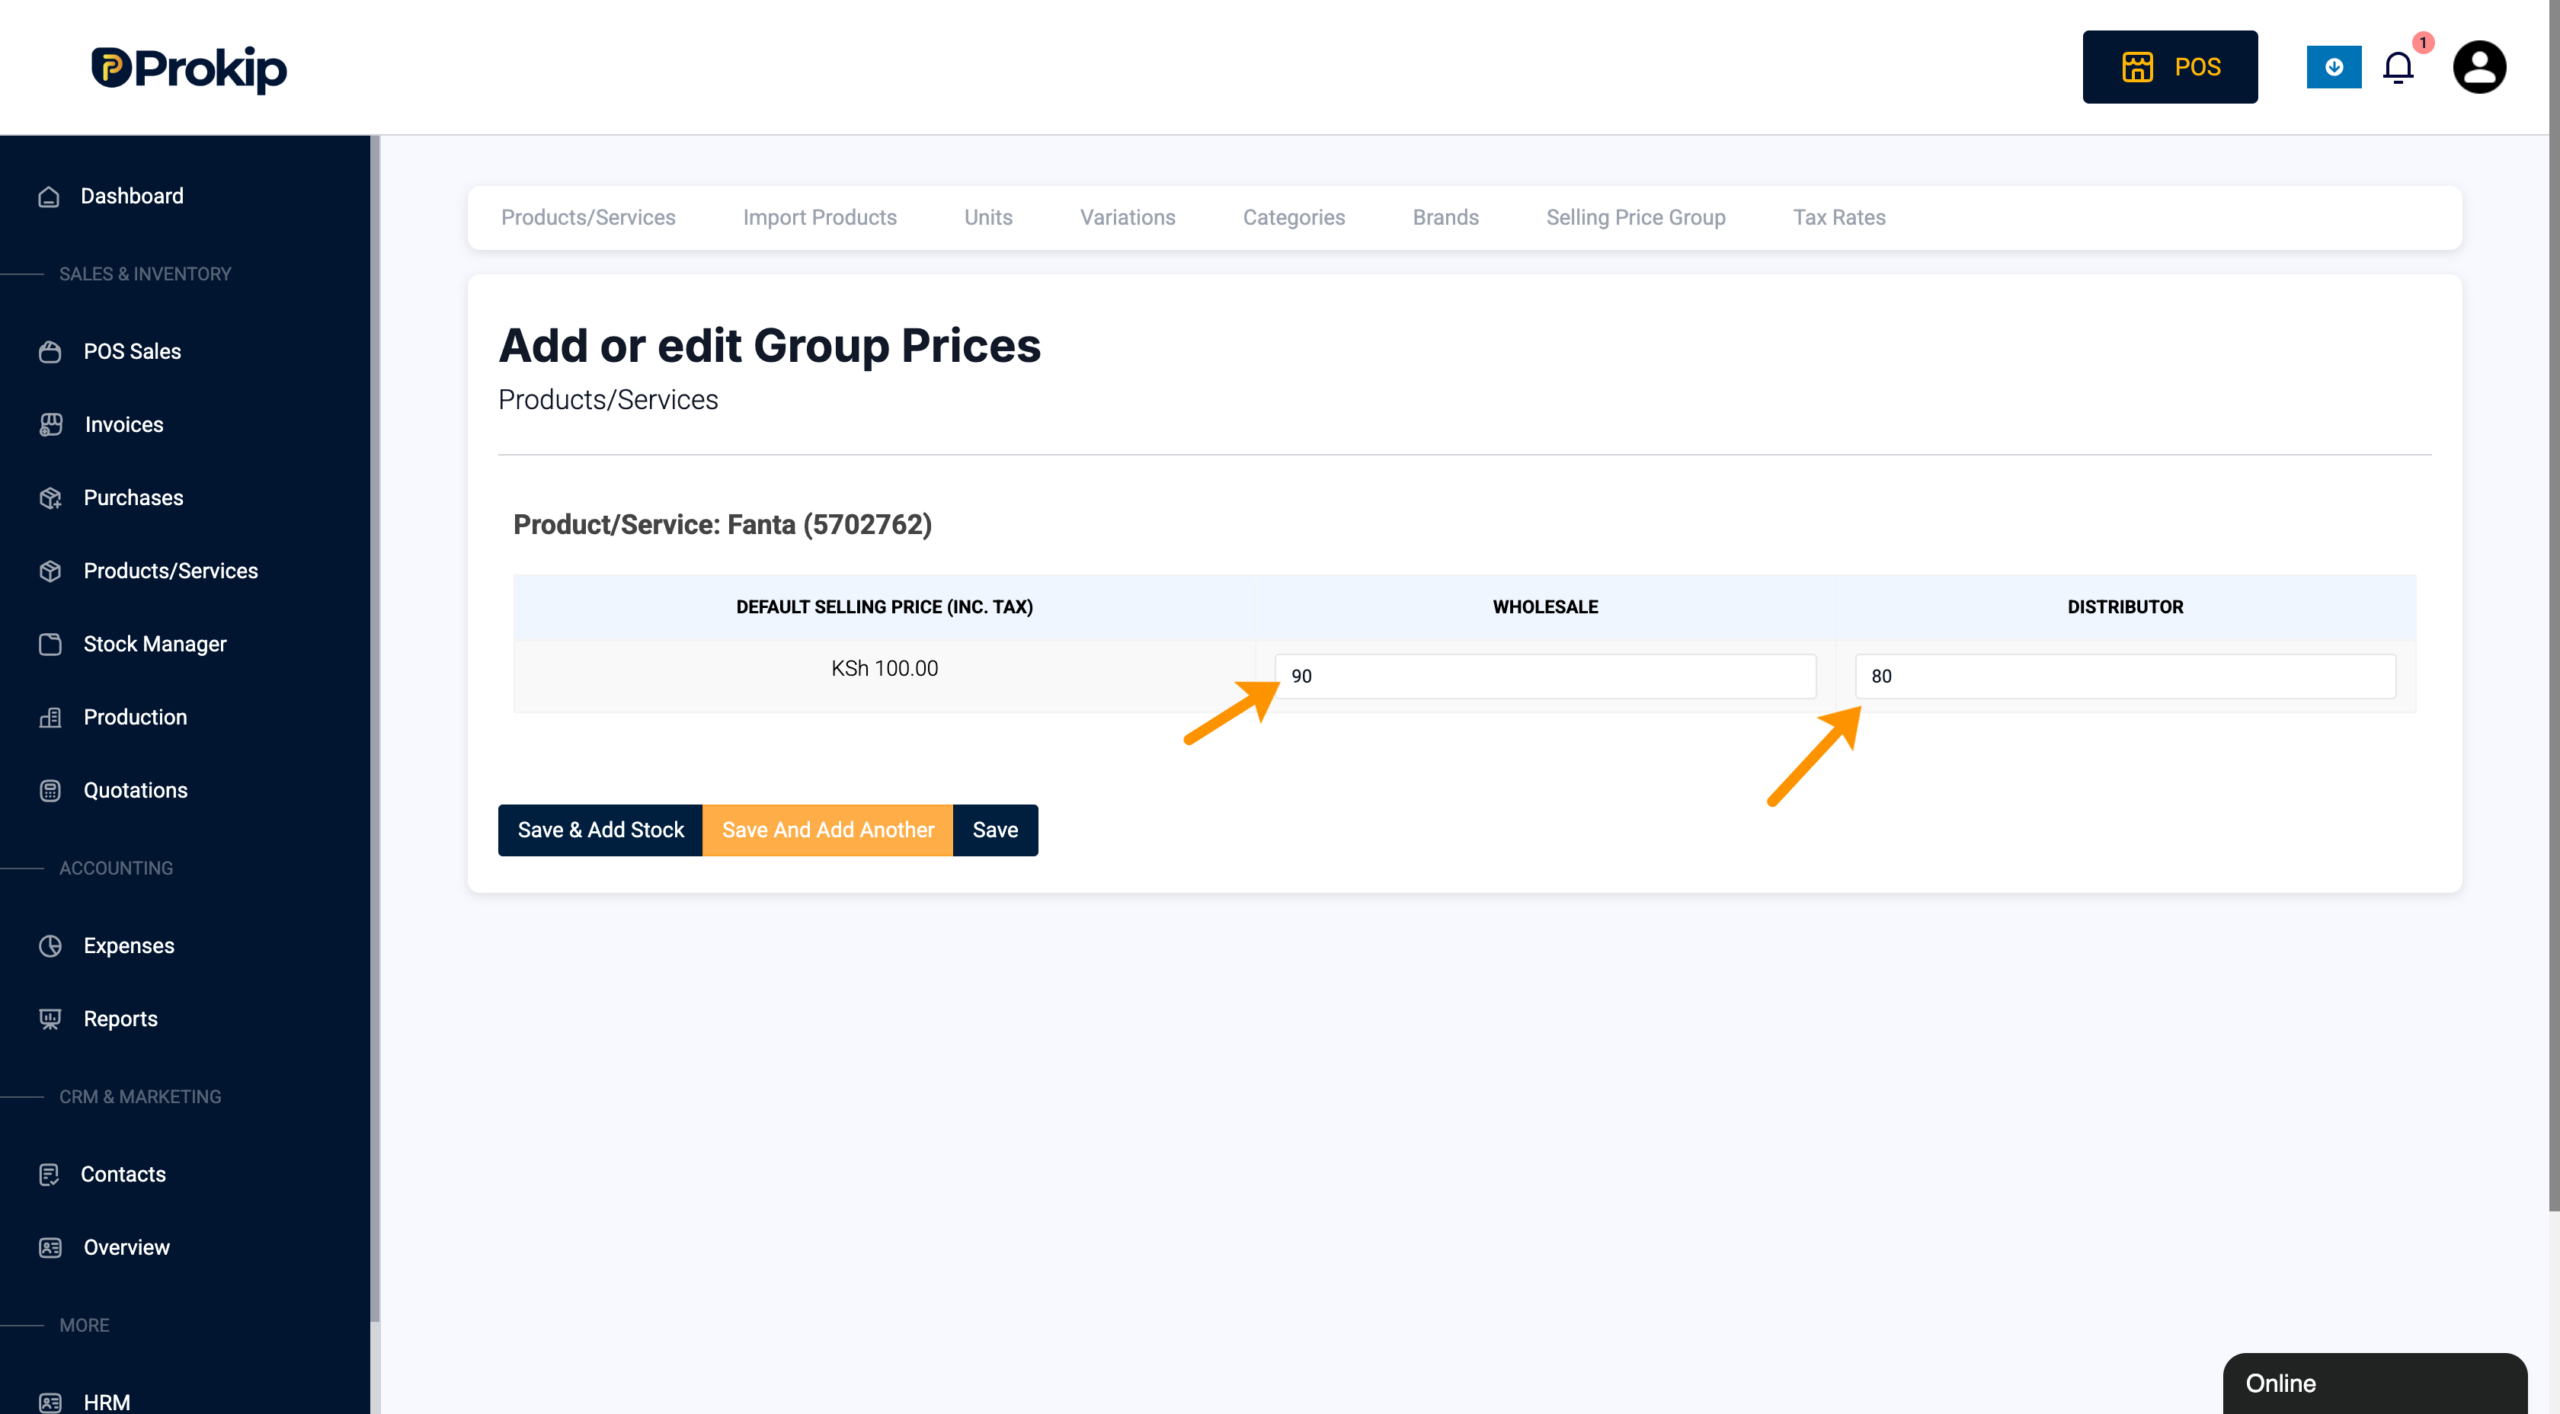
Click Save & Add Group Prices
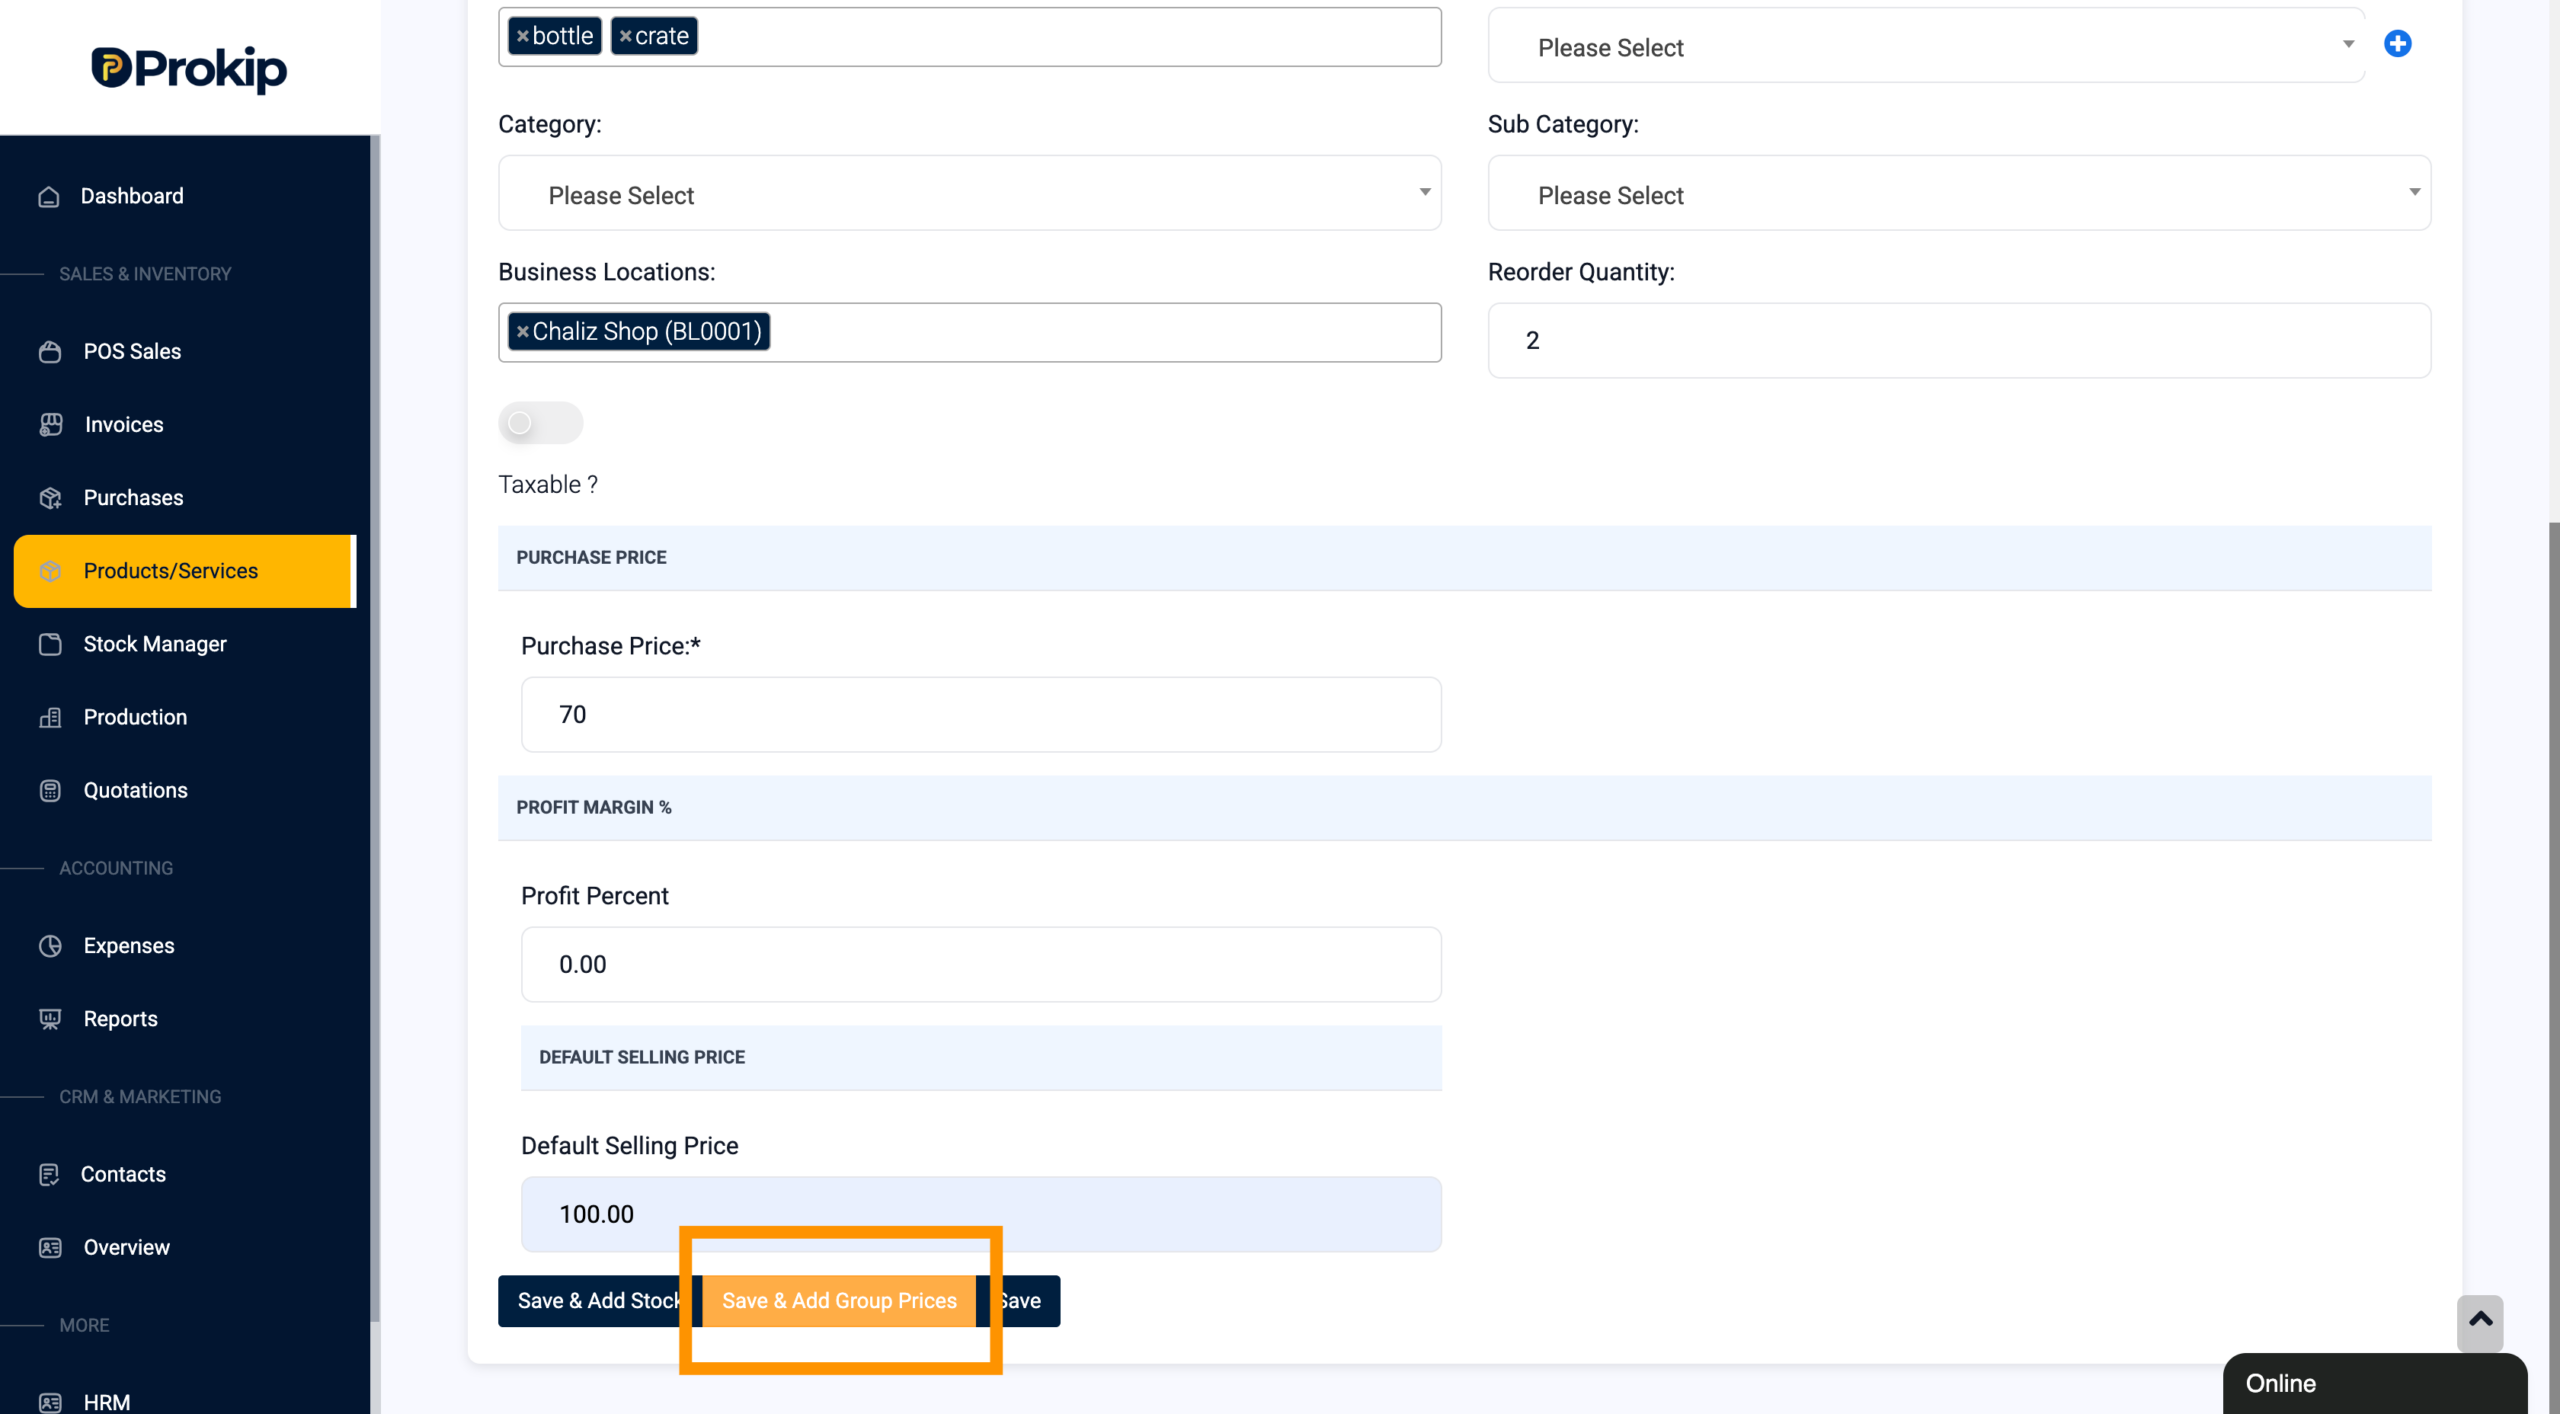
You will be redirected to Add or Edit Group Prices, where you can:
-
View the base unit price
-
Enter prices for each group (e.g., Wholesale, Distributor)
5. Selling at POS
When processing a sale:
-
Select the Selling Price FIRST, otherwise it will use the Default selling price
-
Select the product
-
Choose the unit (e.g., bottle or crate)
-
The system will automatically:
-
Apply the correct conversion
-
Calculate the correct price
-
Use the appropriate Selling Price Group
-
Tips & Best Practices
✔ Always define the correct base unit before adding sub-units
✔ Use clear and consistent naming for units and price groups
✔ Double-check conversion ratios to avoid pricing discrepancies
Troubleshooting
Issue: Sub-unit not appearing at POS
➡️ Ensure the unit is properly saved and linked to the base unit
Issue: Incorrect pricing when selling sub-units
➡️ Verify:
-
Base unit price is correct
-
Conversion rate is accurate
-
Correct Selling Price Group is applied
Issue: Price group not applied
➡️ Confirm the correct price group is assigned to the customer or sales channel
Summary
By combining the Sub-Unit feature and Selling Price Groups, Prokip enables you to:
✔ Manage multi-unit products efficiently
✔ Automate pricing across different units
✔ Customize pricing for different customers or sales scenarios
This setup improves accuracy, saves time, and ensures a seamless selling experience at the POS.