Prokip allows you to sell from one location or multiple business locations — such as different branches, shops, or warehouses. Each location has its own inventory, sales records, and staff access, helping you manage your business efficiently.
Before You Start
- Make sure all your business locations are already added in Settings → Business Settings → Locations.
- Ensure each location has products assigned to it.
- Confirm you’re logged in as a user who has permission to access the locations.
Selling from a Single Location
- Go to POS from the dashboard.
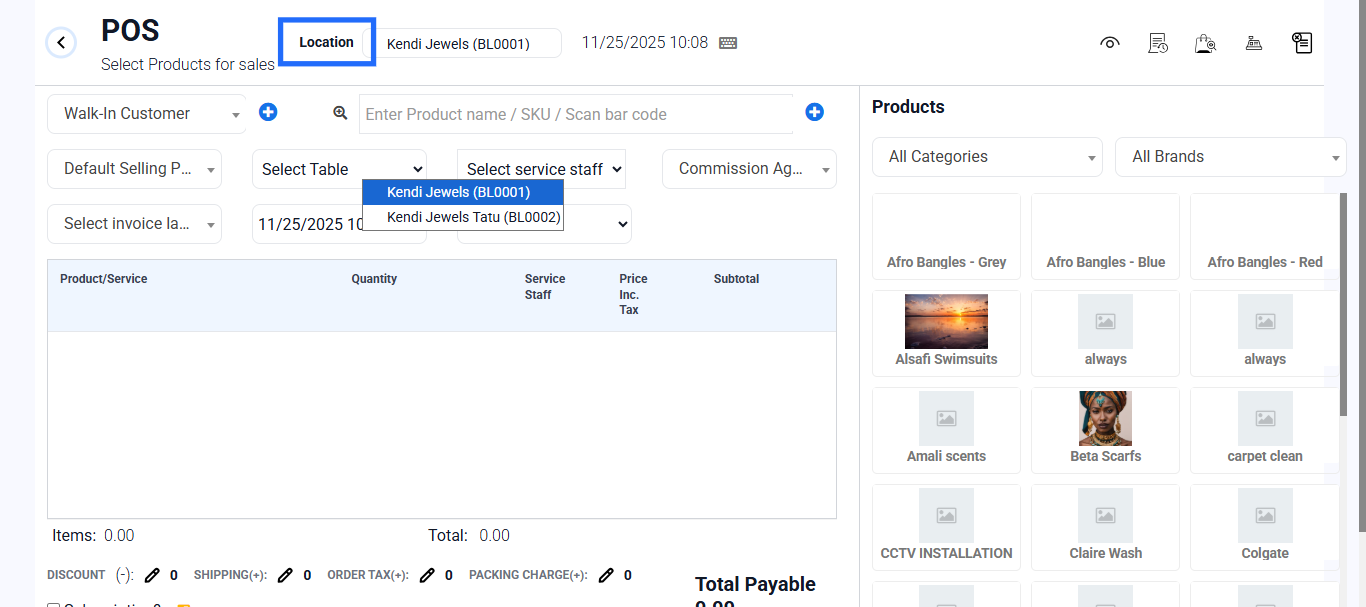
- At the top of the POS page, check the “Business Location” dropdown.
- Select the specific location you want to sell from (e.g., “Main Branch”).
- Add the customer and products for the sale.
- Choose the payment method (Cash, Card,etc.) and finalize the sale.
All stock and sales data will be recorded under that location only.
Selling from Multiple Locations
If you manage more than one branch or store:
- Switch to the correct branch before starting a sale.
- Click on the Location dropdown and select another location (e.g., “Branch B”).
- Once selected, add your products, confirm quantities, and complete the sale.
- Repeat this process for each location as needed.
- Each location will track its sales and inventory separately.
Checking Location-Based Sales
To view or track sales by location:
- Go to POS Sales.
- Use the filter option to select a specific location.
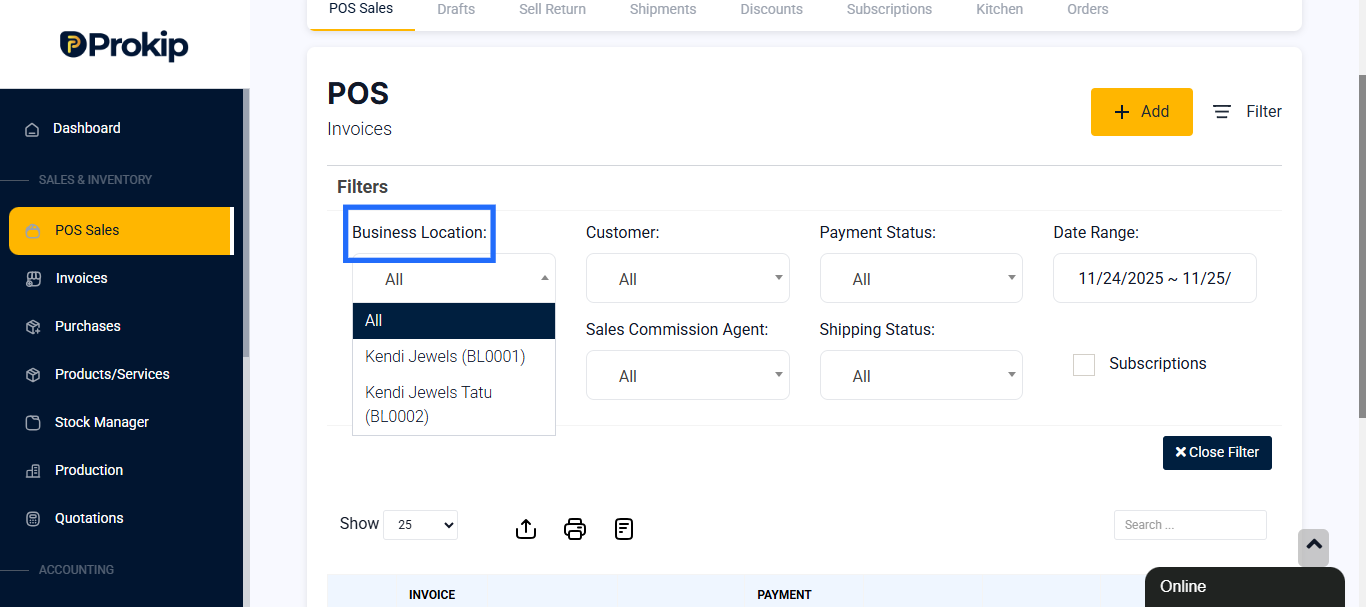
- You can view and download reports for each branch separately.
Best Practices
- Always confirm the correct location before recording a sale to avoid stock mix-ups.
- Assign products to every location that sells them.
- Train your staff to log in only to their assigned branch.
- Review stock reports regularly to ensure each location’s inventory is accurate.
Use location filters in reports to track performance and profitability per branch.