In Prokip, you can record a single purchase containing multiple products — even from different categories — in one entry. This helps save time, keeps your supplier transactions organized, and automatically updates your stock after purchase completion.
Before You Start
Before recording a multi-product purchase, make sure:
- All products are already added under Products/Services.
- The supplier (contact) is created and available in your contact list.
- You know the business location where the stock will be received.
Steps to Record Purchase of Different Products
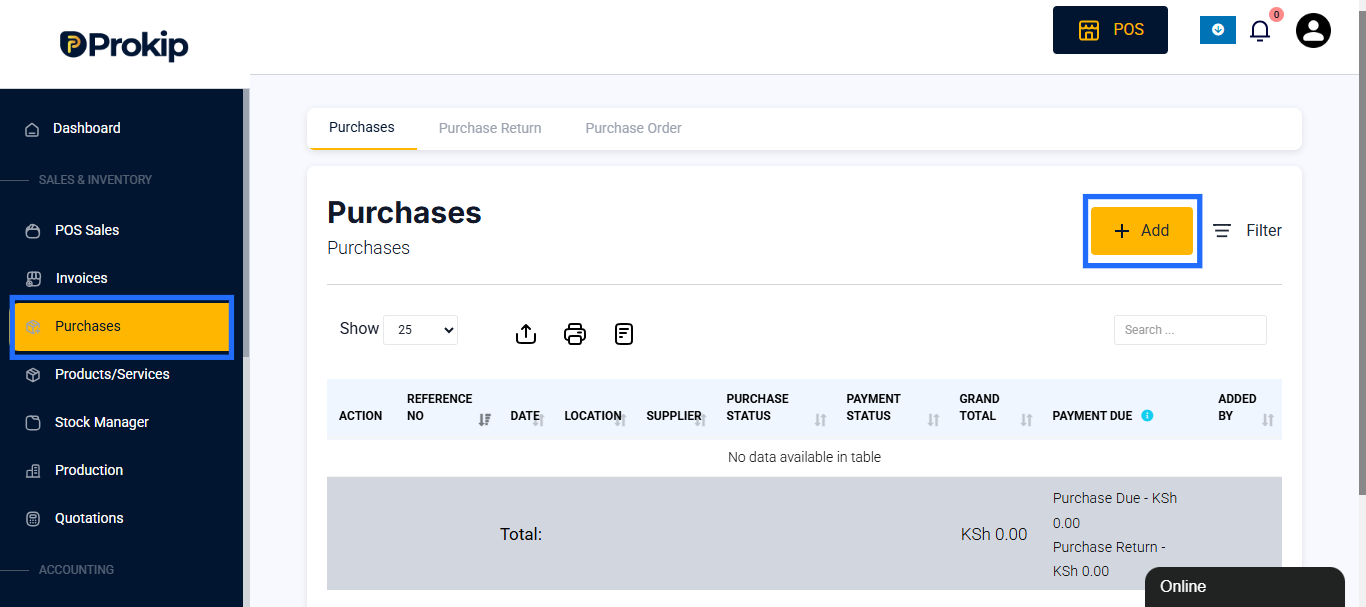
Step 1: Go to the Purchase Section
- From the Dashboard, click Purchases on the sidebar.
- Select +Add to add Purchase.
Step 2: Select Supplier and Purchase Type
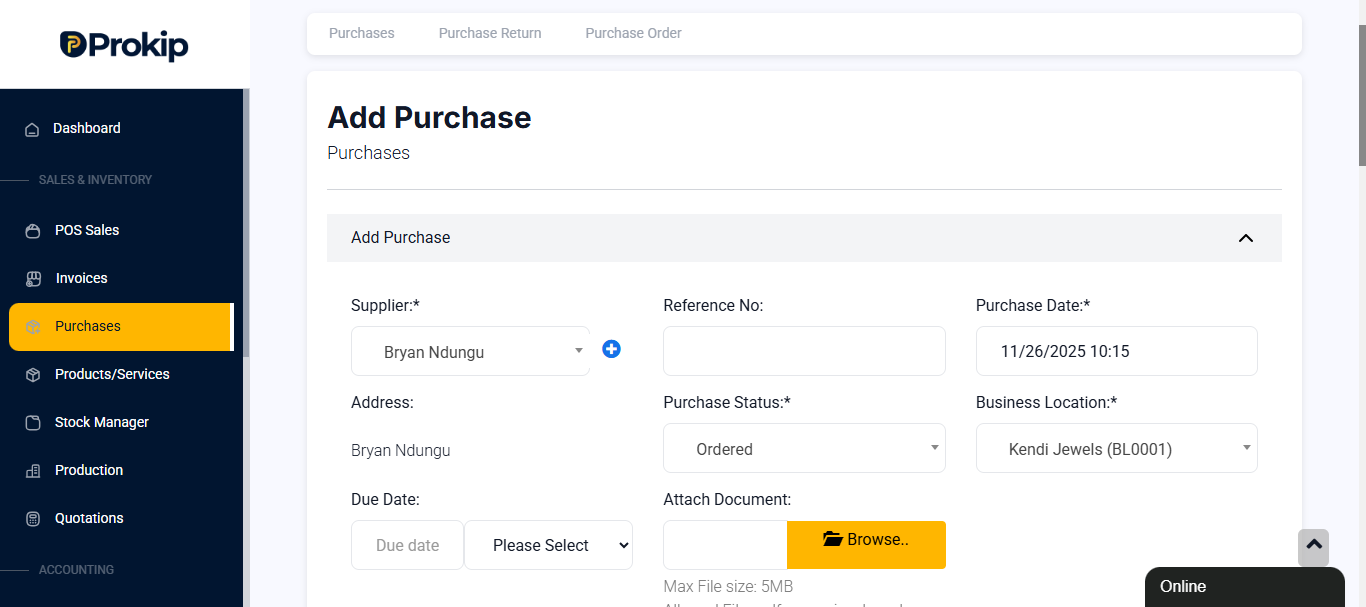
- Choose your supplier from the dropdown list. Example: ABC Wholesalers Ltd
- Select the business location where the items will go.
- Set the purchase date (defaults to today).
- Choose a status — Pending, Ordered, or Completed.
Step 3: Add Multiple Products
- In the product section, click on the search bar under “Product Name.”
- Type or select the first product (e.g., Flour 25kg).
- Enter the quantity, unit cost, and expiry date (if applicable).
- Click Add another product (or simply type in the next one).
- Example: Add Cooking Oil 10L and Sugar 1kg.
- Continue until you’ve added all items from that supplier.
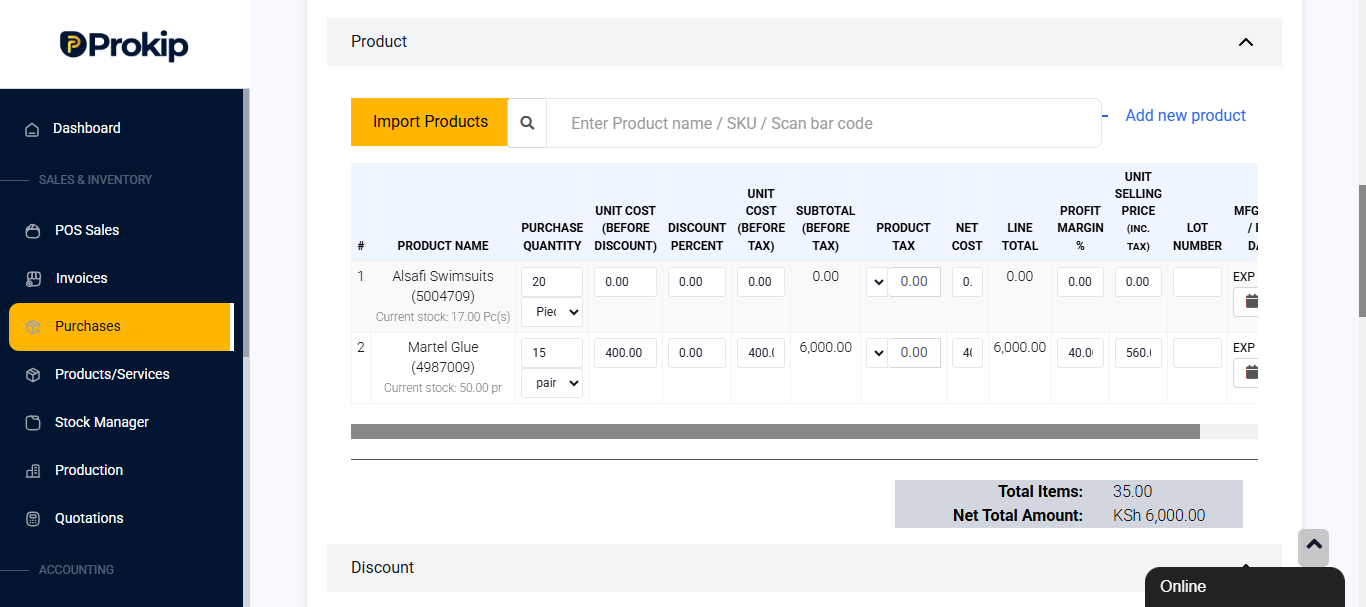
(Screenshot: Product entry section showing multiple products added.)
Step 4: Review and Adjust Totals
After listing your products, Prokip automatically calculates totals — but you can adjust details manually:
- Total Items → Shows how many different products were added.
- Net Total Amount → Displays total cost before discounts or charges.
- Discount Type & Amount → Add fixed or percentage discounts if available.
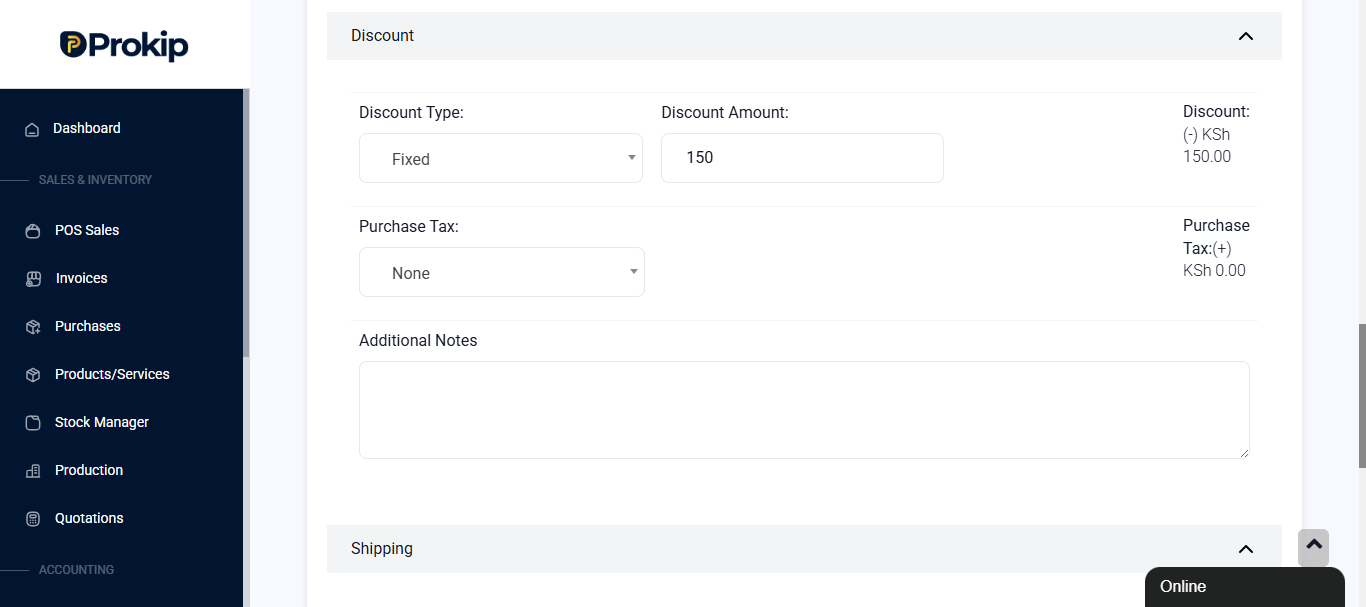
- Shipping Charges → Include transport or delivery costs.
- Purchase Total → Updates automatically to reflect the full total.
Step 5: Add Payment Details & Save the Purchase
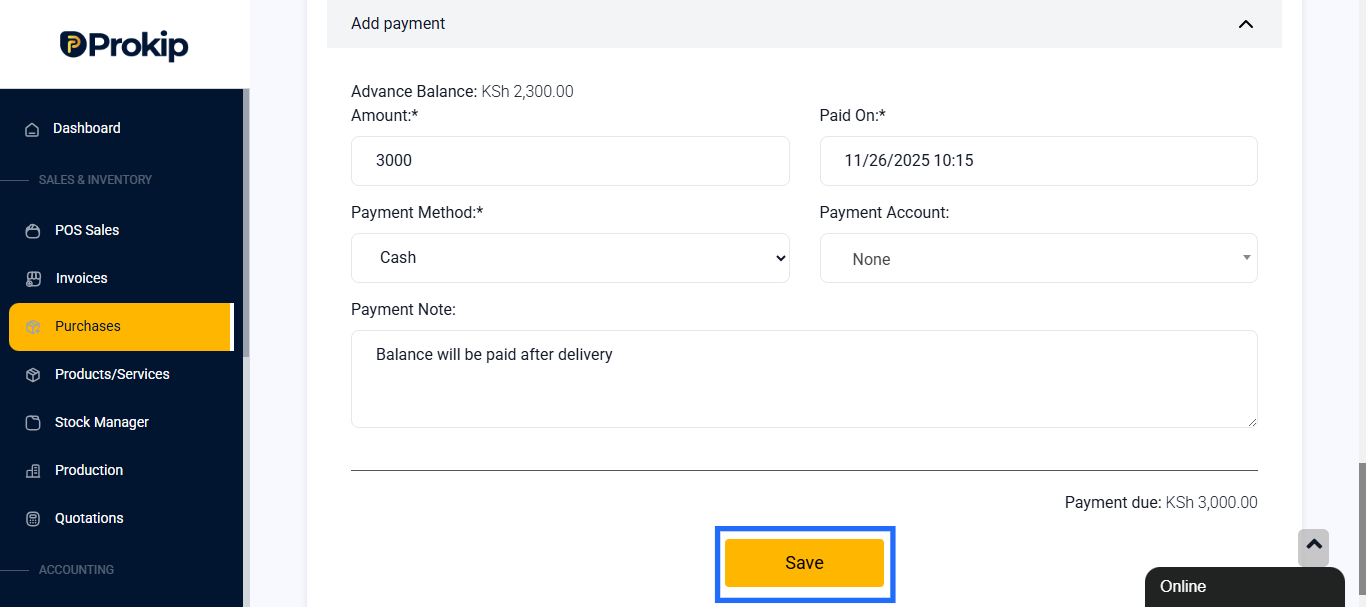
If you’re paying now, you can record payment details right away:
- Enter the amount paid.
- Choose the payment method — Cash, Bank Transfer.
- Add any payment note, e.g., “Paid on delivery.”
- The remaining balance will automatically appear under Payment Due.
- Review all the information carefully.
- Click Save to complete the purchase entry.
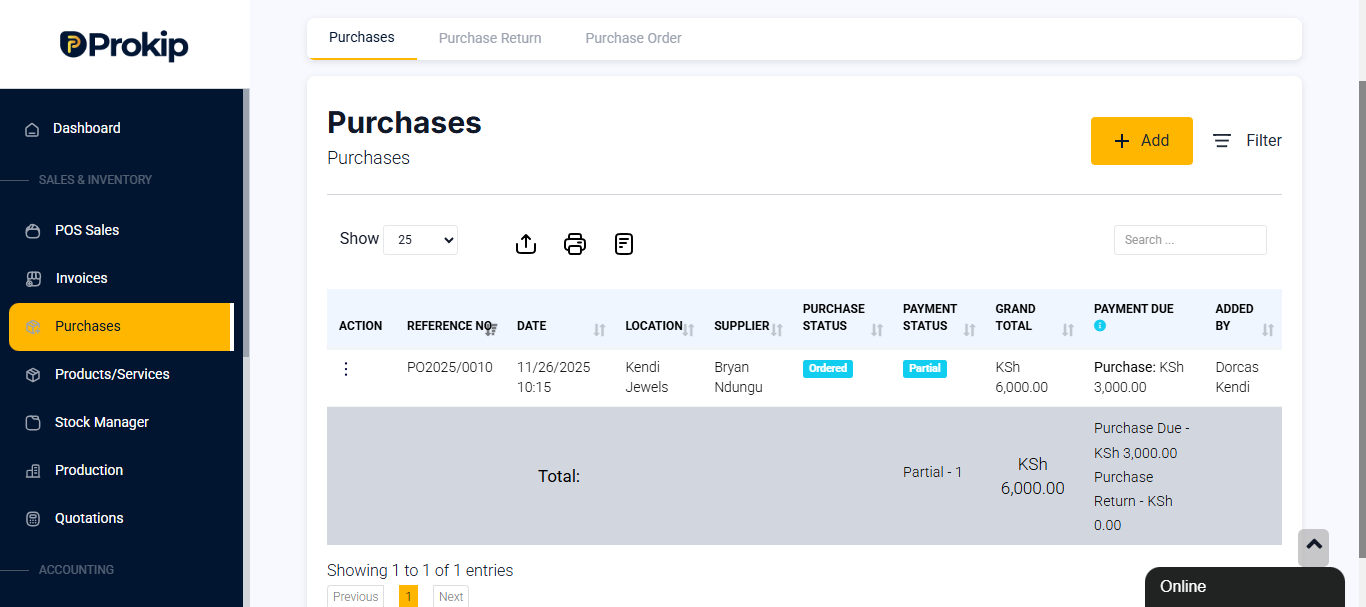
- The purchase will appear in your Purchases page.
After Saving
- If the purchase status is Completed, stock quantities are added immediately to your inventory.
- If Pending or Ordered, items will remain unadded until marked as Complete.
- You can always edit or update the purchase later from Purchases list.
Best Practices
- Always confirm supplier details before saving.
- Double-check product quantities and costs to avoid overstocking or undercharging.
- Use discount and shipping fields for accurate profit and expense tracking.
- For repeated purchases, use the “Duplicate” feature to save time.
- Keep status accurate — “Pending” for unpaid, “Completed” for received stock.