When you add a new contact in Prokip, you can record an opening balance to reflect any amount the customer owes (or you owe to a supplier) from before you started using Prokip.
You can also later record advance payments after the contact is saved.
Before You Start
Before adding a contact, make sure you:
- Know whether the person is a Customer, Supplier, or Both.
- Have their basic details (name, phone, email, and address).
- Know the opening balance if there are previous transactions.
- Have your payment details ready if you plan to record an advance payment after adding the contact.
Steps to Add a Contact with an Opening Balance
Step 1: Go to Contacts
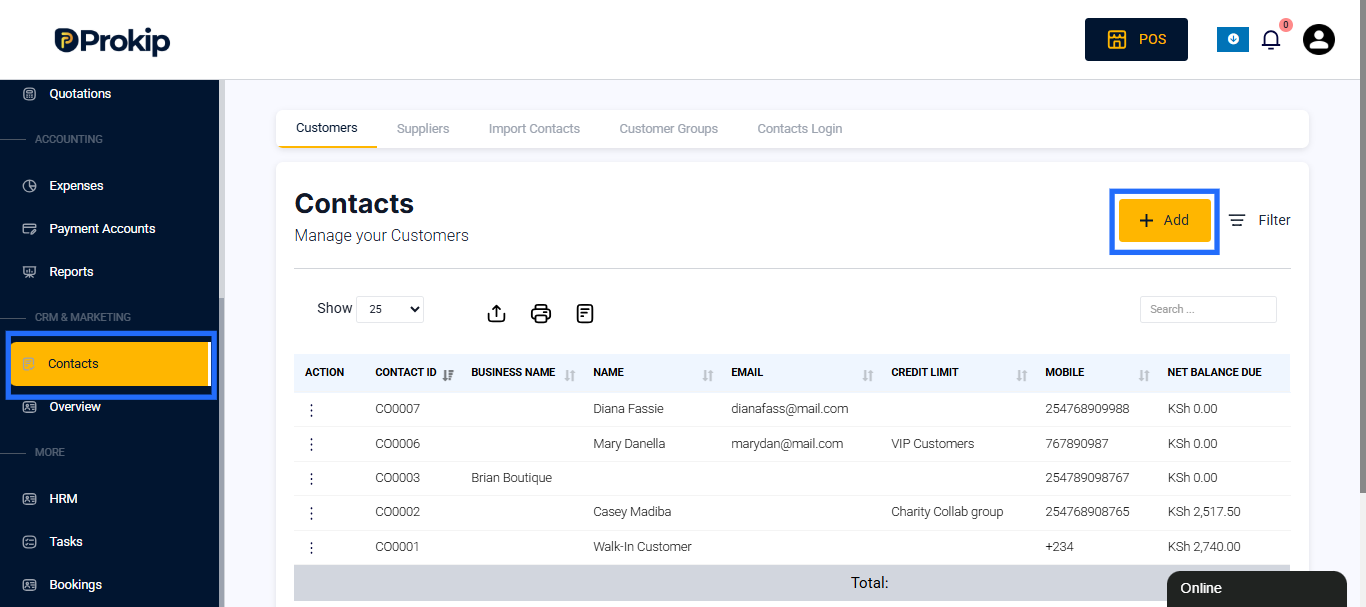
- From your Dashboard, click Contacts on the left menu.
- Select +Add to add contact.
Step 2: Choose Contact Type
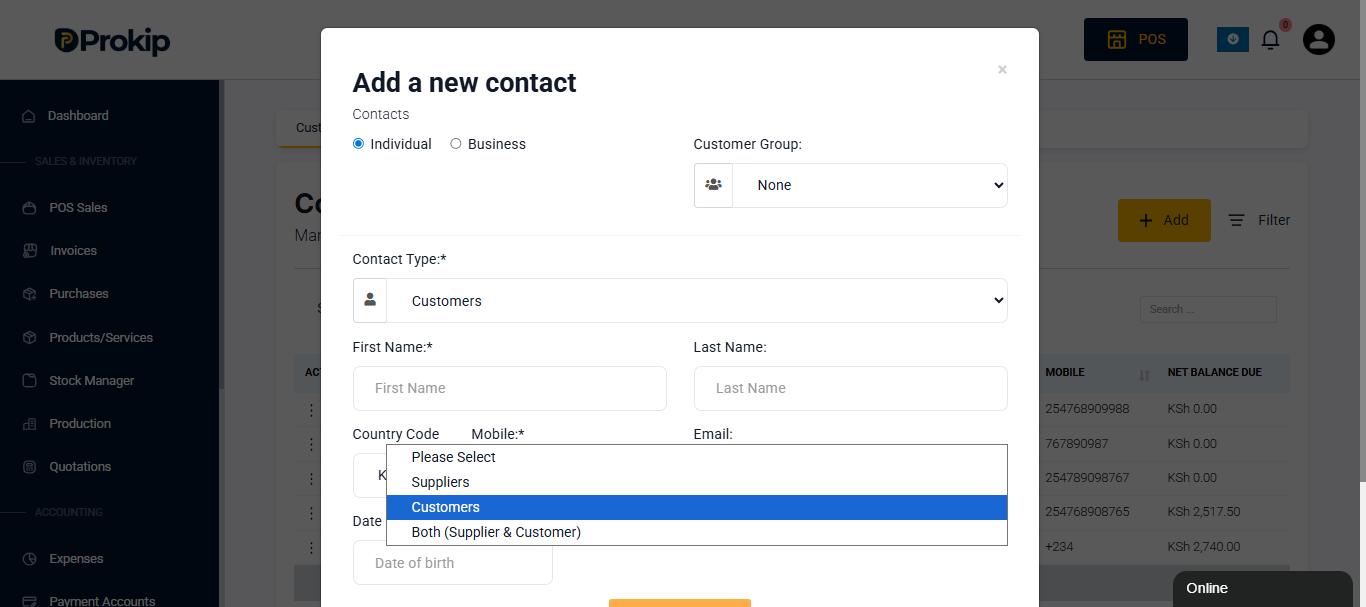
- Under Contact Type, select one of the following:
- Customer – for people buying from you.
- Supplier – for people you buy from.
- Both – if they can be both customer and supplier.
Step 3: Fill in Contact Details
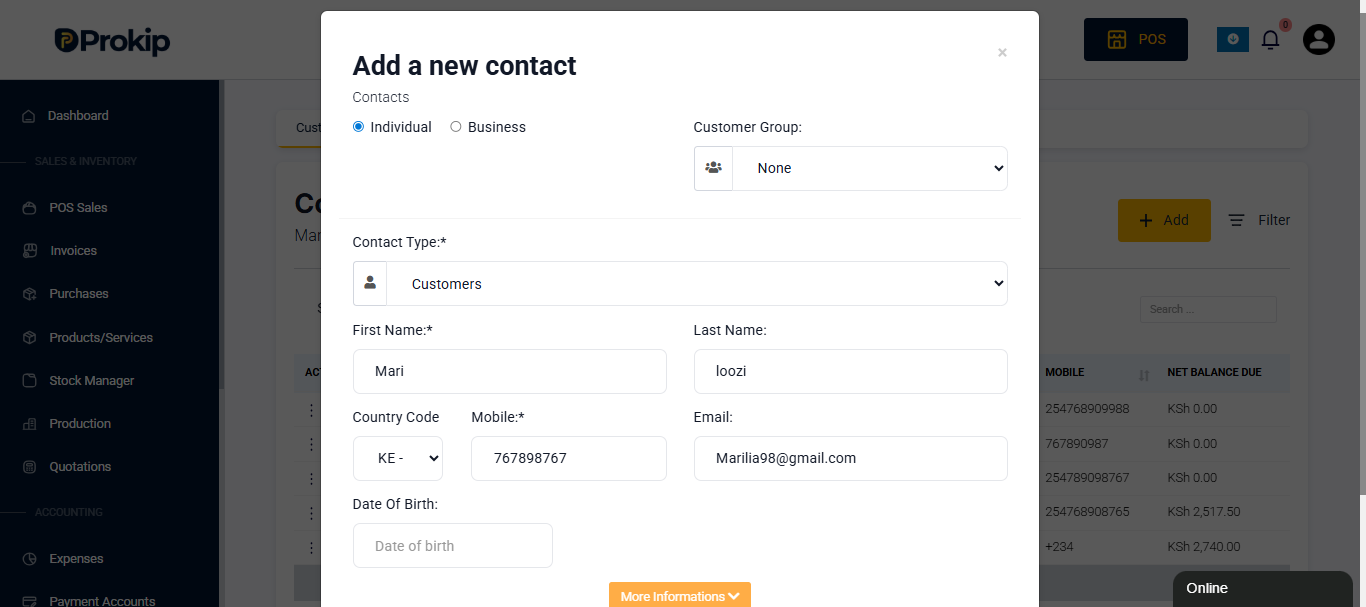
- First Name & Last Name – Type their full name (e.g., Diana Fassie).
- Country Code & Mobile – Choose your country code (e.g., KE – 254) and enter their phone number.
- Email – Enter a valid email address.
- Date of Birth – Optional, for record keeping.
- Tax Number – Add if available (for VAT or business purposes).
- Address Line 1, Shipping Address, City, State, Country, Zip Code – Fill in their location details for invoices and delivery.
Step 4: Add Opening Balance
If the contact already has a balance (money owed or prepaid before using Prokip):
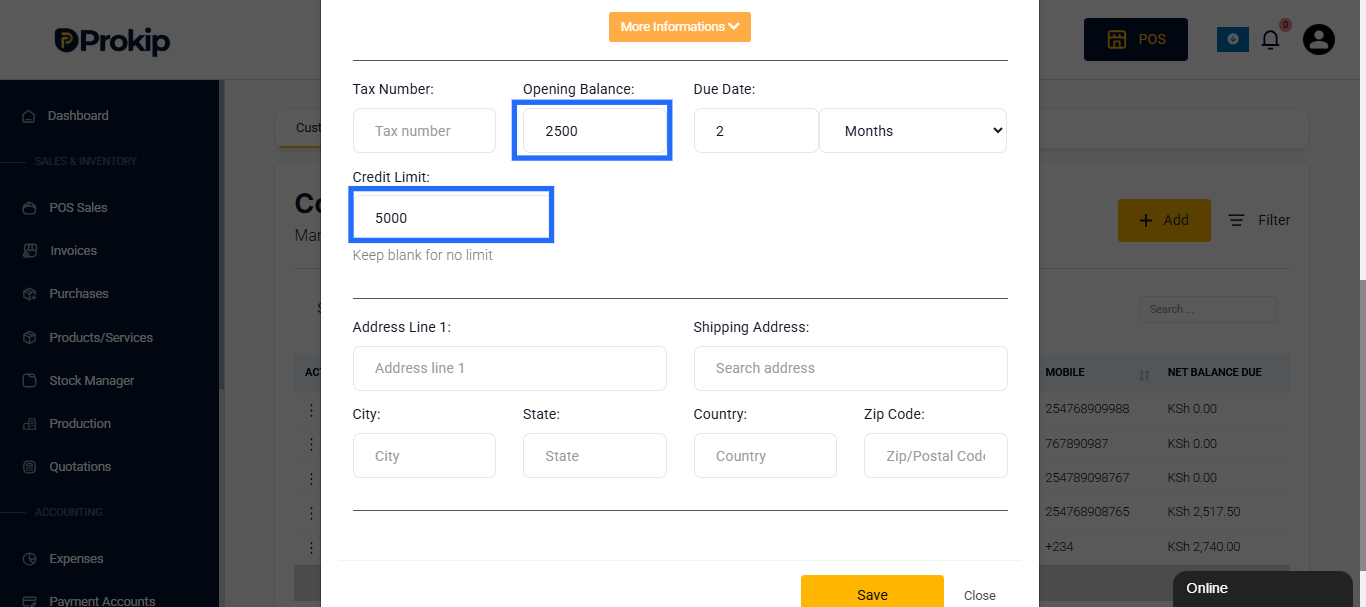
- In the Opening Balance field, enter the correct amount.
- For a Customer, this is what they owe you.
- For a Supplier, this is what you owe them.
- You can also set a Due Date if the balance should be cleared by a specific date.
- Leave Credit Limit blank if there’s no set limit for that contact.
Step 5: Save Contact
- Review all details to ensure they are correct.
- Click Save at the bottom of the form.
Adding an Advance Payment (After Contact is Created)
Once your contact is saved, you can record an advance payment linked to them.
- Go to the Contacts Dashboard.
- Find the contact you just created (e.g., Diana Fassie).
- On the right-hand side, click Action → Pay to add Advance Payment.
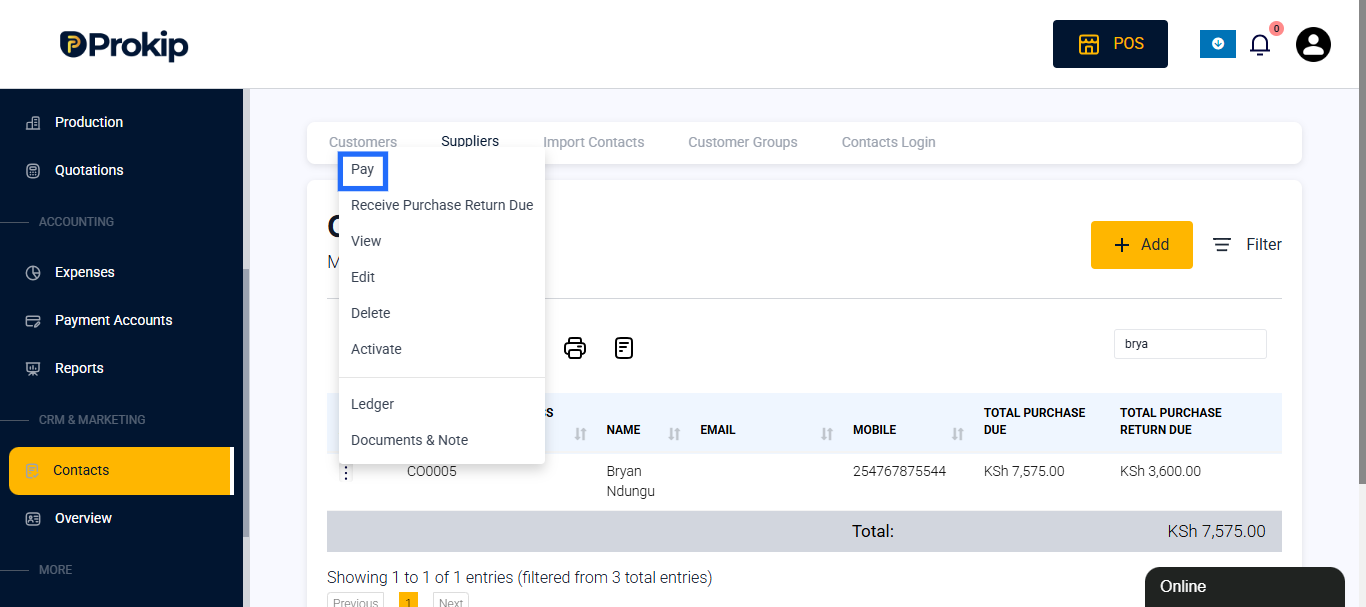
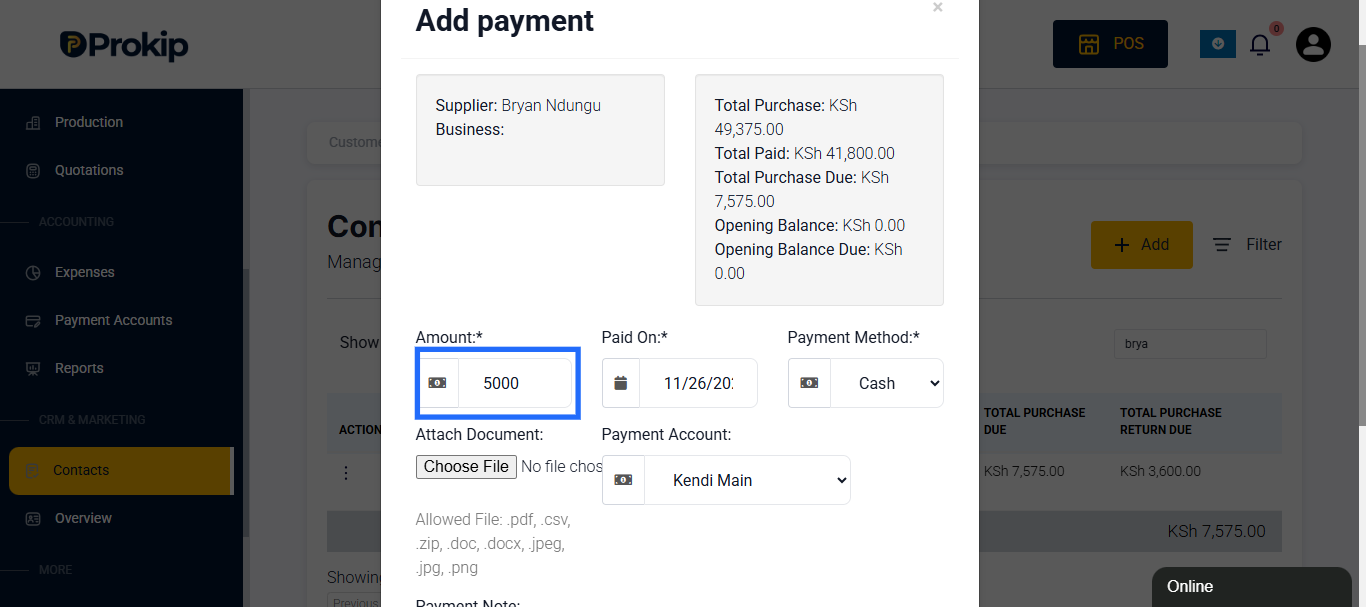
- Enter the following details:
- Amount – How much was received or paid.
- Paid on – Choose the payment date.
- Payment Method – Select Cash, Bank Transfer, POS, etc.
- Payment Note – Optional, describe what the advance is for (e.g., “Deposit for upcoming order”).
- Click Save to confirm.
Best Practices
- Always confirm the contact type before saving; it determines where the balance appears (Customer or Supplier list).
- Use the Opening Balance only once — when setting up old balances. Use Advance Payment for new deposits or prepayments.
- Add clear notes in payment descriptions to avoid confusion later.
- Check balances under the Contact’s Ledger for accuracy.
- Avoid duplicate entries — if a contact already exists, update it instead of adding a new one.