Before You Start
Before setting up Customer Groups, make sure you have:
- Added your customers under the Contacts section.
- Created any necessary Selling Price Groups if you plan to use them (for example, Retail, Wholesale, or VIP price groups).
What Customer Groups Do
Customer Groups in Prokip help you organize customers based on their buying type or pricing level.
This allows you to automatically apply different prices or discounts when making sales.
For example, you can have:
- Retail Customers who buy at regular prices.
- Wholesale Customers who get reduced prices.
- VIP Customers who receive a special discount.
Step 1: Open the Customer Groups Page
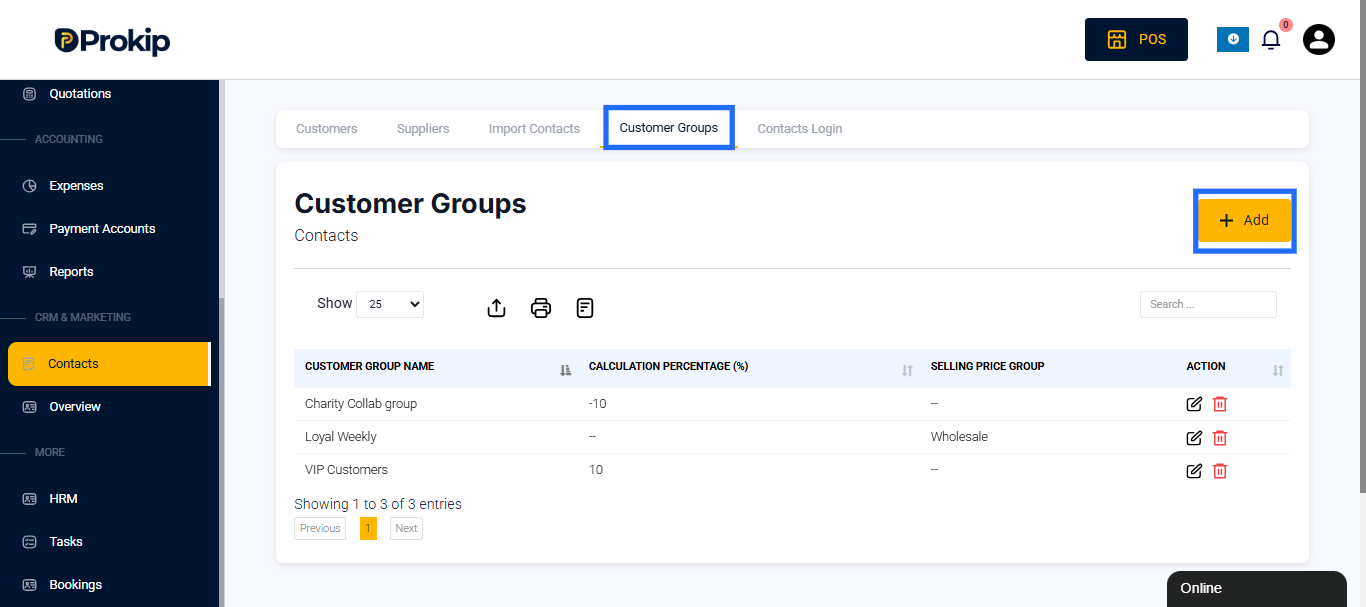
- From the left menu from the dashboard, click Contacts.
- Select the Customer Groups tab.
- Click +Add to add a Customer Group.
Step 2: Fill in the Details
Customer Group Name
Enter the name of your customer group.
Example: Loyalty, Permanent, or VIP Customers.
Price Calculation Type
You’ll see two options here — choose one depending on how you want prices to adjust for customers in this group.
Option 1: Selling Price Group
- Choose Selling Price Group as your calculation type.
- A new field called Selling Price Group will appear.
- Select the price group that should apply from the dropdown (for example, “Wholesale”).
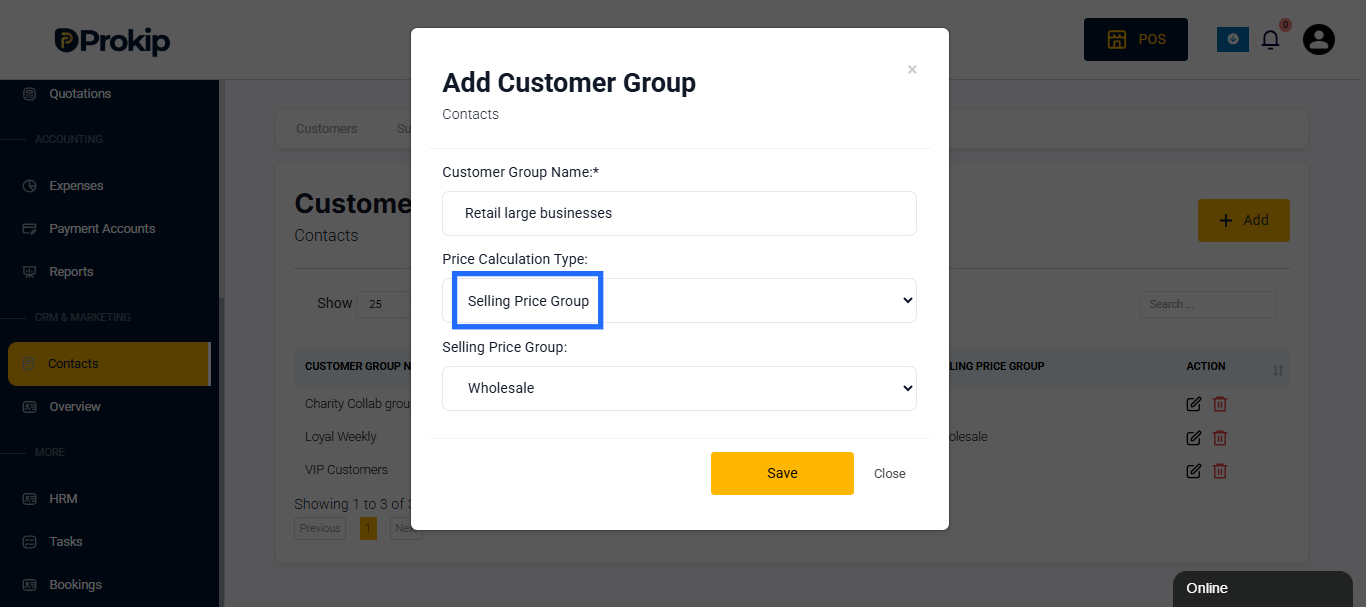
This means that all customers under this group will automatically use the selected selling price group during sales.
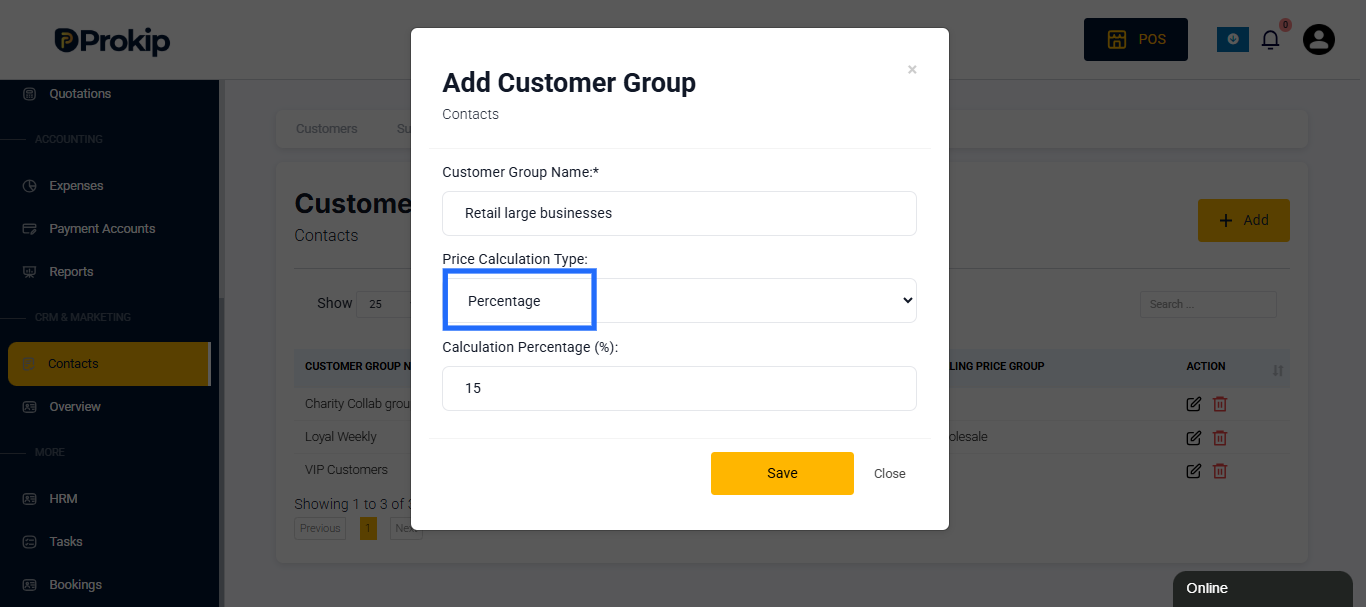
Option 2: Percentage
- Choose Percentage as your calculation type.
- A new field called Calculation Percentage (%) will appear.
- Enter the percentage you want to adjust prices by.
- To reduce prices, add a negative sign before the number (for example, -10 for a 10% discount).
- To increase prices, enter a positive number (for example, 10 to increase by 10%).
Step 3: Save the Group
Once all details are entered, click Save.
Your new Customer Group will now appear in the list.
Step 4: Assign a Customer to a Group
- Go to Contacts list.
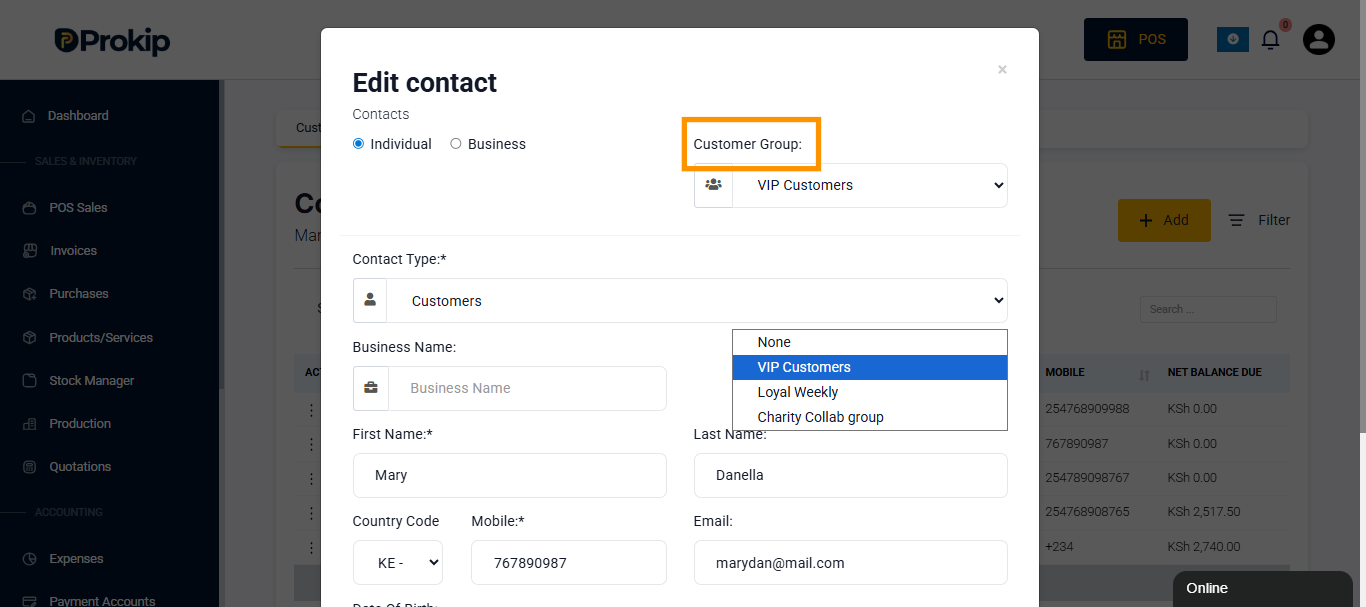
- Find the customer you want to add to the customer group and click Edit from the action menu.
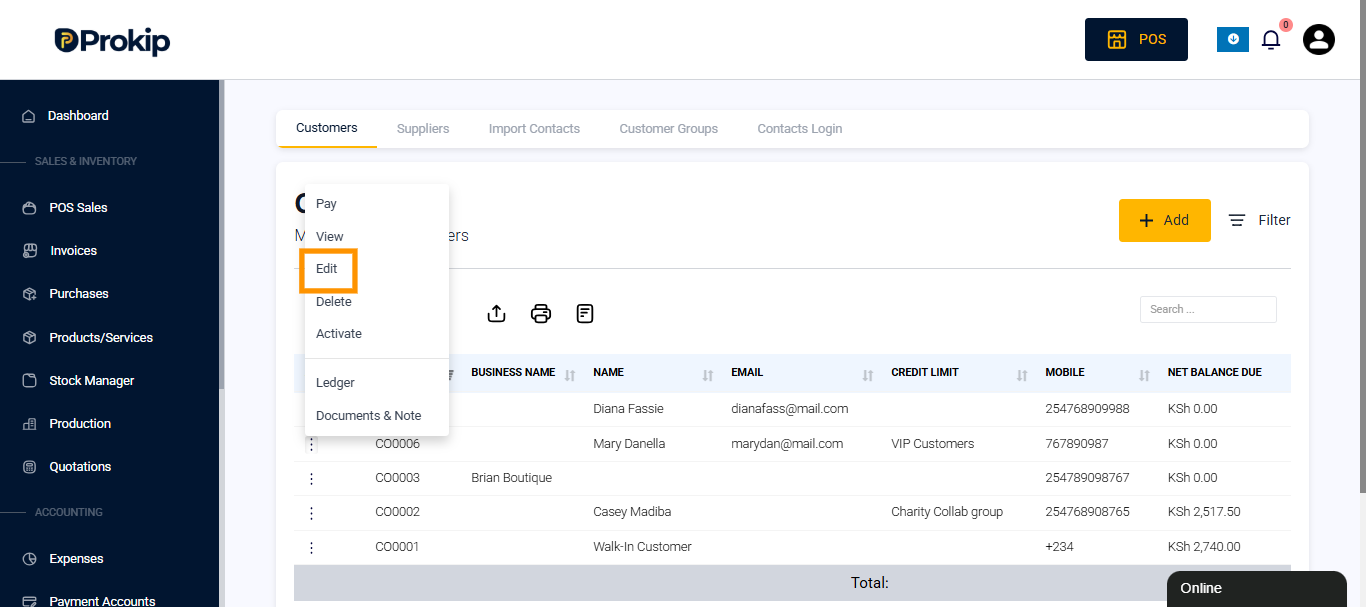
- In the Customer Group field, choose the correct group.
- Click Update.
Step 5: Using Customer Groups During Sales
When you select a customer during a sale or on the POS screen:
- Prokip automatically applies the pricing rule based on that customer’s group.
- Prices adjust instantly depending on whether they belong to a Loyalty, Permanent, or VIP group.
Best Practices
- Use clear and descriptive names for each customer group.
- Always create Selling Price Groups before linking them to Customer Groups.
- Use Percentage only when you want flexible discounts or markups.
- Review customer groups regularly to ensure accuracy.
- Assign every customer to the right group to avoid price errors during sales.