Purpose
You assign products to specific locations when you prefer not to add them directly using the Add button or when there are many products to save time.
Before You Start
- Ensure the location is already created and available in Prokip.
Steps
- Log in to your Prokip.
- Go to Products/Services and click on it.
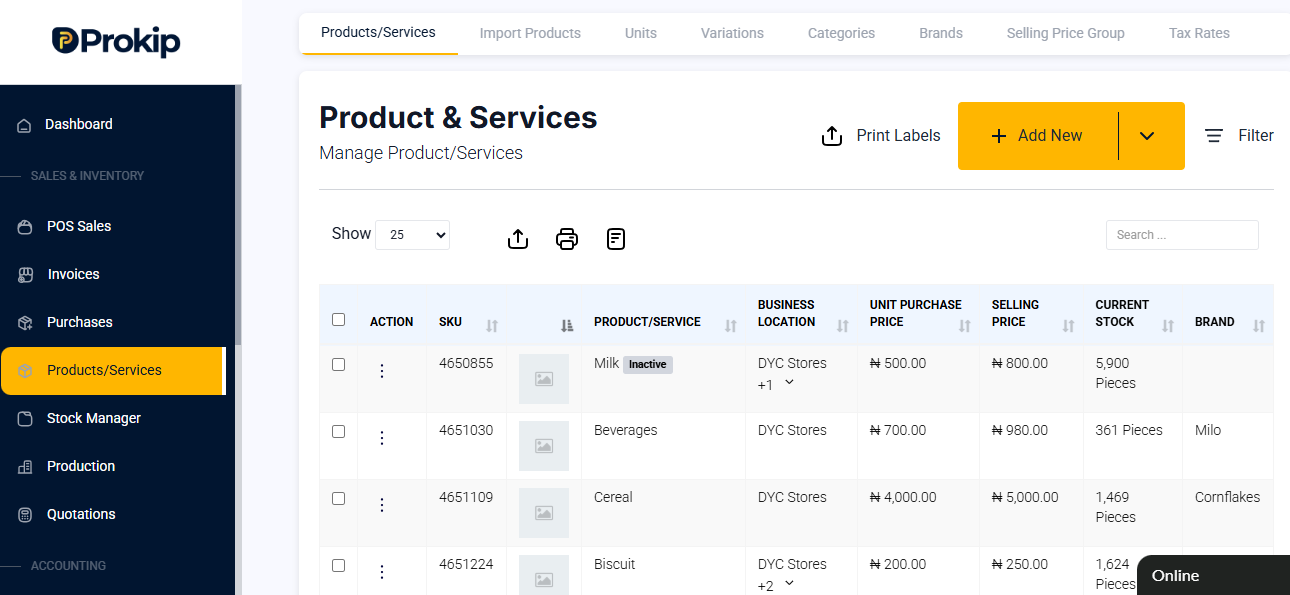
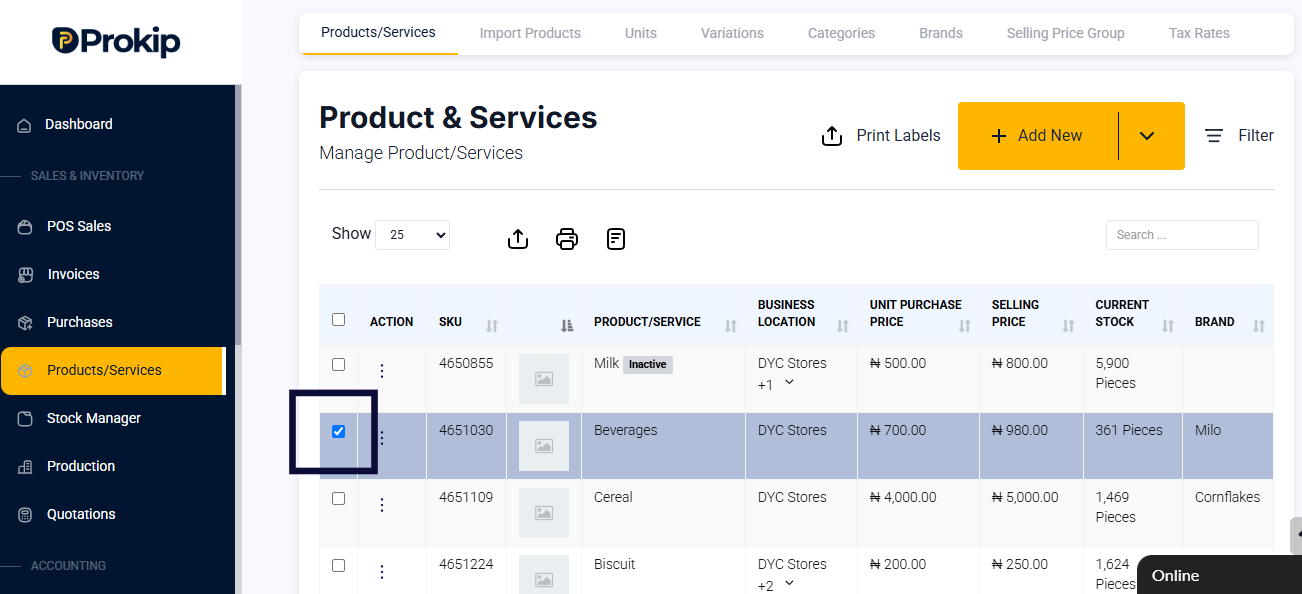
3. Select the product(s) using the checkbox on the left side.
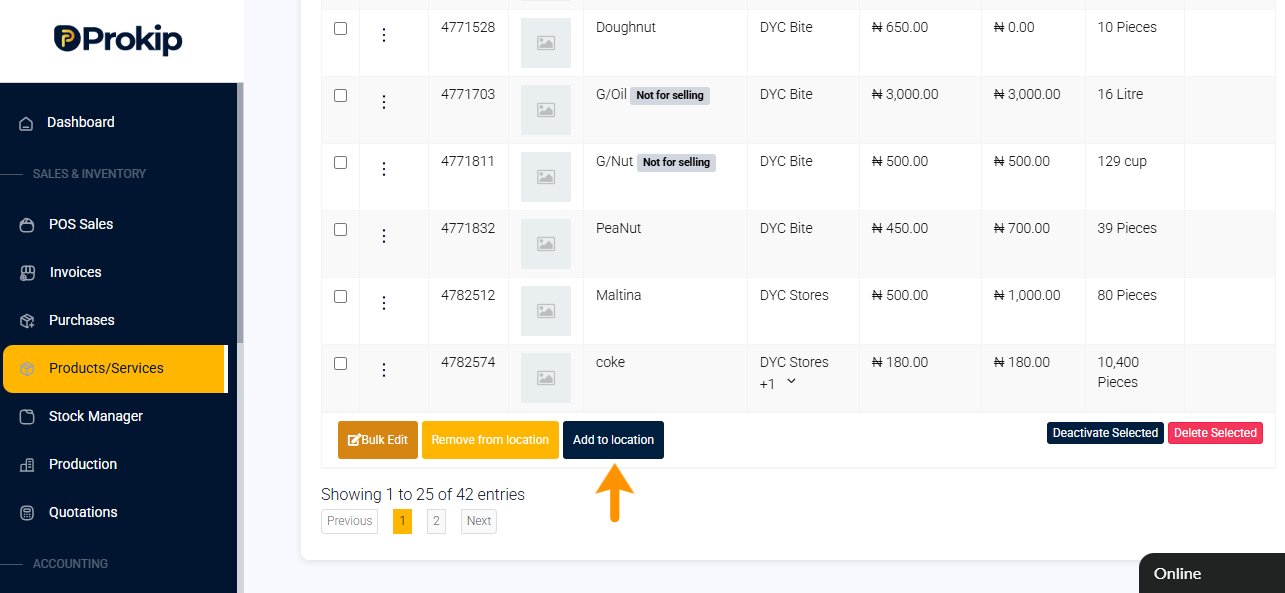
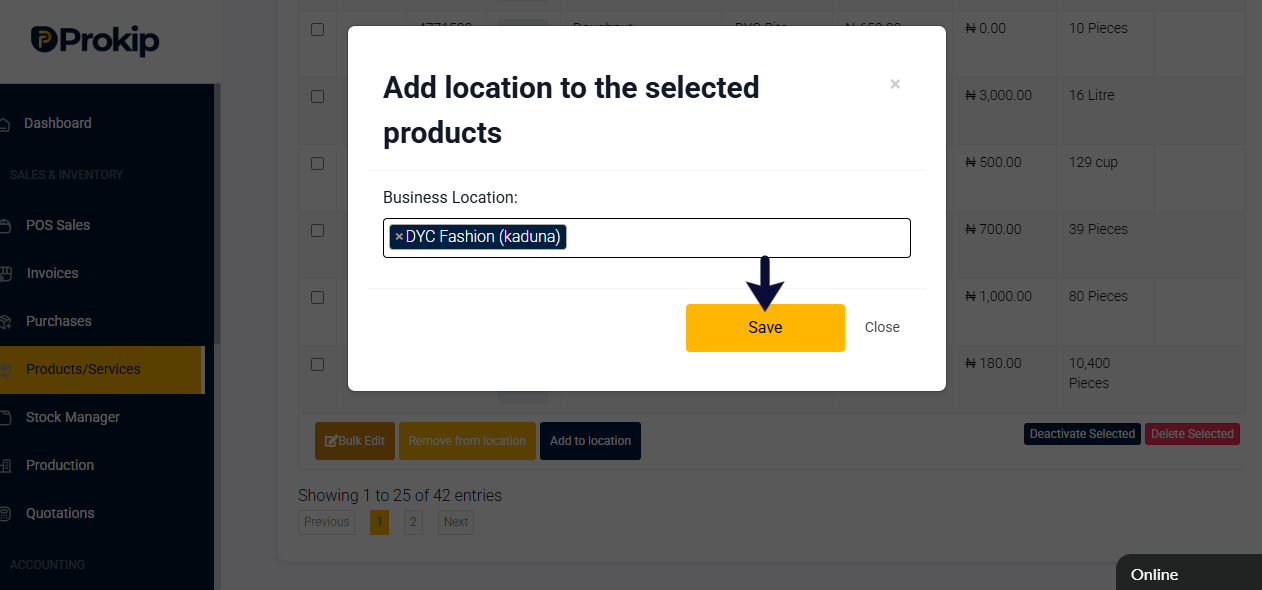
4. Scroll to the bottom and click on Add to Location.
5. Click on the empty label to select the location you are assigning the product.
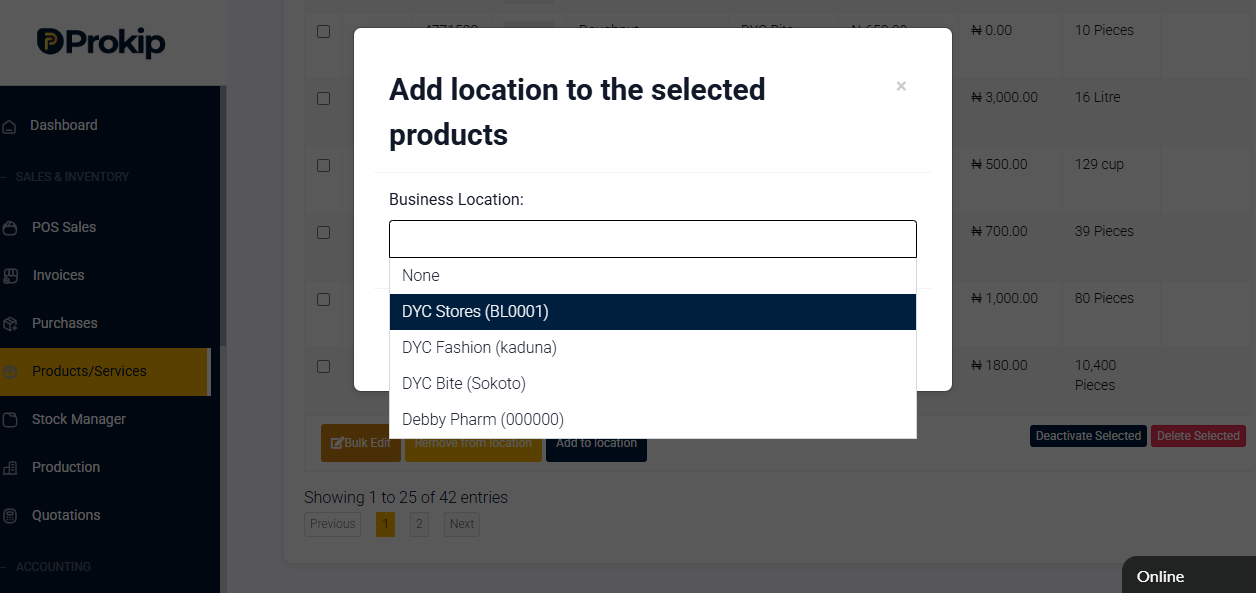
6. Click Save.
FAQ
Q1: Why should I assign products to locations instead of adding them directly?
A: It saves time and helps organize products efficiently when working with multiple items.
Q2: Can one product be assigned to multiple locations?
A: Yes. Repeat the process for each location.
Q3: Does it include stock quantity?
A: No. Assigning products to locations only links the product to the preferred location. To move stock between locations, use Stock Transfer.