Purpose
This article explains how to create a service (such as photocopying, repairs, or consulting).
Services are items you sell that do not require stock tracking, unlike physical products.
Before You Start
Ensure the following:
-
You have permission to manage Products & Services
-
Your Business Location is already set up
-
The Invoices Module is enabled
Step-by-Step: Creating a Service
Step 1: From your dashboard, click Products & Services.
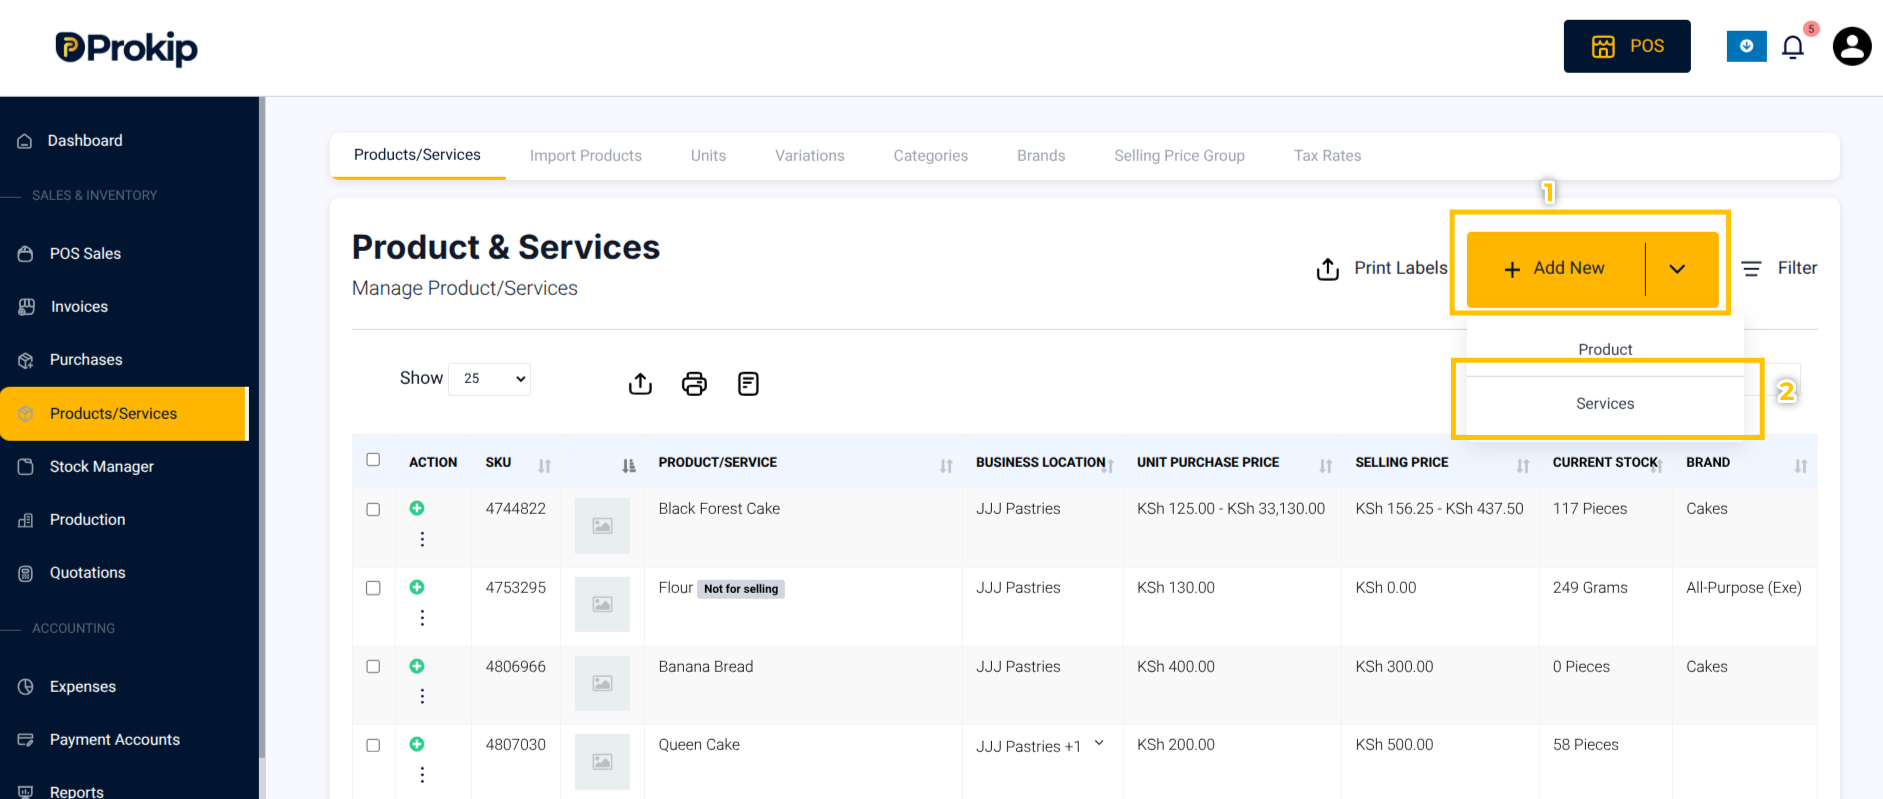
Step 2: Click the Add New button.
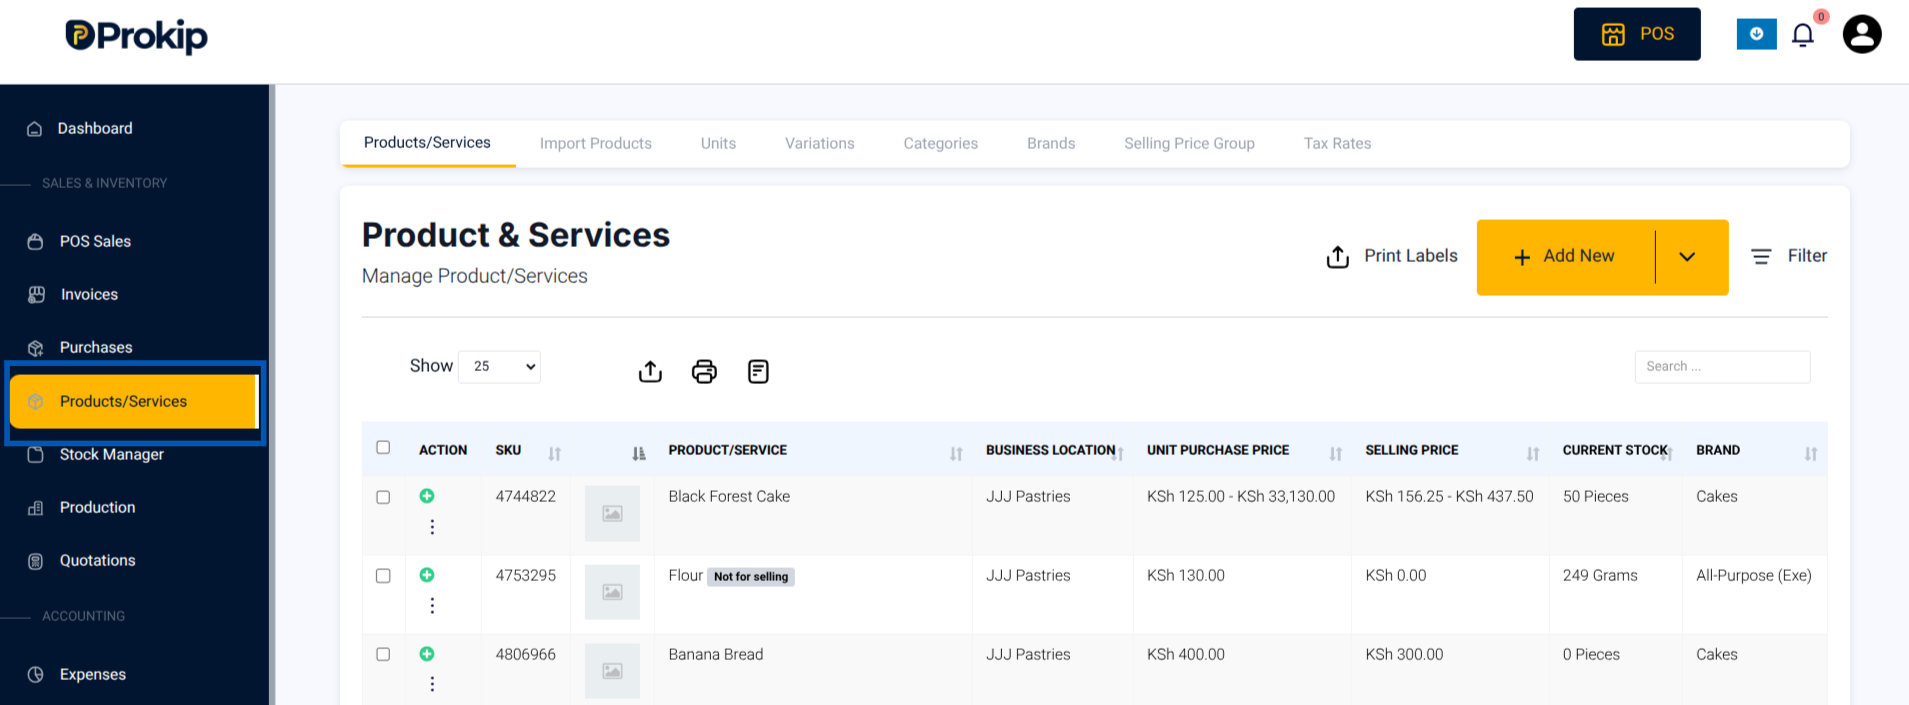
Step 3: Select Service as the item type.
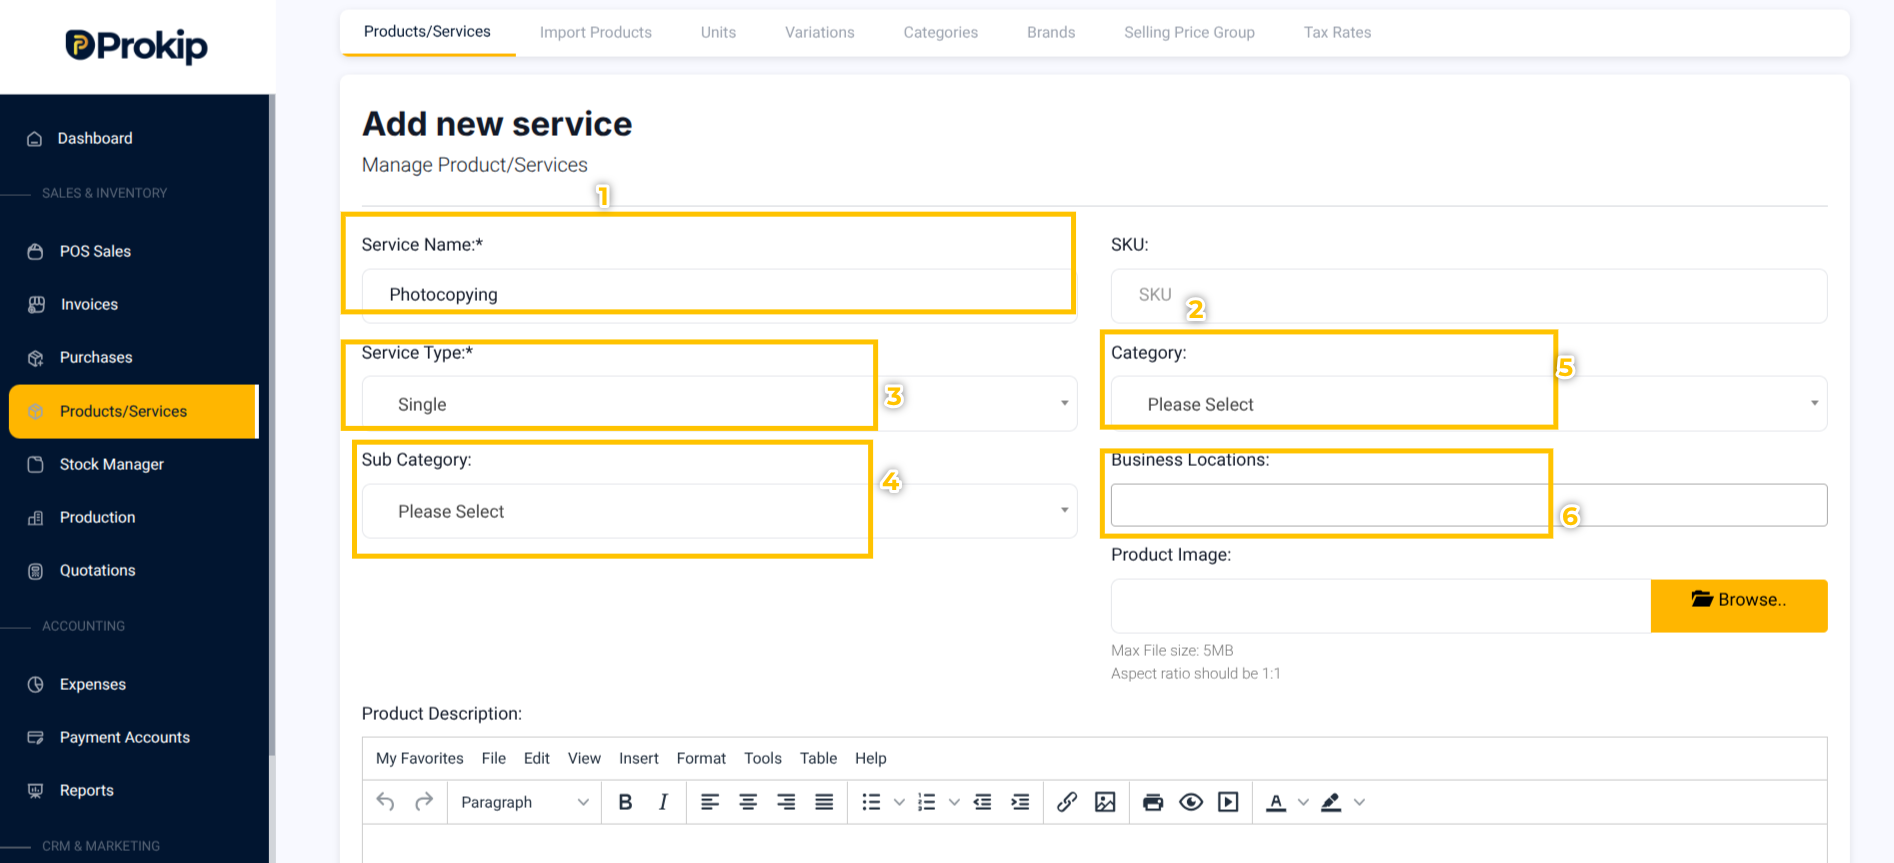
Step 4: Enter the Service Name (for example, “Photocopy”).
Step 5: Input the Service Type whether Single or Combo
Step 6: Enter the Category and SubCategory if applicable.
Step 7: Input the Default Selling Price.
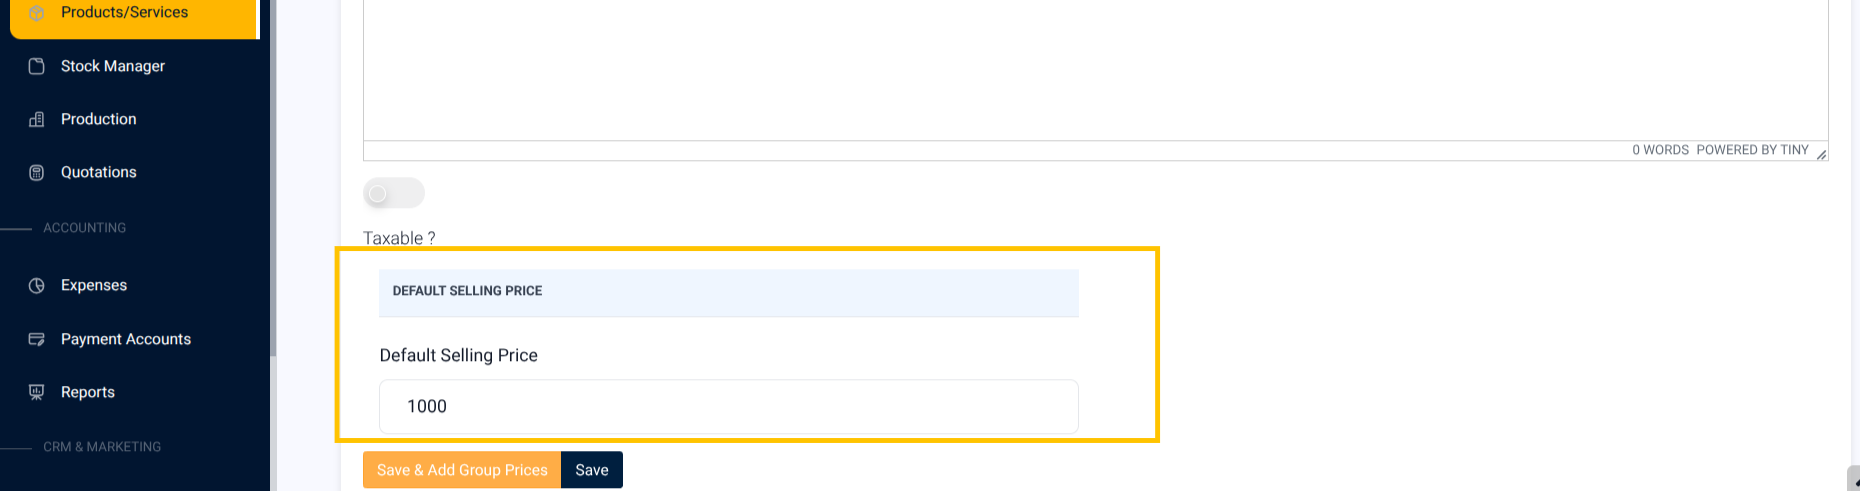
Step 8: Toggled Taxable Button to input Tax details, if applicable.
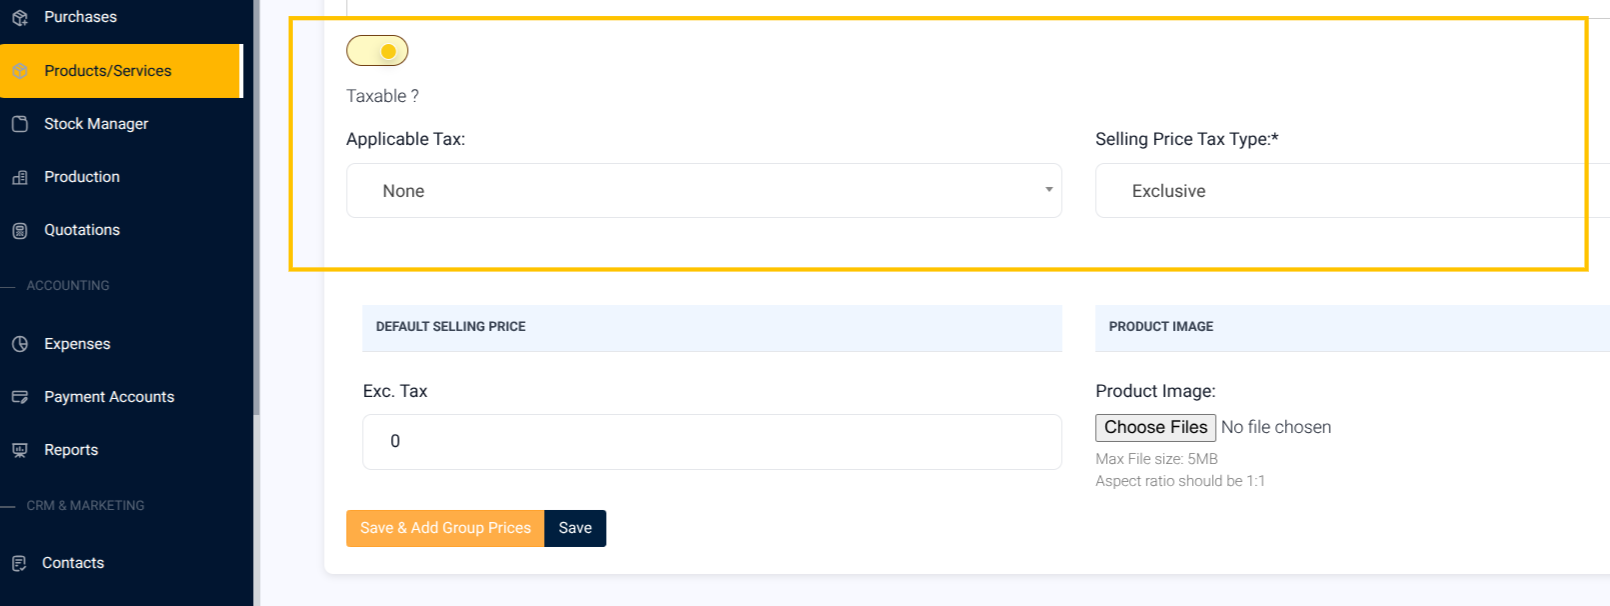
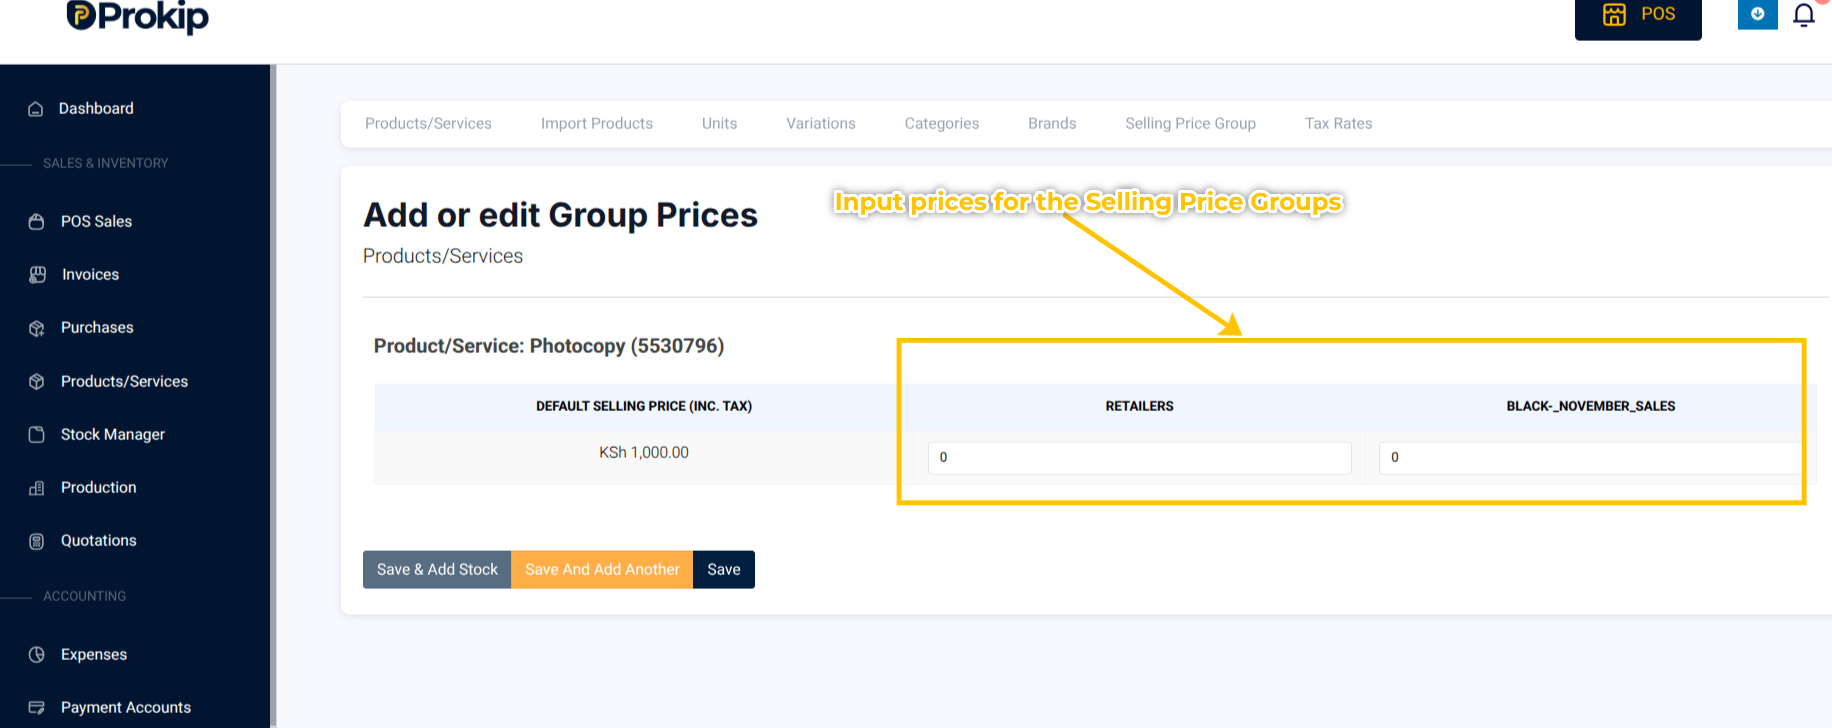
Step 9: Click Save and Add Group Prices to enter Group Prices, if applicable.
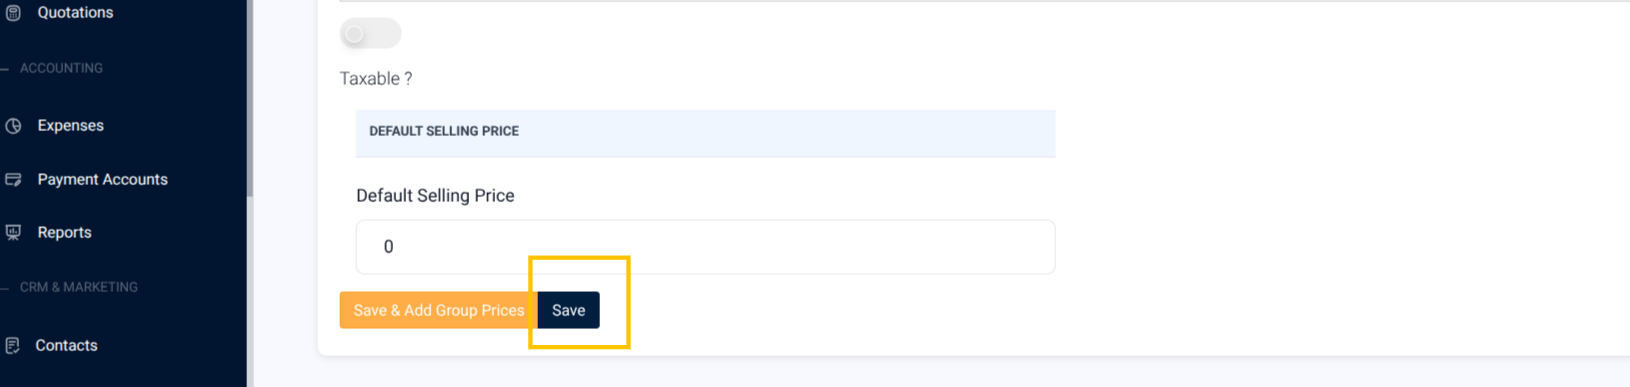
Step 10: Click Save.
Repeat these steps to create additional services.
What Happens Next
-
The service appears in your Products & Services list.
-
You can now select it when creating invoices or recording customer sales.
-
No stock tracking is applied since services are non-inventory items.
Frequently Asked Questions
Q1: Can I change the service price later?
A: Yes. Go to Products & Services → Edit Service, update the price, and save.
Q2: Do services affect stock levels?
A: No. Services are not stock-tracked.
Q3: Can I offer the same service at different branches?
A: Yes. Assign the service to multiple business locations.
Q4: Can I record unpaid service invoices?
A: Yes. Click Save Invoice instead of Save & Record Payment