Creating a Purchase in Prokip helps you request stock from suppliers before the actual purchase is made. It’s a great way to manage inventory, avoid stockouts, and keep track of supplier requests.
Before You Start
Make sure you have:
- Added your suppliers in the Contacts section.
- Added products you want to purchase under the Products/Services feature.
Step 1: Open the Purchase Page
- Log in to your Prokip account.
- Go to the Purchases tab on the sidebar.
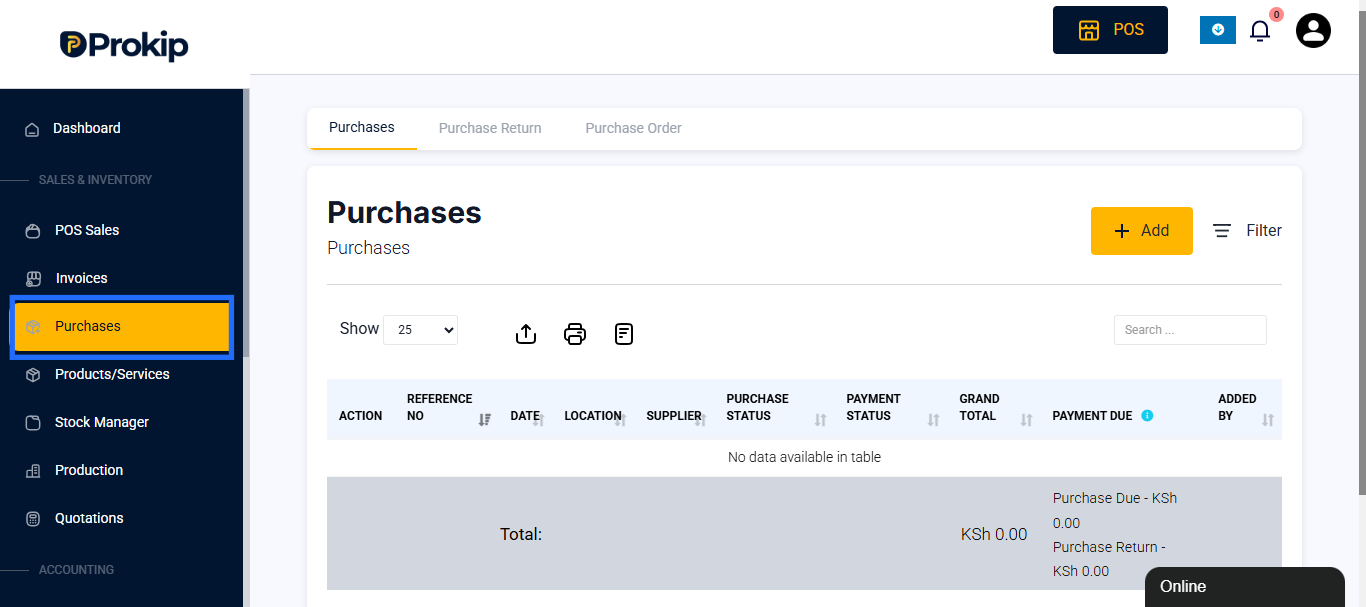
Step 2: Create a New Purchase Order
- Click on the +Add to add a purchase order.
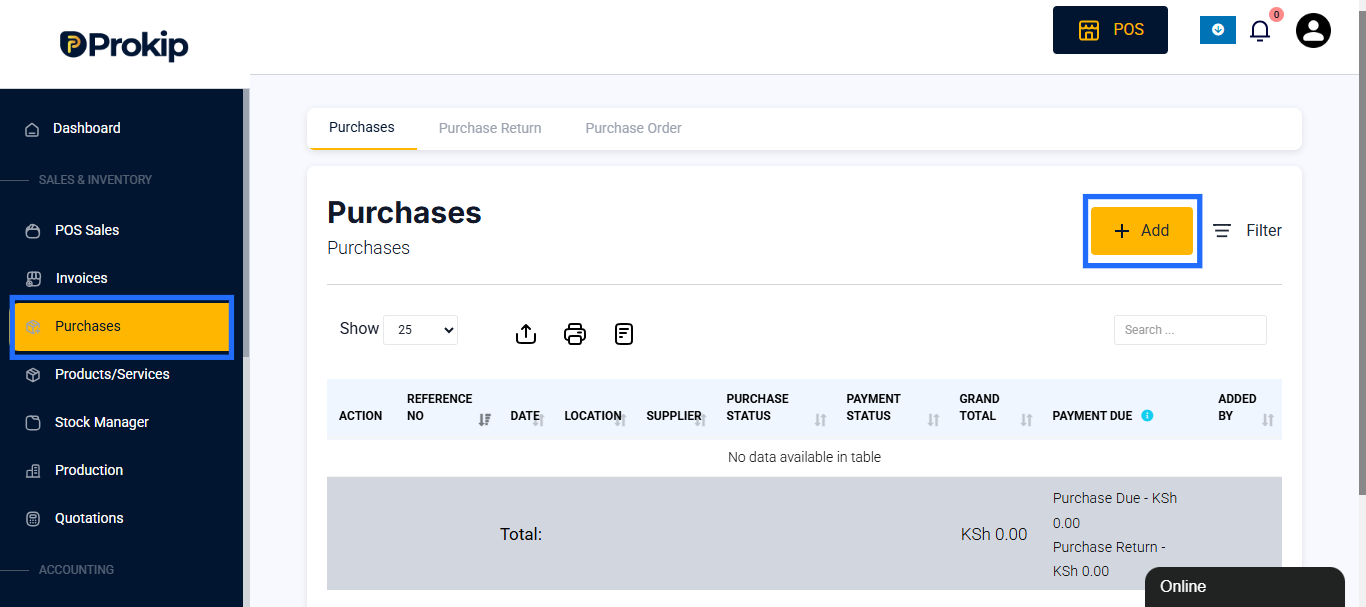
Step 3: Fill in Order Details
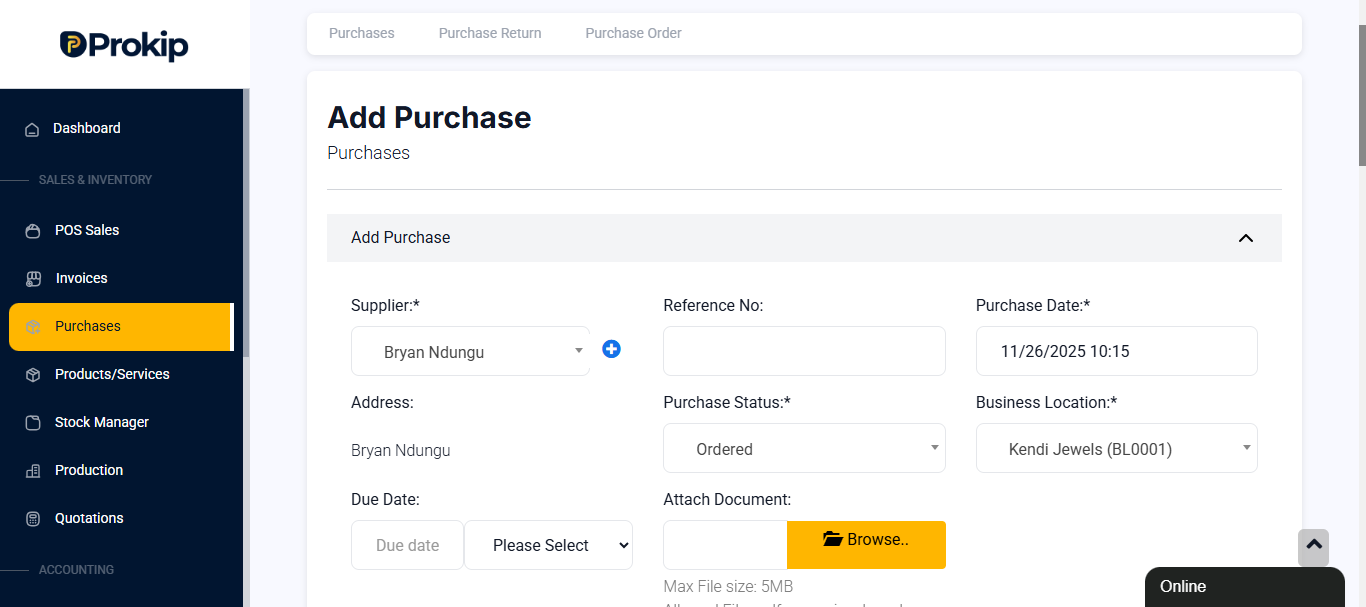
- Supplier: Choose the supplier you want to buy from.
- Purchase Date: The date you’re placing the order.
- Purchase Status: Choose whether the order is received, pending or ordered from the dropdown.
- Business Location: Select the location where the stock will be received.
- Attach Document: Optional, You can add receipts, delivery etc for credibility..
Step 4:Add Products to the Order
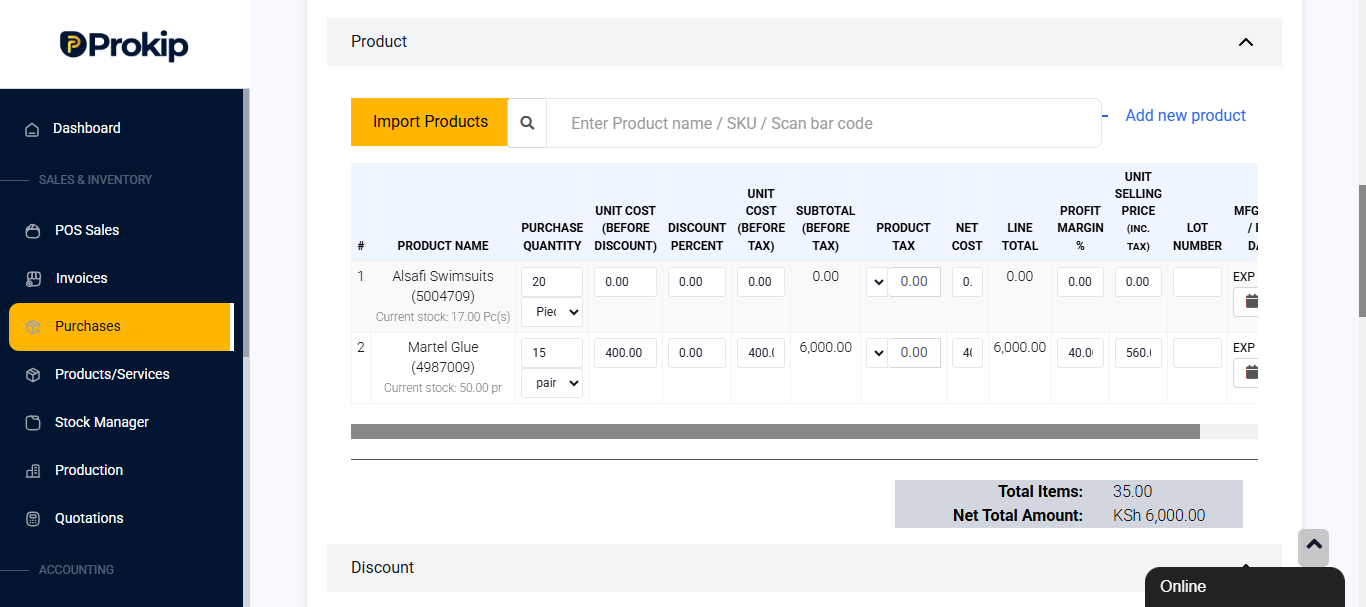
- Search and select products you want to order.
- Enter the quantity and purchase price for each item.
Step 5: Other Details
After you have listed all your products, Prokip automatically calculates the totals, but you can also enter other information about the purchase manually.
Here’s what each field means:
- Total Items: Displays the total number of products added. Example: 20 items.
- Net Total Amount: The total cost before any discounts or tax. Example: KSh 4,000.00.
- Discount Type: Choose whether the discount is Fixed (e.g., KSh 500) or a Percentage (e.g., 10%).
- Discount Amount: Enter the discount value. Example: KSh 0.00 if none is applied.
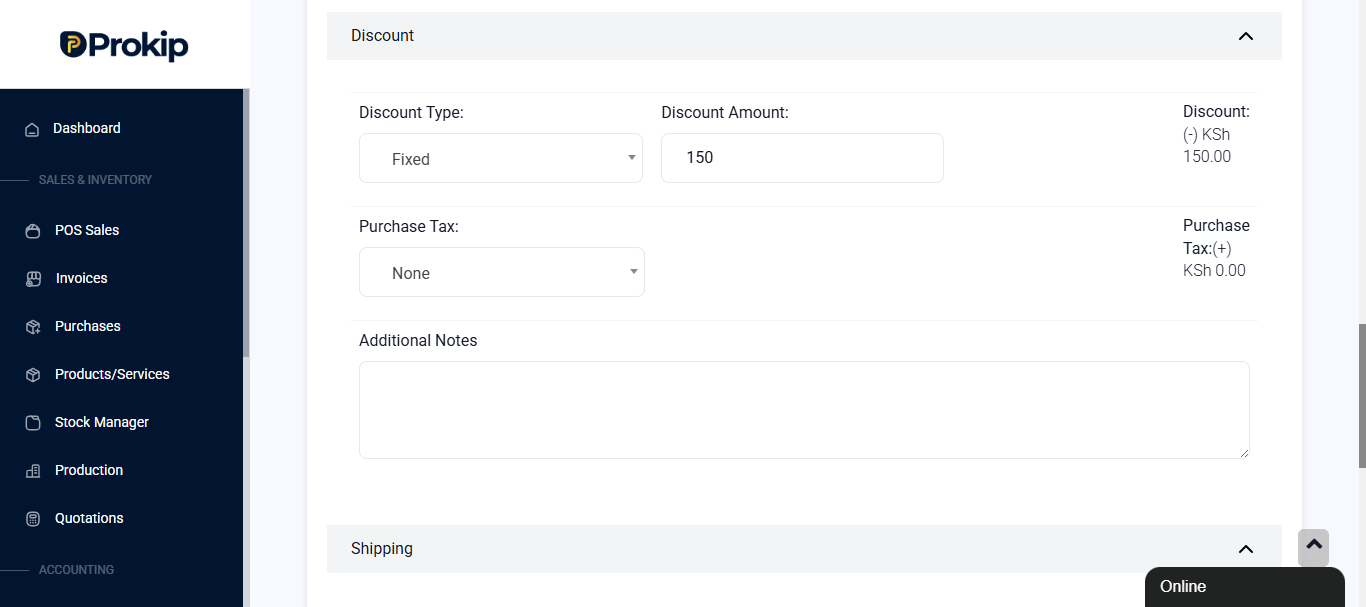
- Purchase Tax: Add applicable tax if your business uses VAT or any other tax type.
- Additional Shipping Charges: Include transport or delivery fees if needed.
- Purchase Total: Automatically calculated to include all discounts, tax, and shipping.
- Advance Balance: Shows any amount that was prepaid to the supplier.
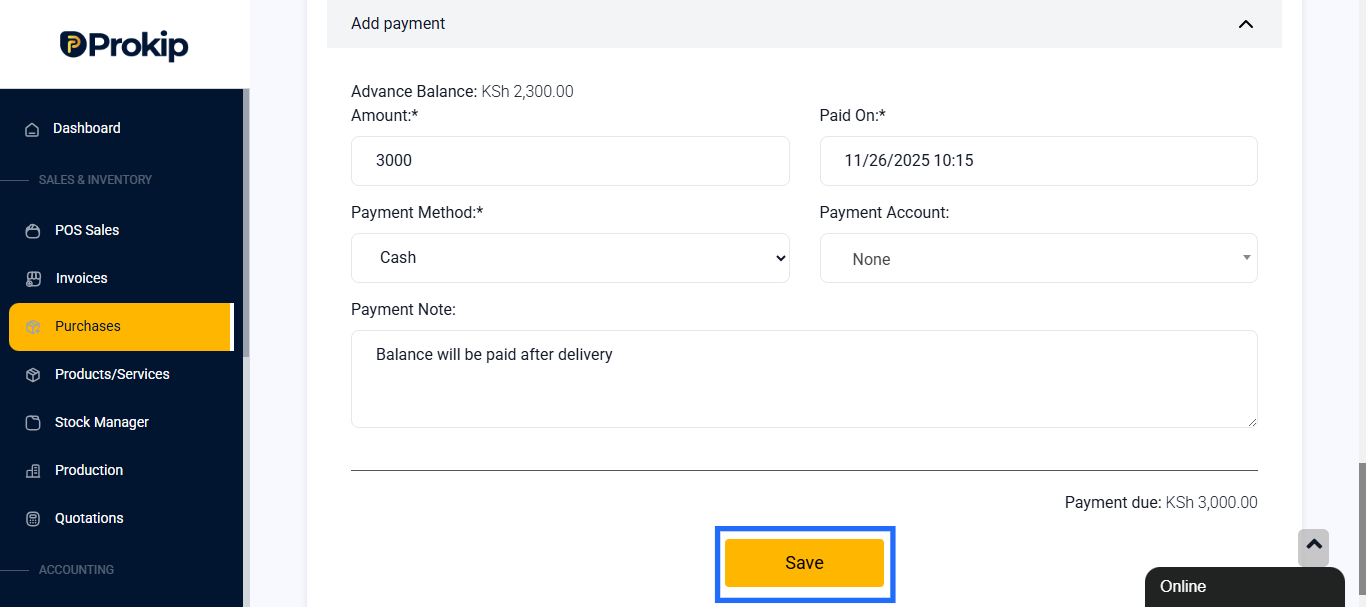
- Amount Paid: Enter how much is being paid now. Example: KSh 0.00 if the order is unpaid.
- Paid On: Choose the date & time of payment. Example: 10/13/2025 06:56.
- Payment Method: Select the mode of payment such as Cash, Bank Transfer, or POS.
- Payment Note: Add any relevant remarks. Example: “Partial payment made.”
- Payment Due: Automatically displays the remaining balance that still needs to be paid.
Step 6: Save the Purchase Order
- Review all details carefully.
- Click Save to finalize your purchase order.
Step 7: View and Manage Orders
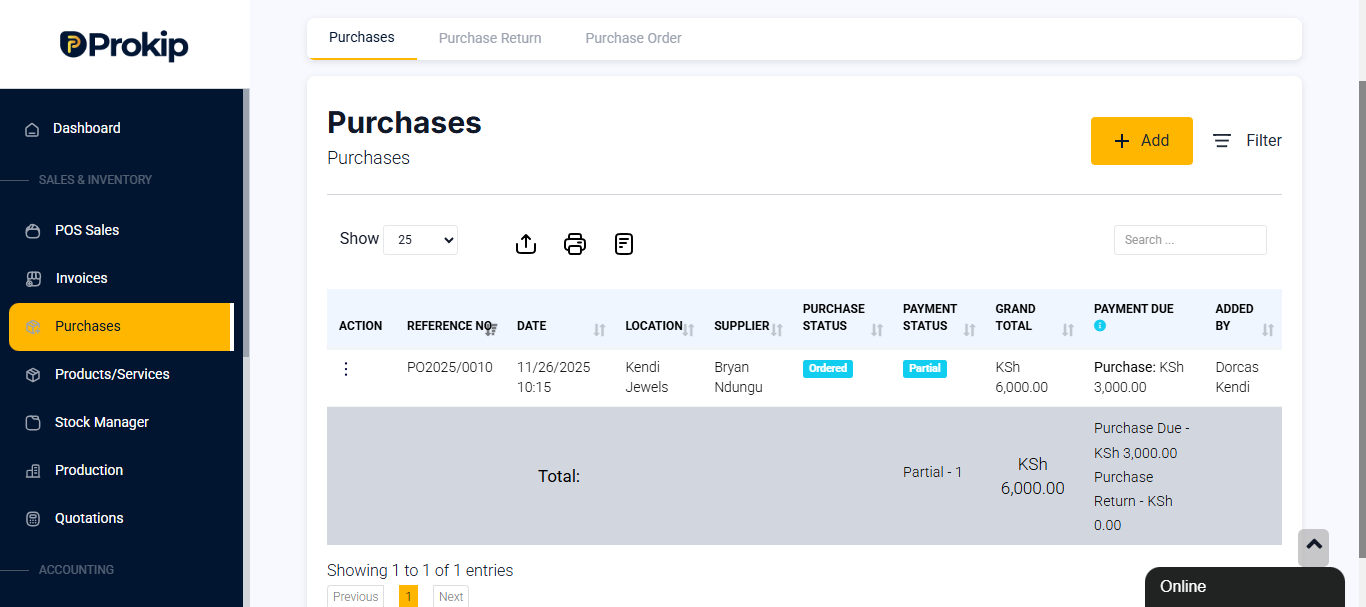
- You can track all your orders under the Purchase tab list.
- Filter by Date, Location, Purchase Status & Payment Status to manage them easily.
Best Practices
- Always confirm supplier details before sending a purchase order.
- Double-check product quantities and pricing to avoid over-ordering.
- Keep digital records by downloading your Purchase as a PDF.
- Update the Purchase status once goods are received for accurate stock management.