How to Record Payment for a Service in Prokip
Purpose
This article explains how to record payment for services in Prokip using the Invoice feature.
Using invoices for services ensures:
-
Customer balances remain accurate
-
Payments post to the correct cash, bank, or mobile money account
-
Sales reports and income tracking stay correct
Before You Start
Ensure the following:
-
The service has already been created under Products & Services
-
The Invoices Module is enabled
-
At least one Payment Account (Cash, Bank, or Mobile Money) exists
-
You have permission to create invoices and record payments
-
The correct Business Location is selected (if you have multiple branches)
Step-by-Step: Recording Payment for a Service
A : Open the Invoice Module
Step 1: Log in to your Prokip account.
Step 2: From the left sidebar, click Invoices.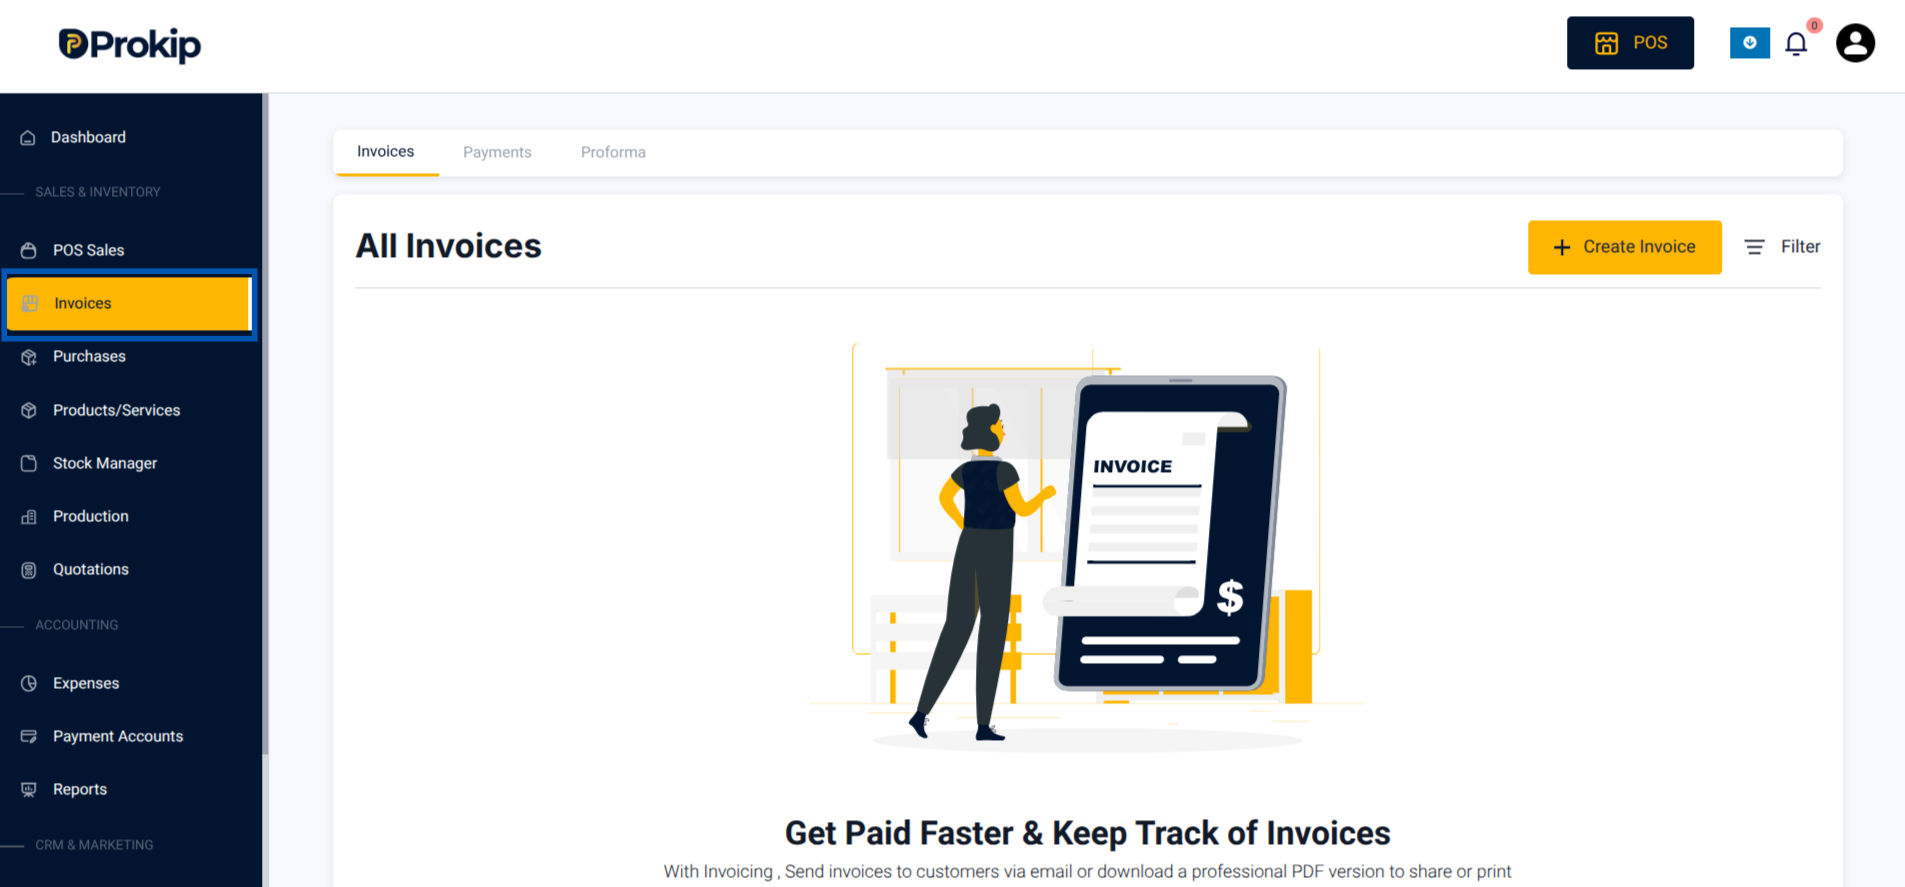
Step 3: Click Create Invoice.
B: Select the Business Location
Purpose:
If your business operates multiple branches, you must select where the service was provided.
Step 4: At the top of the invoice form, select the Business Location.
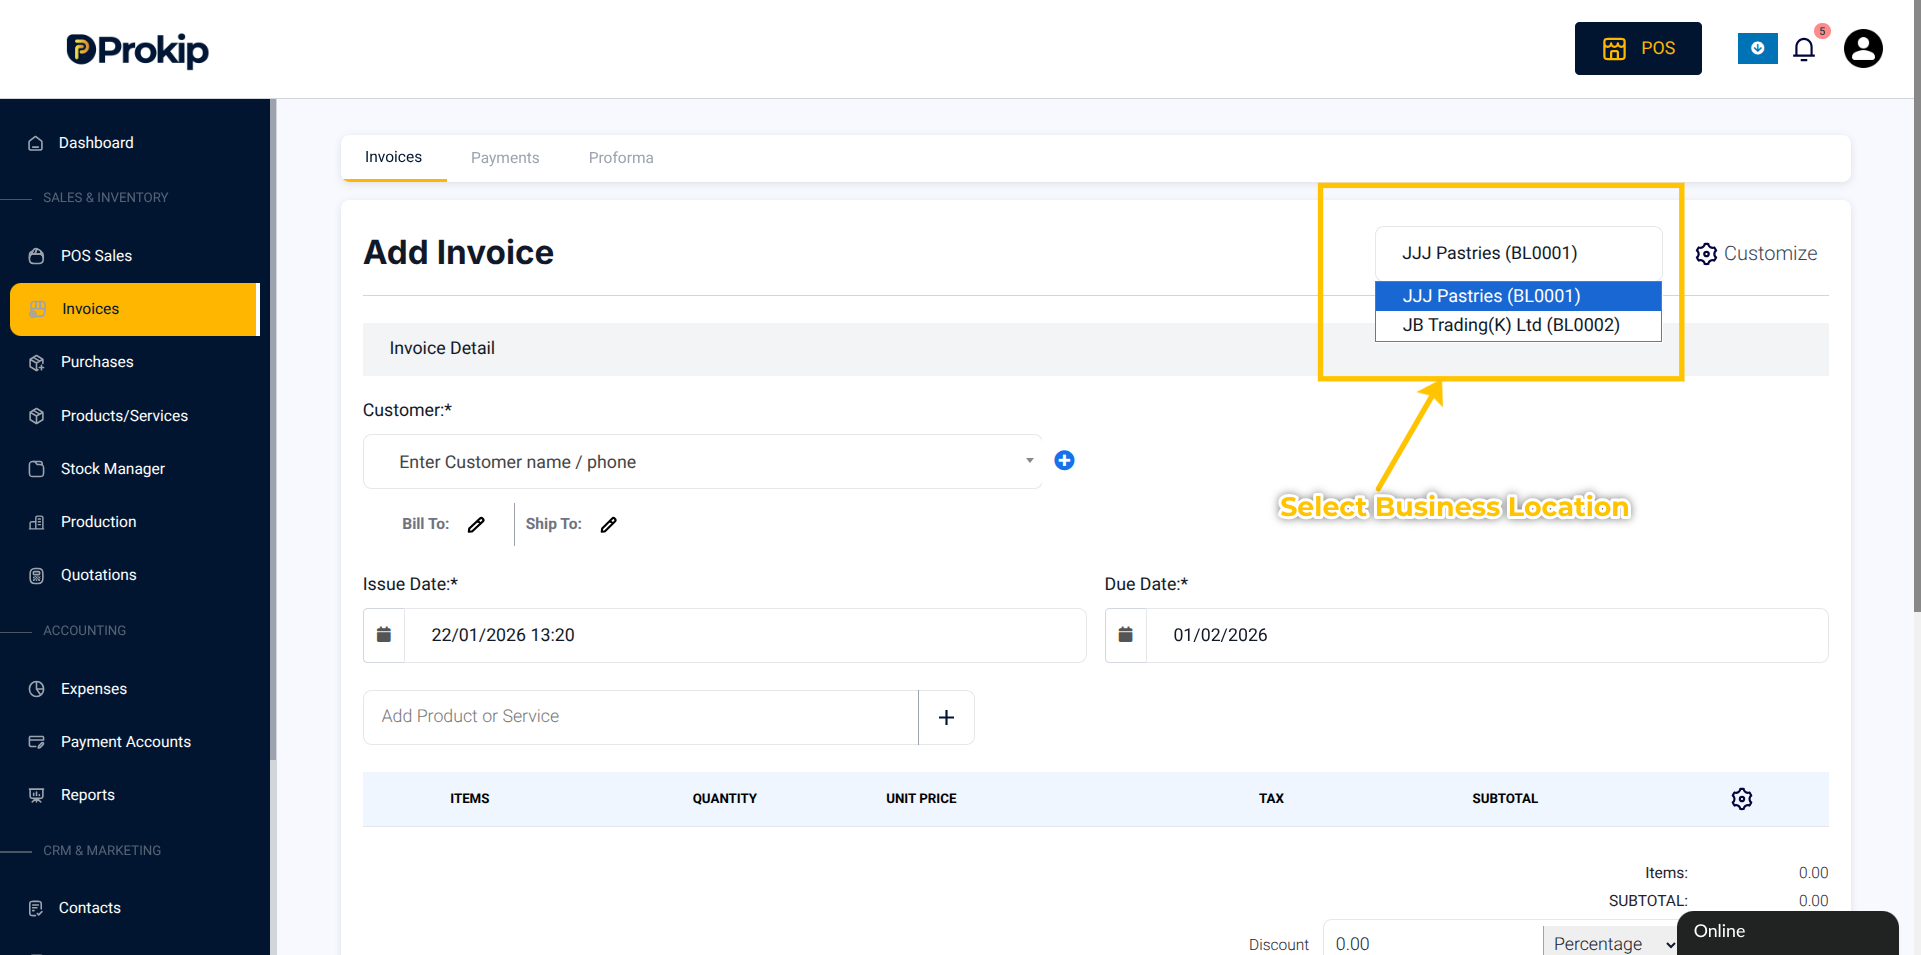
If you have only one location, leave the default selection unchanged.
C: Select or Add the Customer
Step 5: In the Customer field, search for the customer’s name.
Step 6 (Optional):
If the customer is not already on your system:
-
Click the Add (+) button
-
Enter the customer’s First Name, Last Name, and Mobile Number
-
Click Save
The customer will automatically appear in the invoice form.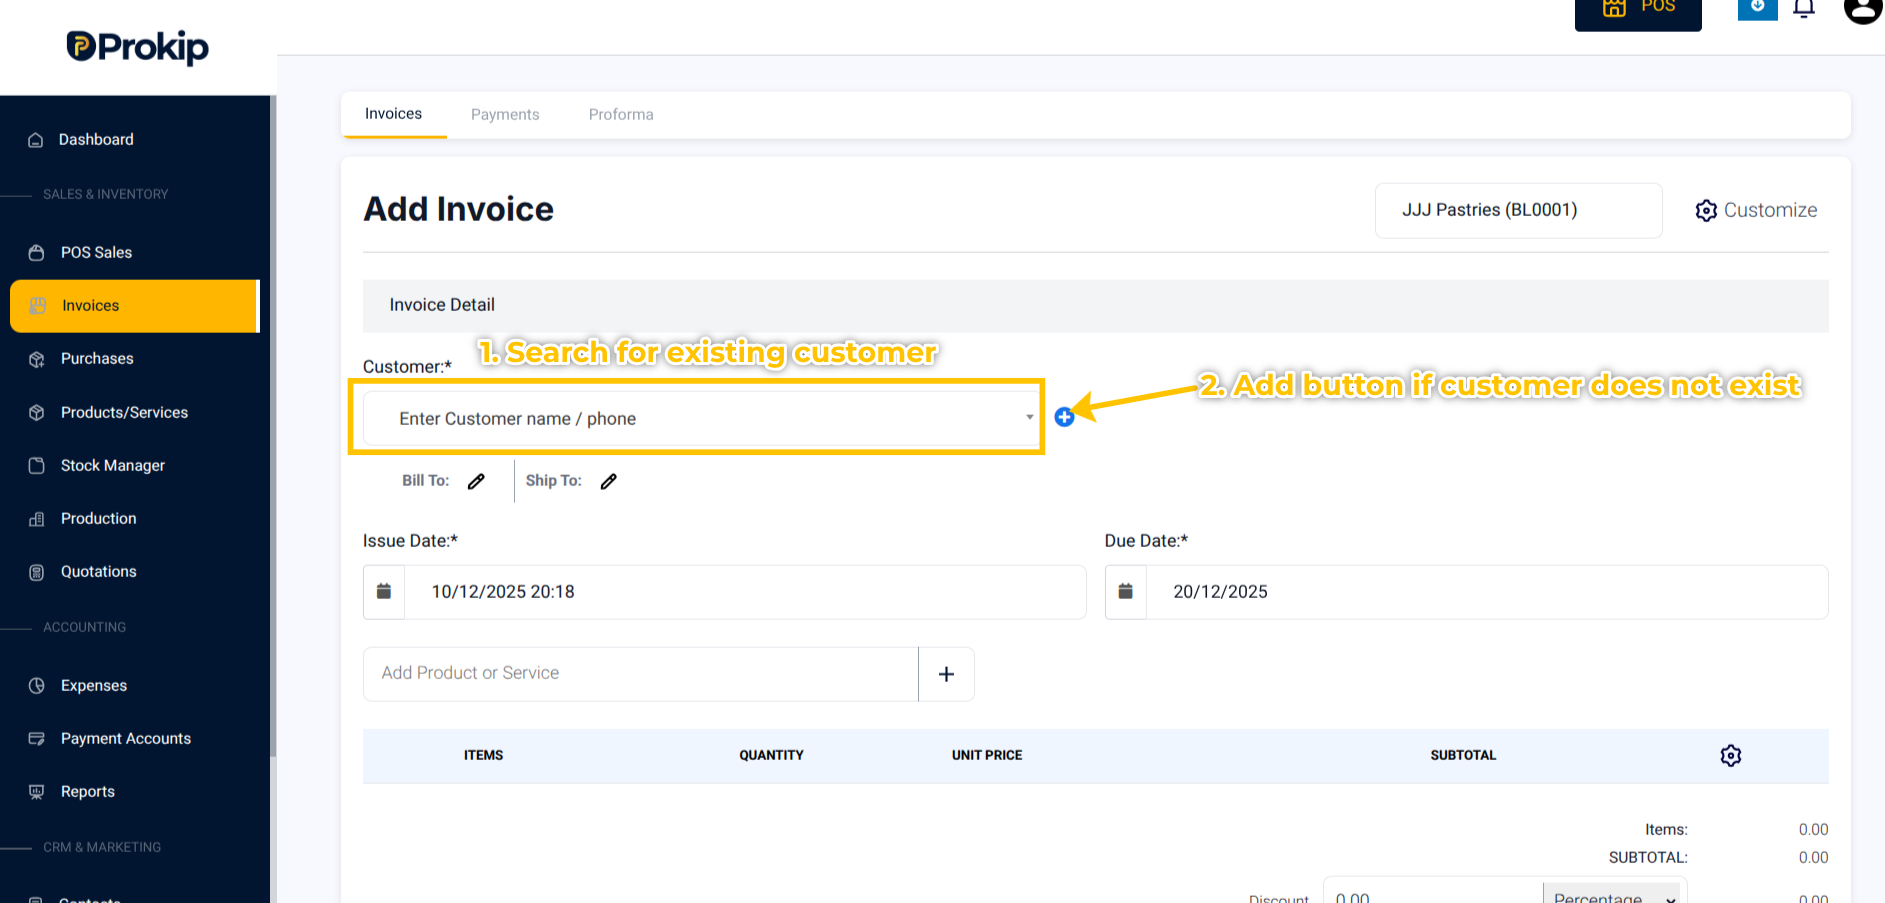
D: Confirm Invoice Dates
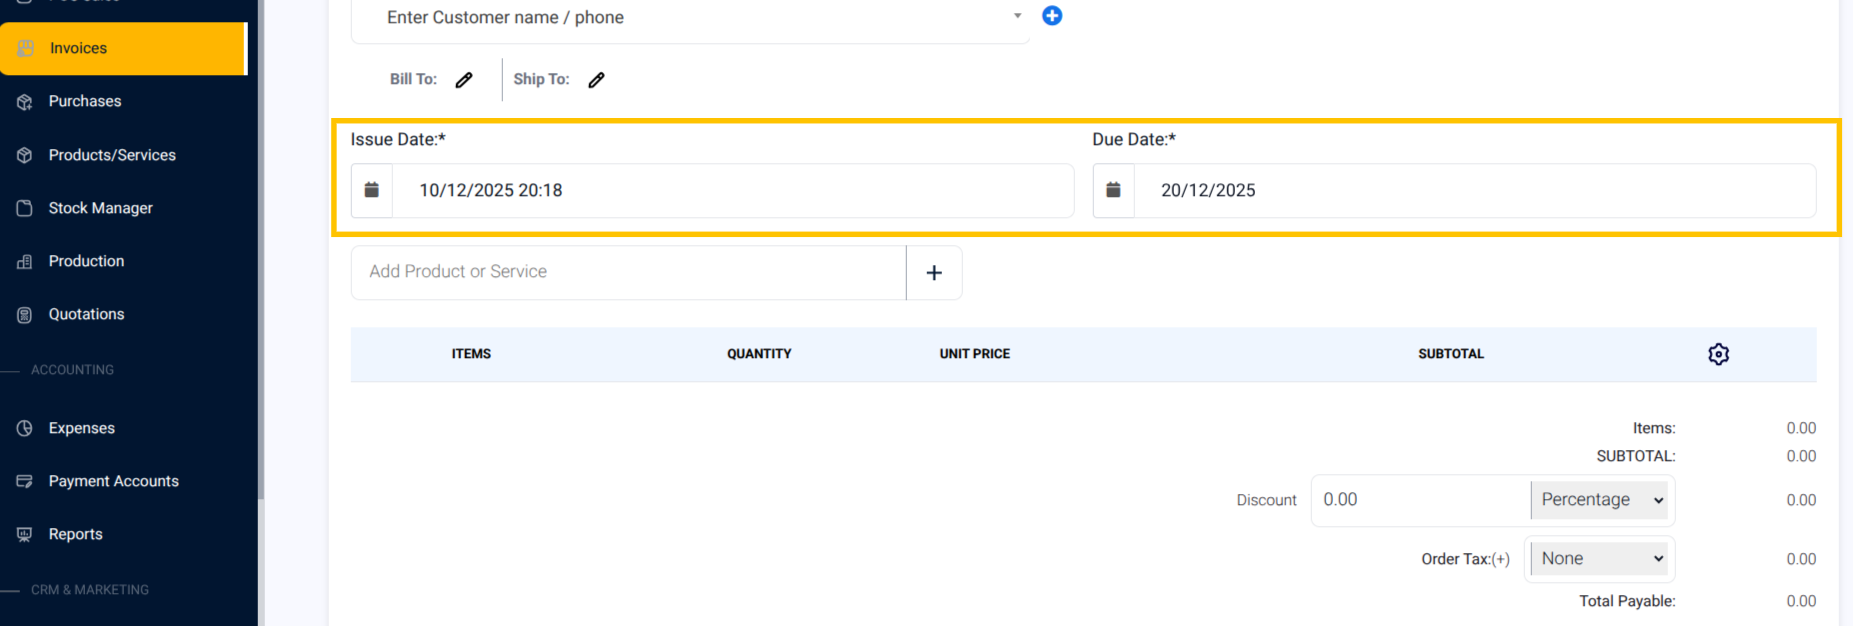
Step 7: Review the Issue Date (defaults to today).
Step 8: Review or change the Due Date if payment will be made later.
Setting a future due date helps the system track unpaid invoices and send reminders.
E: Add the Service to the Invoice
Step 9: In the product/service search field, type the service name
(for example, “Photocopy,” “Rent,” or “Consulting”).
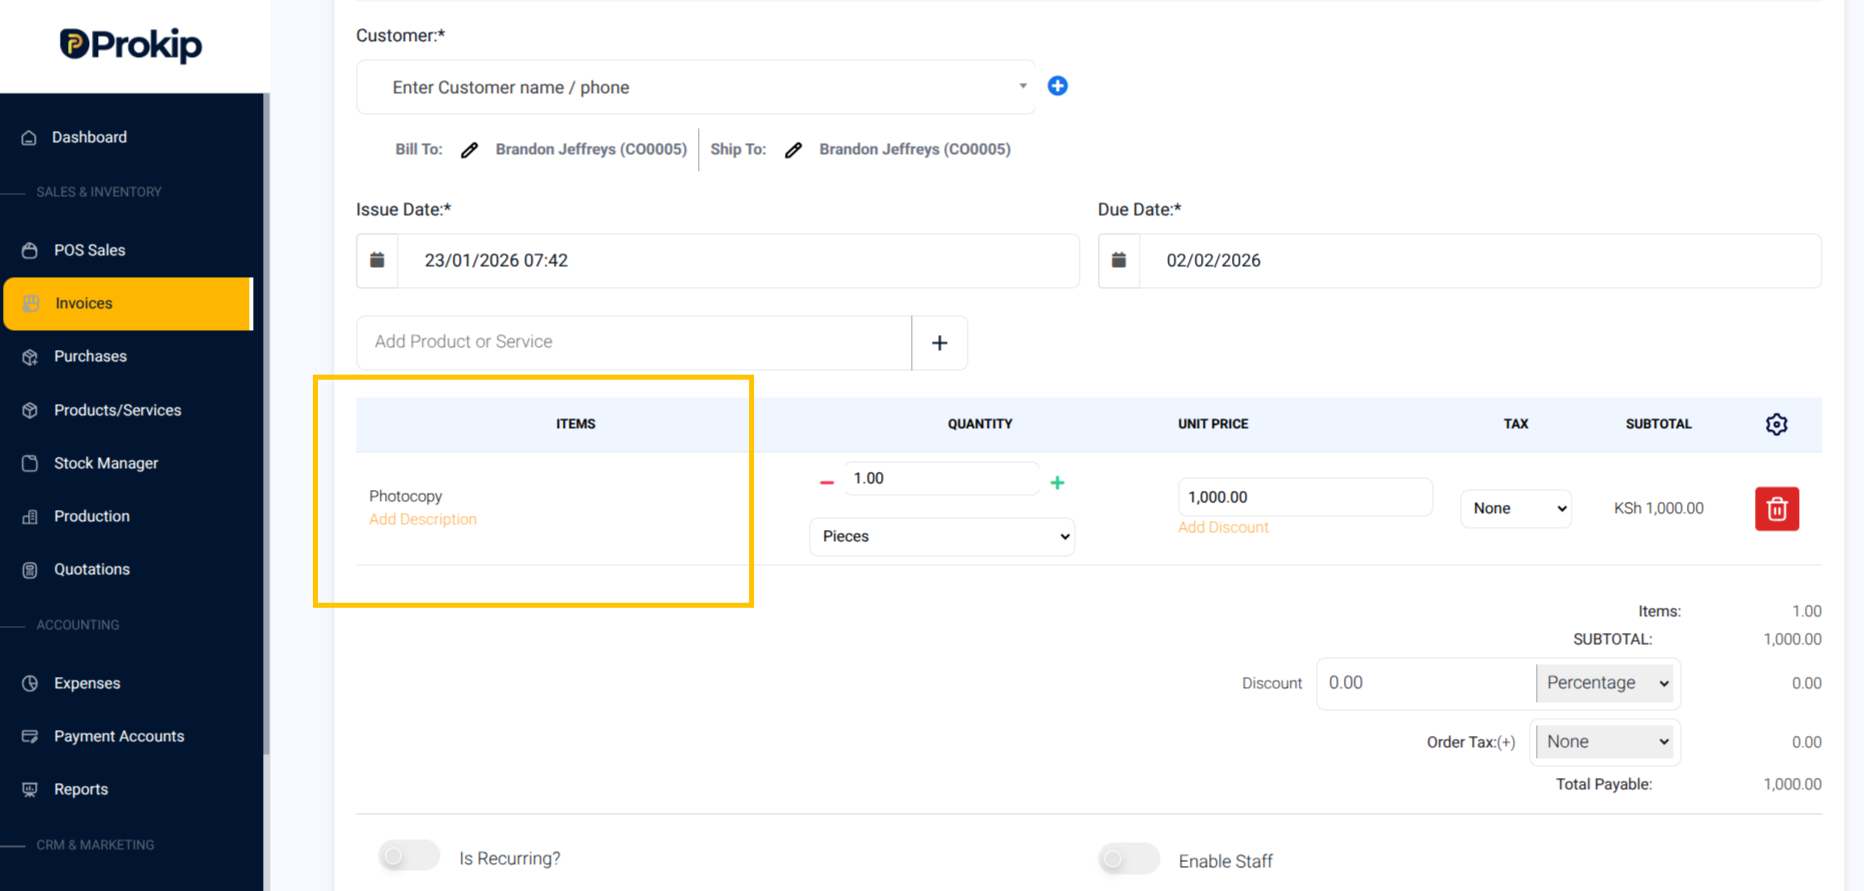
Step 10: Click the service to add it to the invoice.
Step 11: Adjust the Quantity if needed
(for example, number of photocopies or hours worked).
You can add multiple services to the same invoice if the customer received more than one service.
F: Apply Discounts (Optional)
Step 12: Click on Add Discount
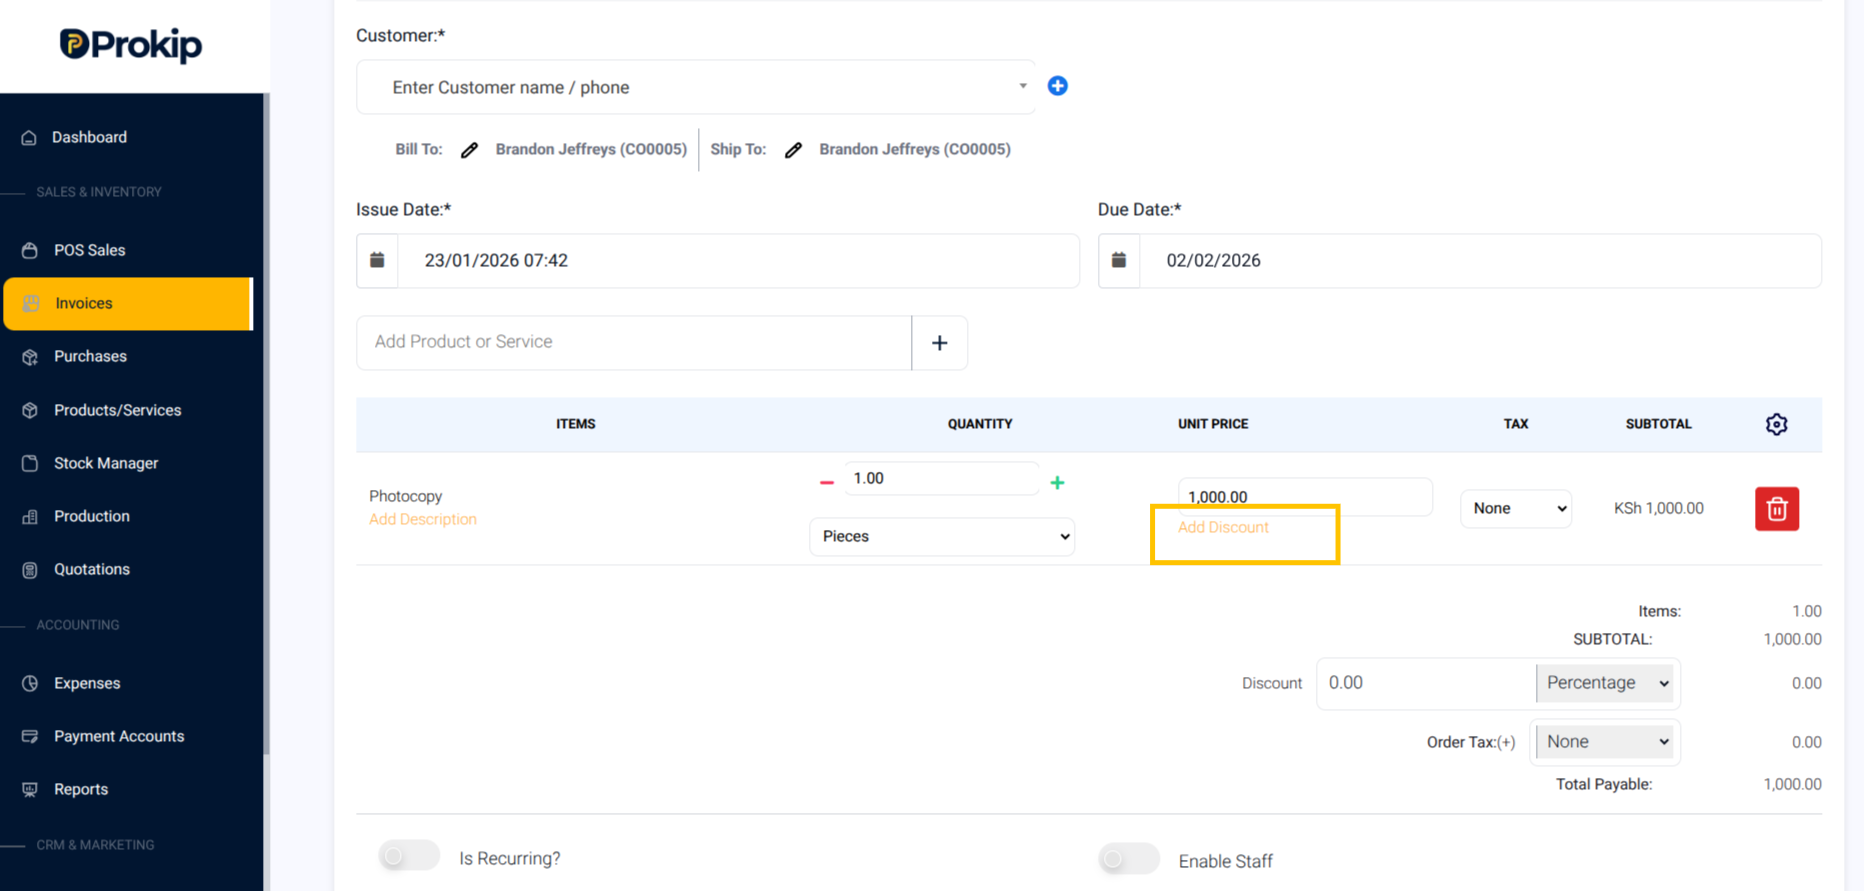
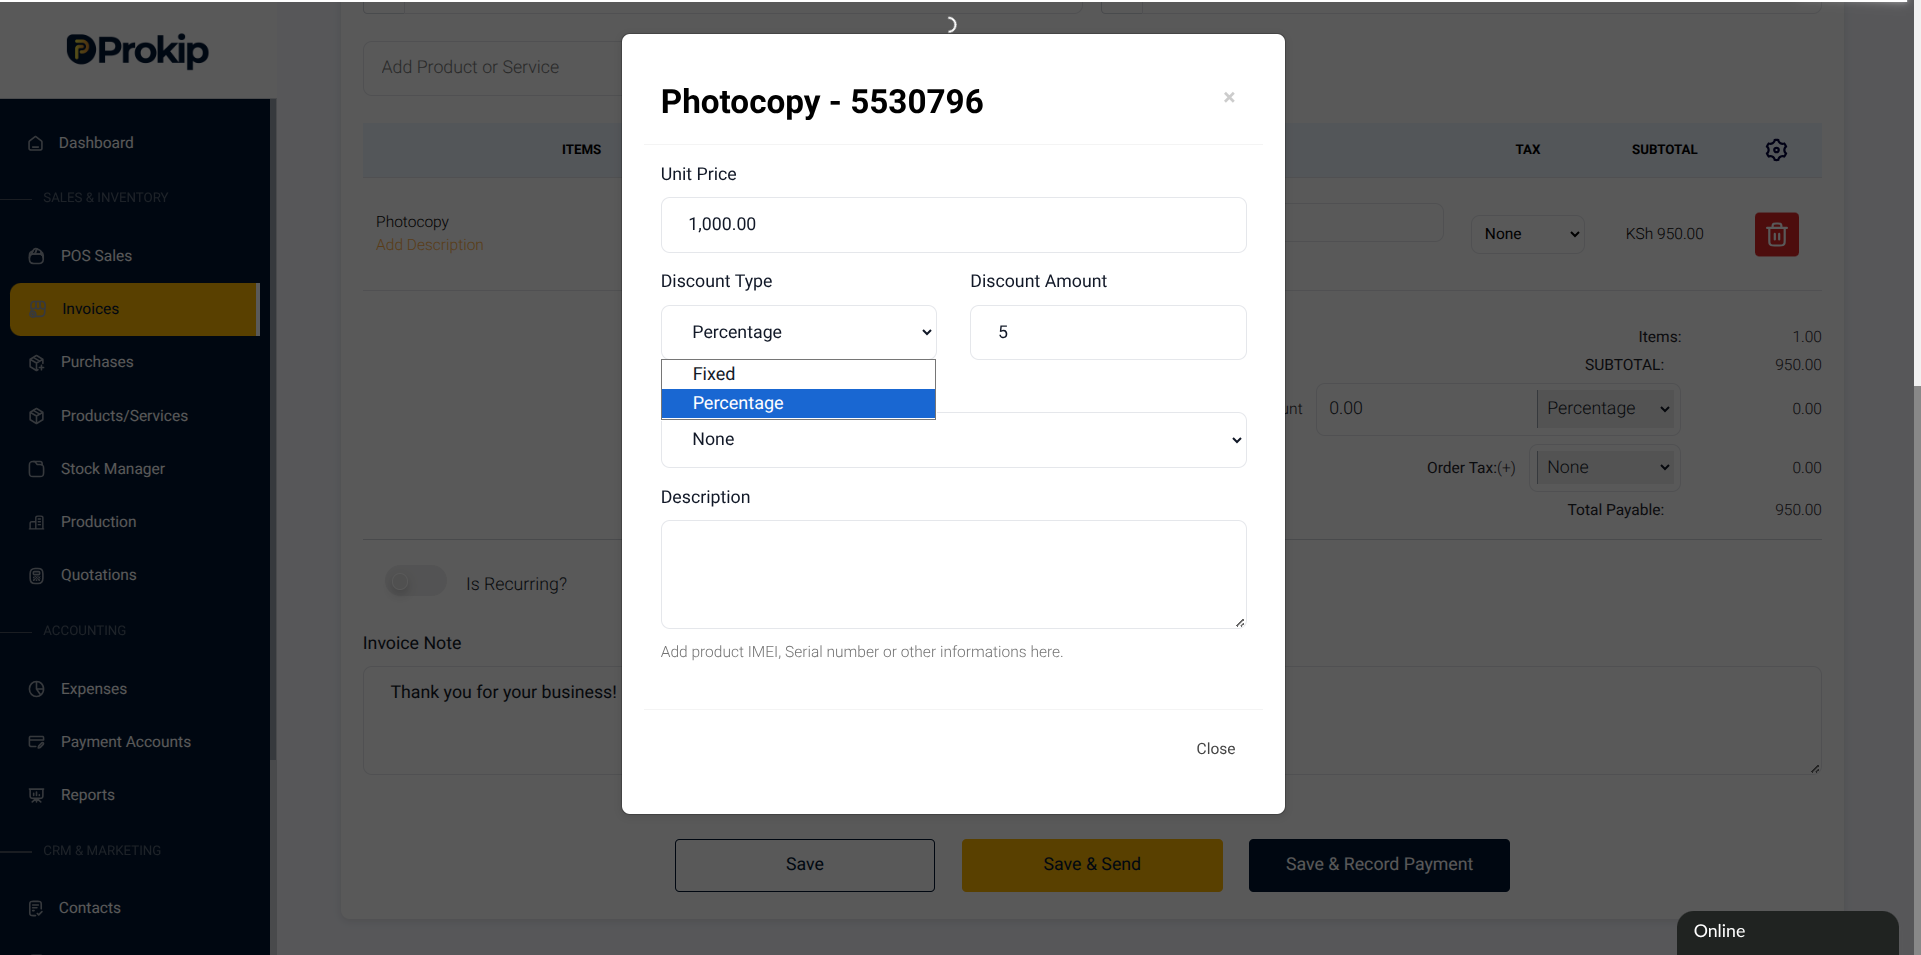
Step 13: If offering a discount, choose:
-
Percentage discount (for example, ten percent), or
-
Fixed amount discount (for example, five thousand naira).
The Total payable amount will update to include the inputted discount.
G: Optional Settings
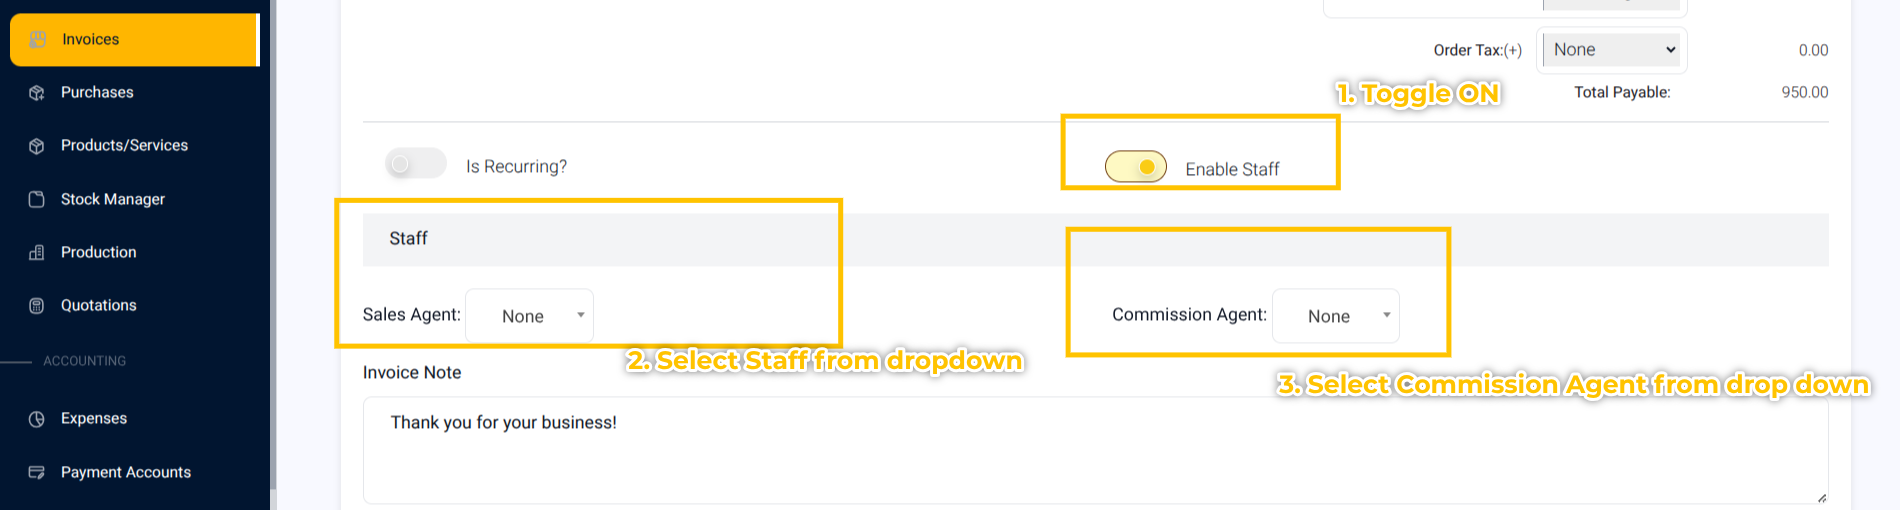
Step 14: Toggle On enable Staff and then select from dropdown
This will attach a staff or Commision Agent to the Invoice
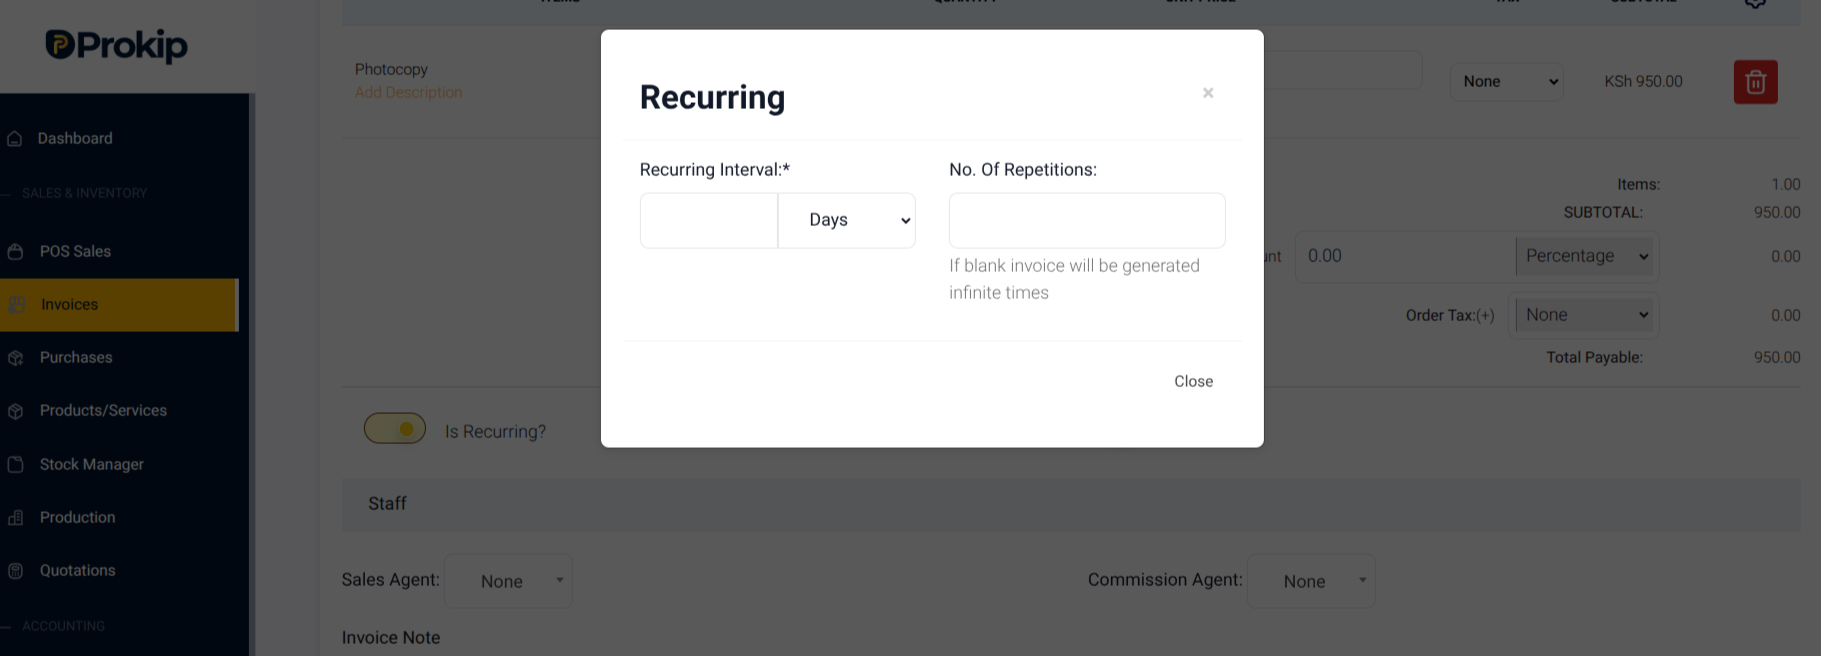
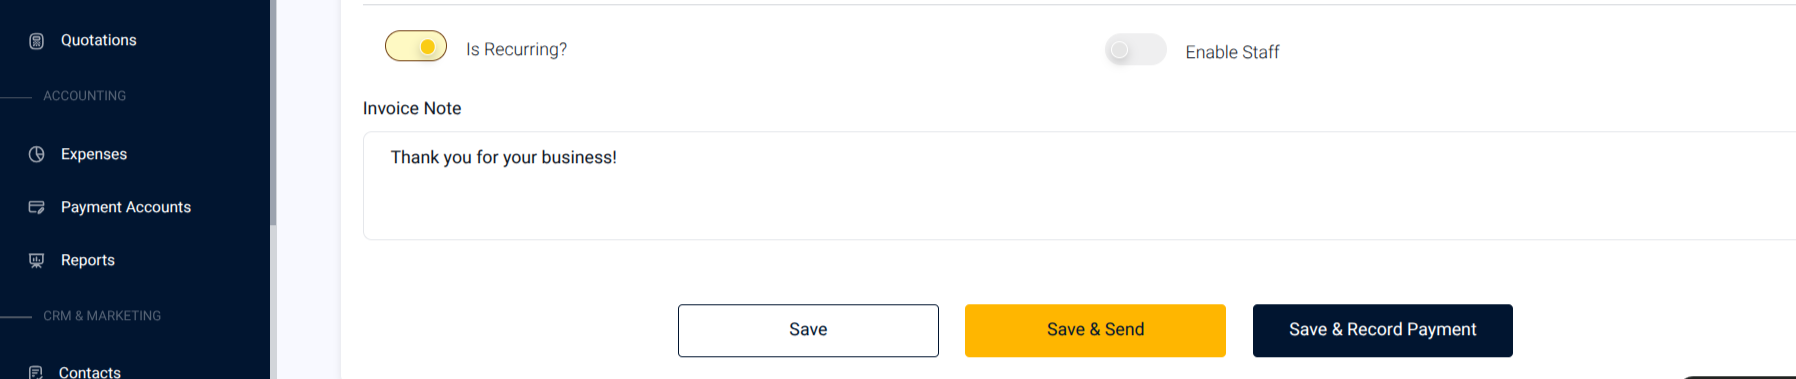
Step 15: Toggle ON “Is recurring” if it is a recurring invoice.
Input the number of days, months or years the recurring happens.
G: Save and Record Payment
Step 16: Scroll down and click Save & Record Payment.
Enter Payment Details
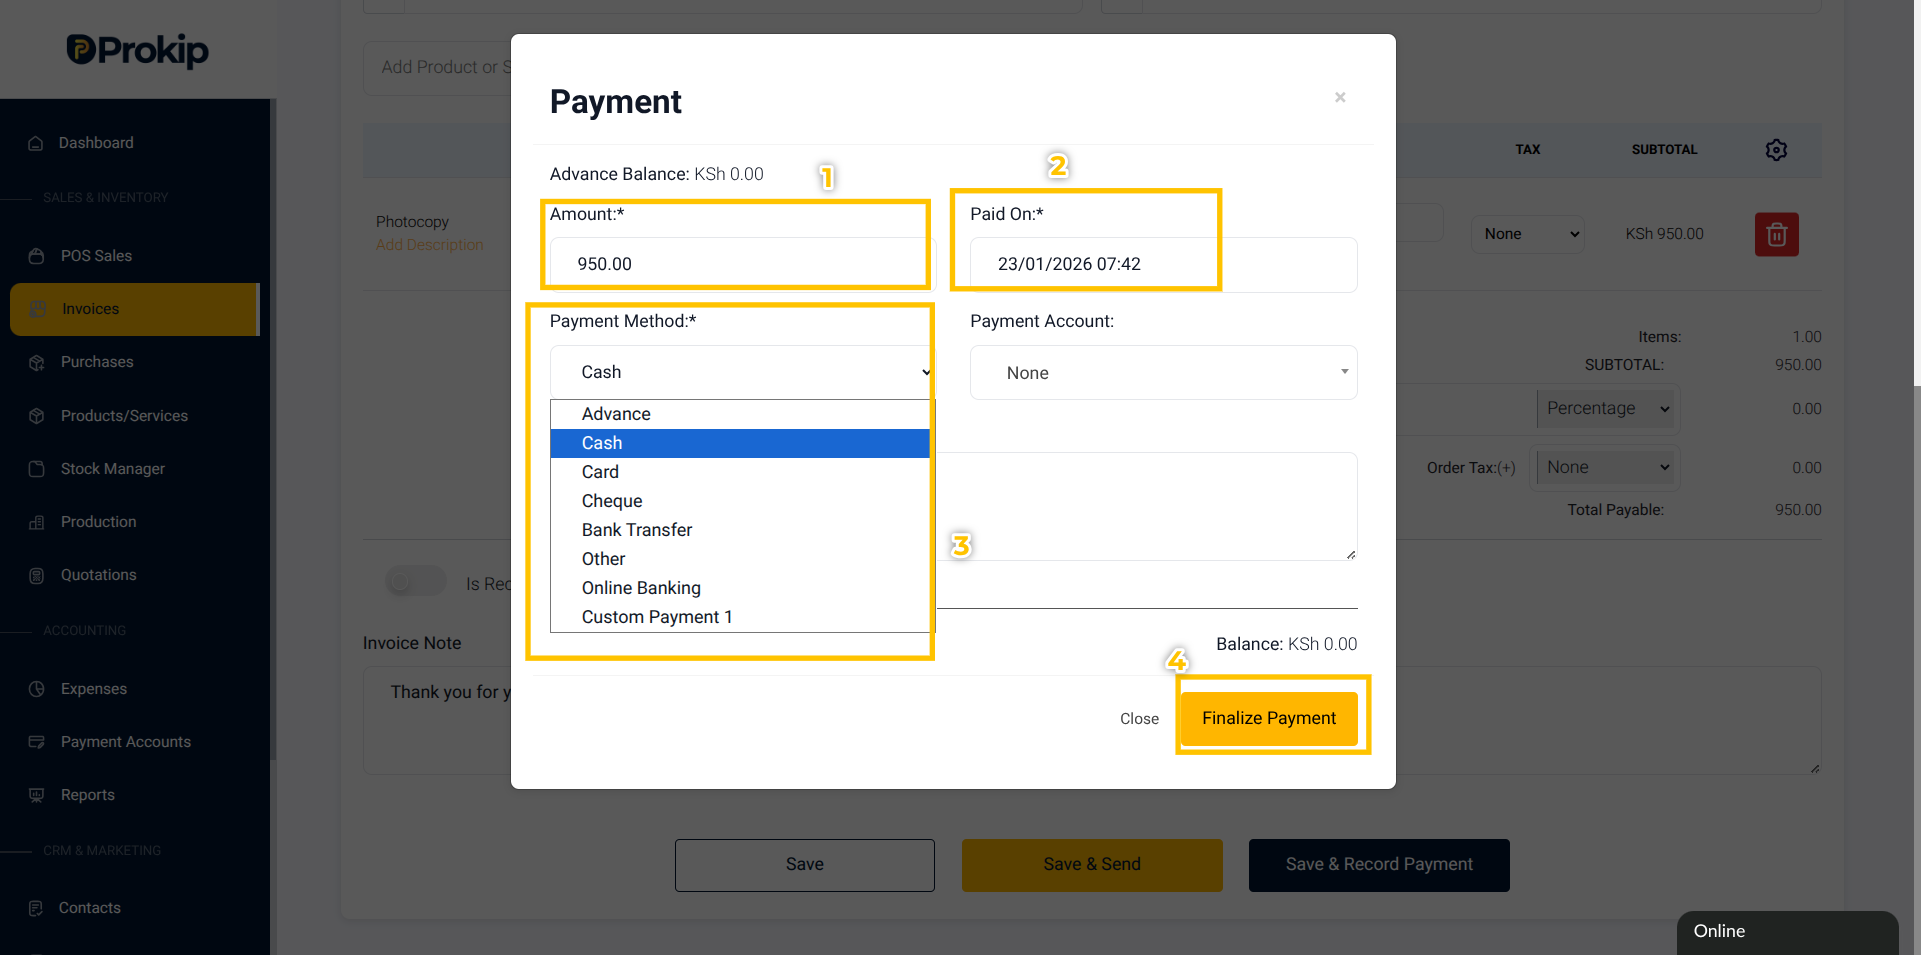
Step 17: In the payment window, enter the Amount Paid.
Step 18: Select the Payment Method, such as:
-
Cash
-
Bank Transfer
-
Mobile Money
Step 19: If paying via bank transfer or mobile money, select the Payment Account where the money was received.
If paying by cash, you can leave the payment account as Cash.
H: Finalize the Payment
Step 20: Click Finalize Payment.
What Happens Next
After finalizing payment:
-
The invoice status changes to Paid
-
The payment posts to the selected Payment Account
-
The transaction appears in Sales Reports
-
The customer’s account balance updates automatically
-
The service sale is recorded successfully
Tips & Troubleshooting
-
If the service does not appear in the invoice search, confirm it was created as a Service, not a product.
-
If the wrong payment account is selected, edit the payment immediately from the invoice actions menu.
-
If the customer pays partially, enter the amount paid — the invoice will remain marked as Partially Paid.
-
If you forget to record payment, open the invoice later and click Record Payment.
Frequently Asked Questions(FAQs)
Q1: Can I record payment later instead of immediately?
Yes. Click Save Invoice instead of Save & Record Payment, then record payment when the customer pays.
Q2: Can I add multiple services to one invoice?
Yes. You can add as many services as needed before saving.
Q3: Can I change the service price during invoicing?
Yes. You can edit the price directly on the invoice without changing the master service price.
Q4: Does recording services affect stock?
No. Services do not track inventory.