You can add employees, assign permissions and roles, and maintain secure access control across your business.
This ensures each team member has secure credentials with role-based access, improving accountability, data security, and activity tracking.
Before You Start
- Confirm you have Admin Access
- Prepare each user’s first name, last name, and email address.
- Decide the role and business location(s) to assign.
Steps
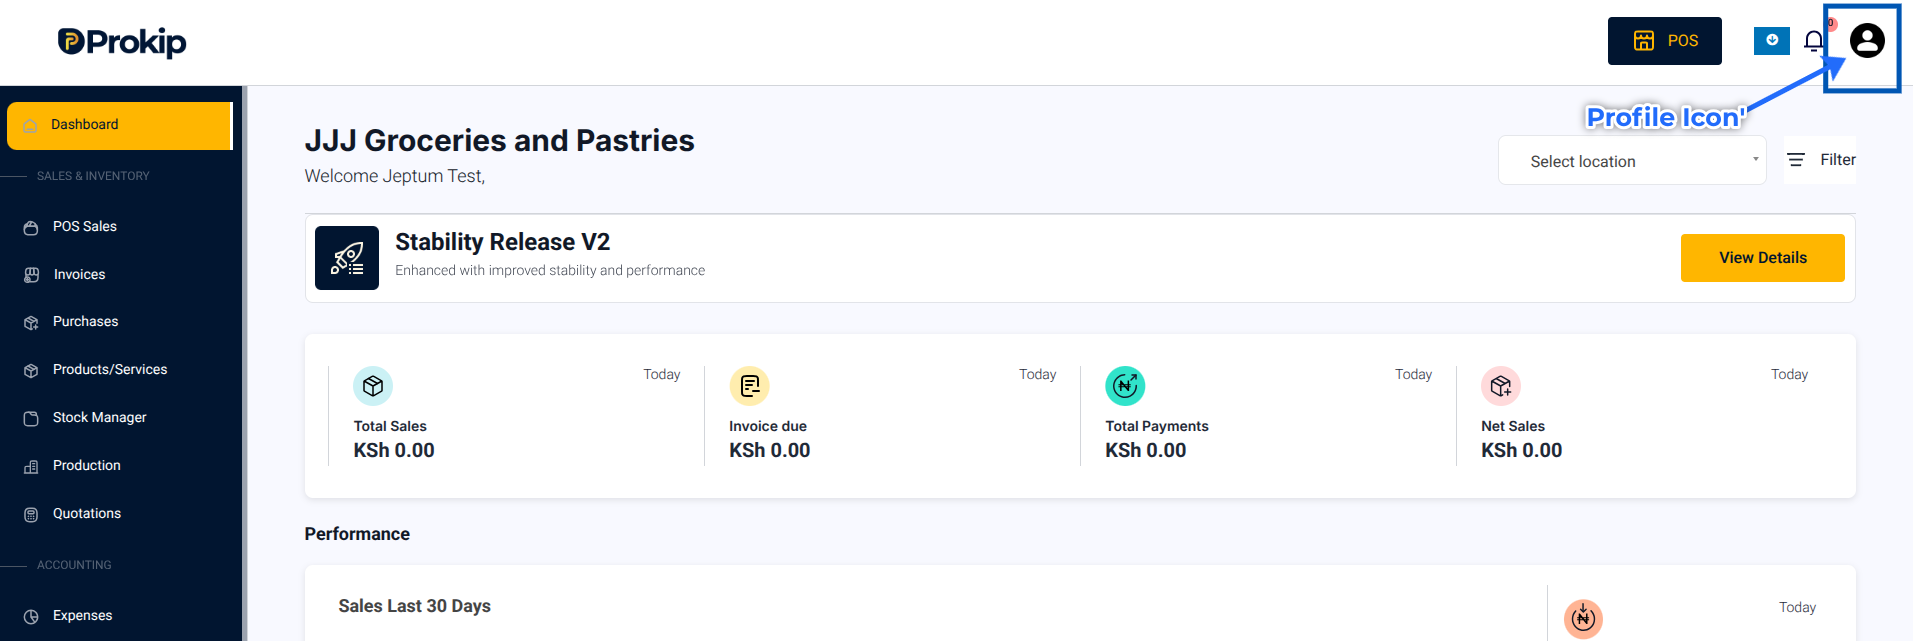
- Click on your Profile Icon in the top-right corner.
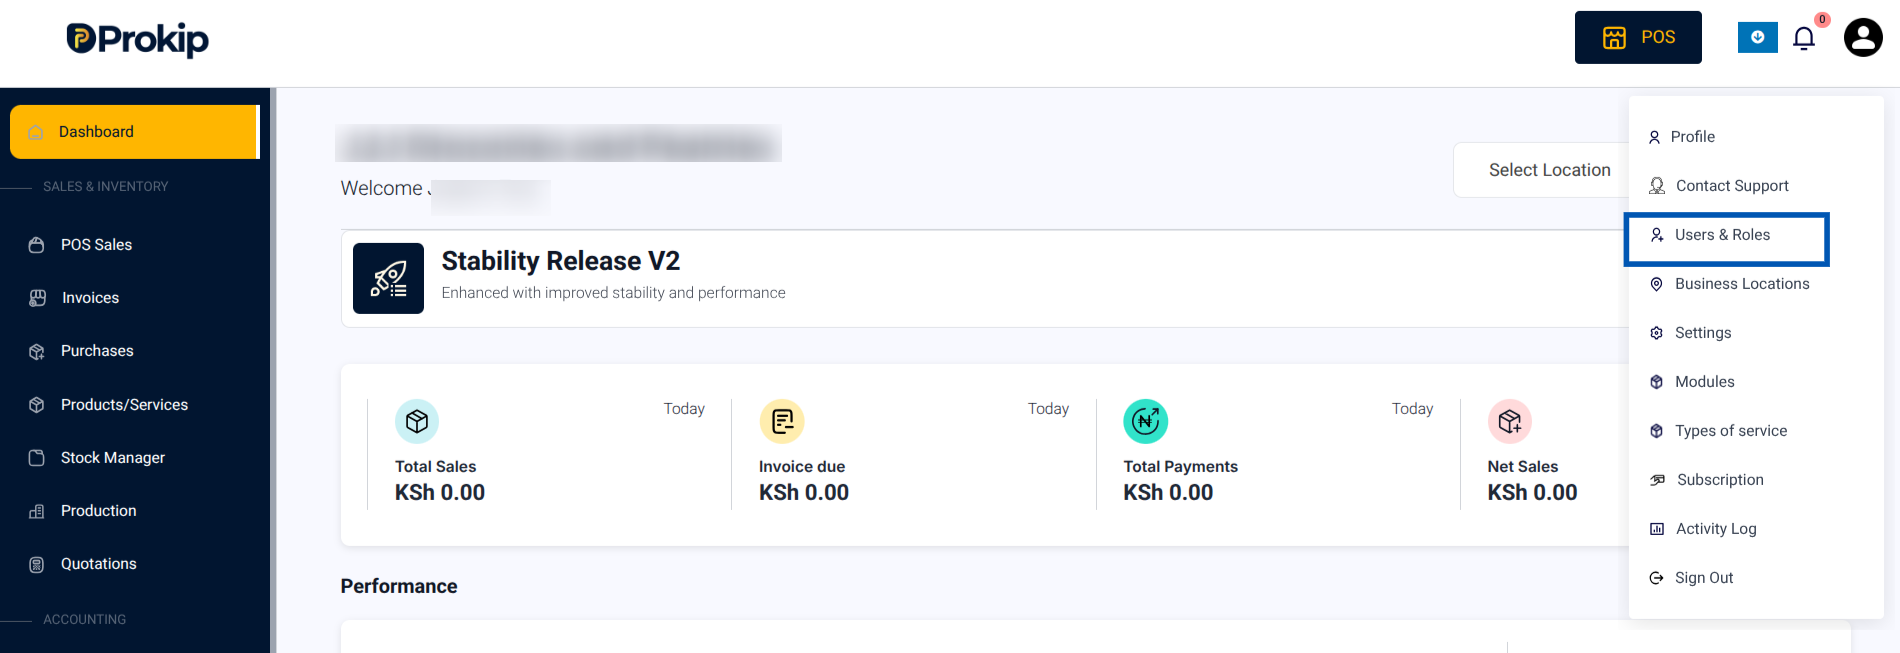
2. From the menu, select Users & Roles
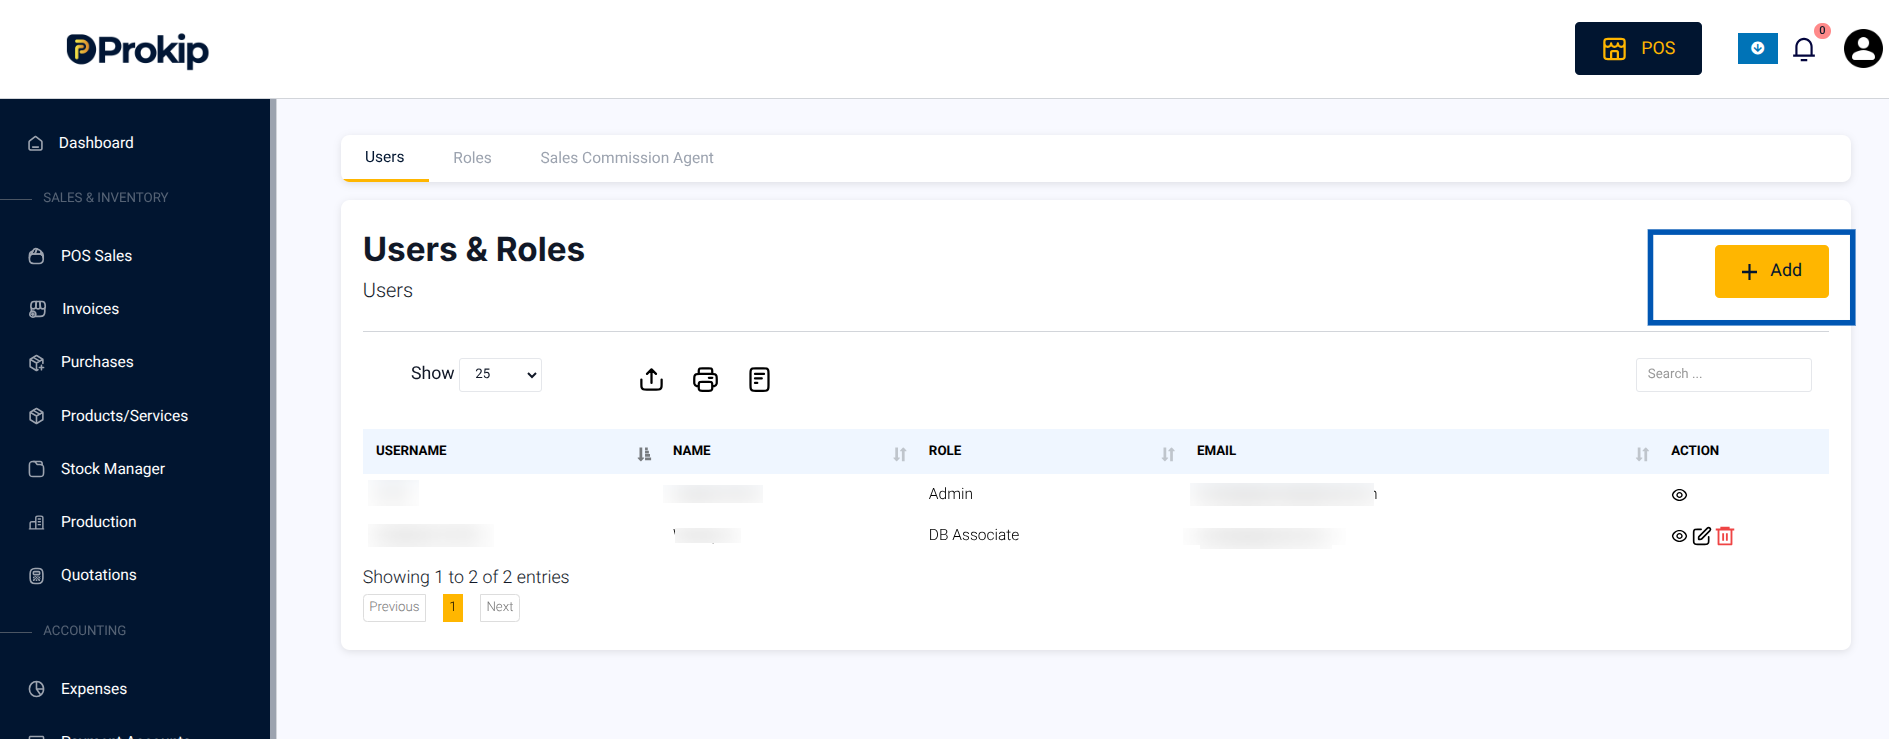
3. Click Add to add a new user.
4. Enter the user’s details:
- First name
- Last name
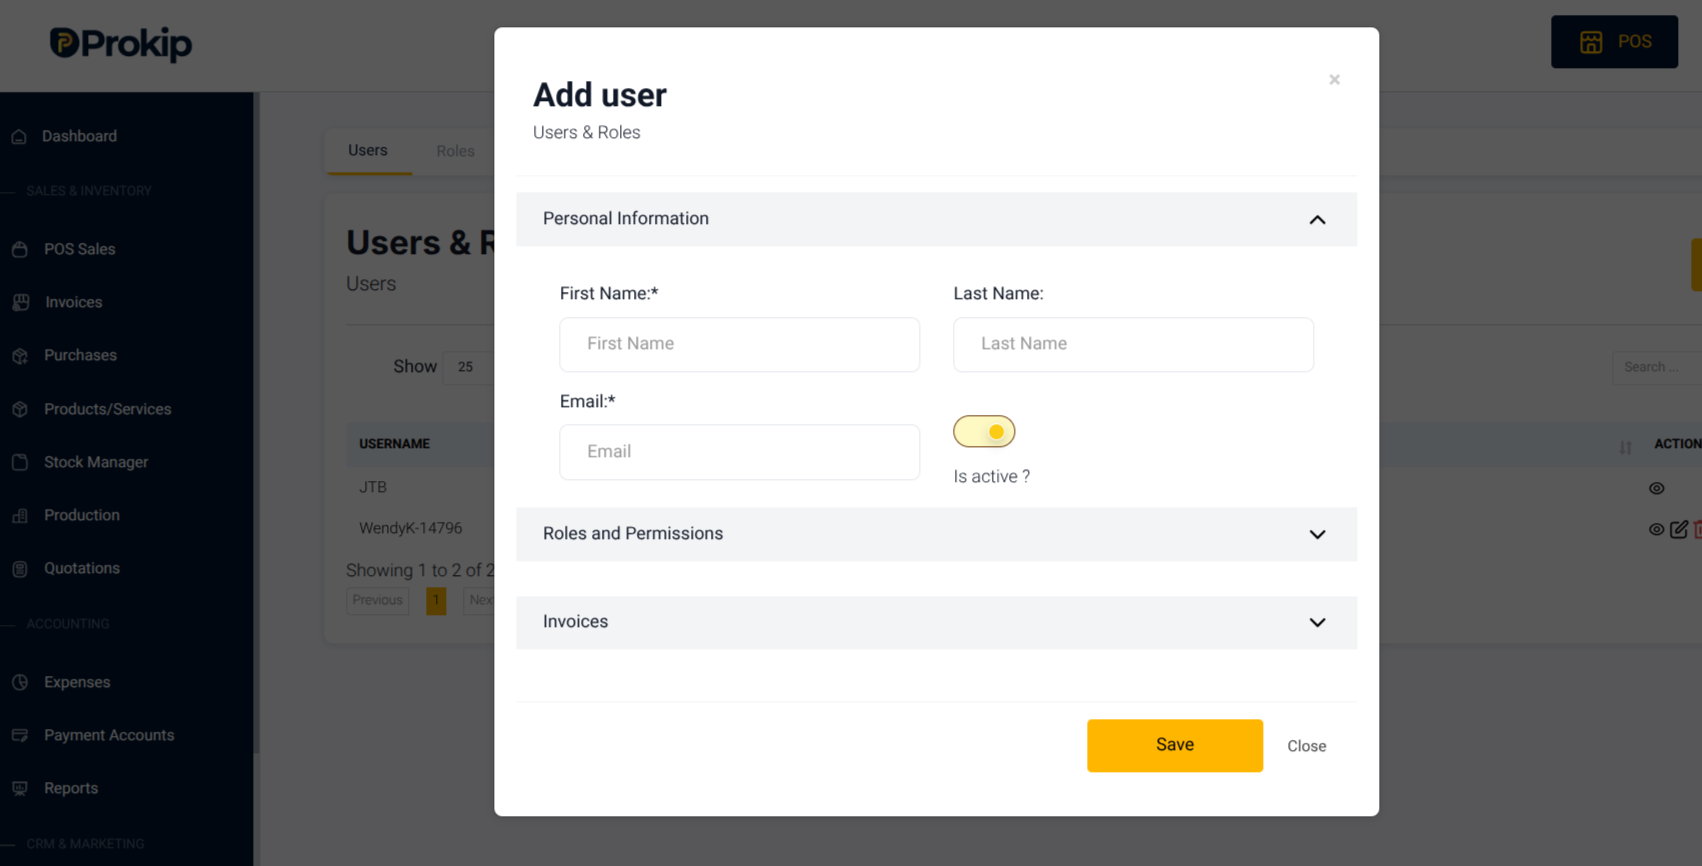
5. Upon filling the details, Toggle Is Active? ON if the user should be active.
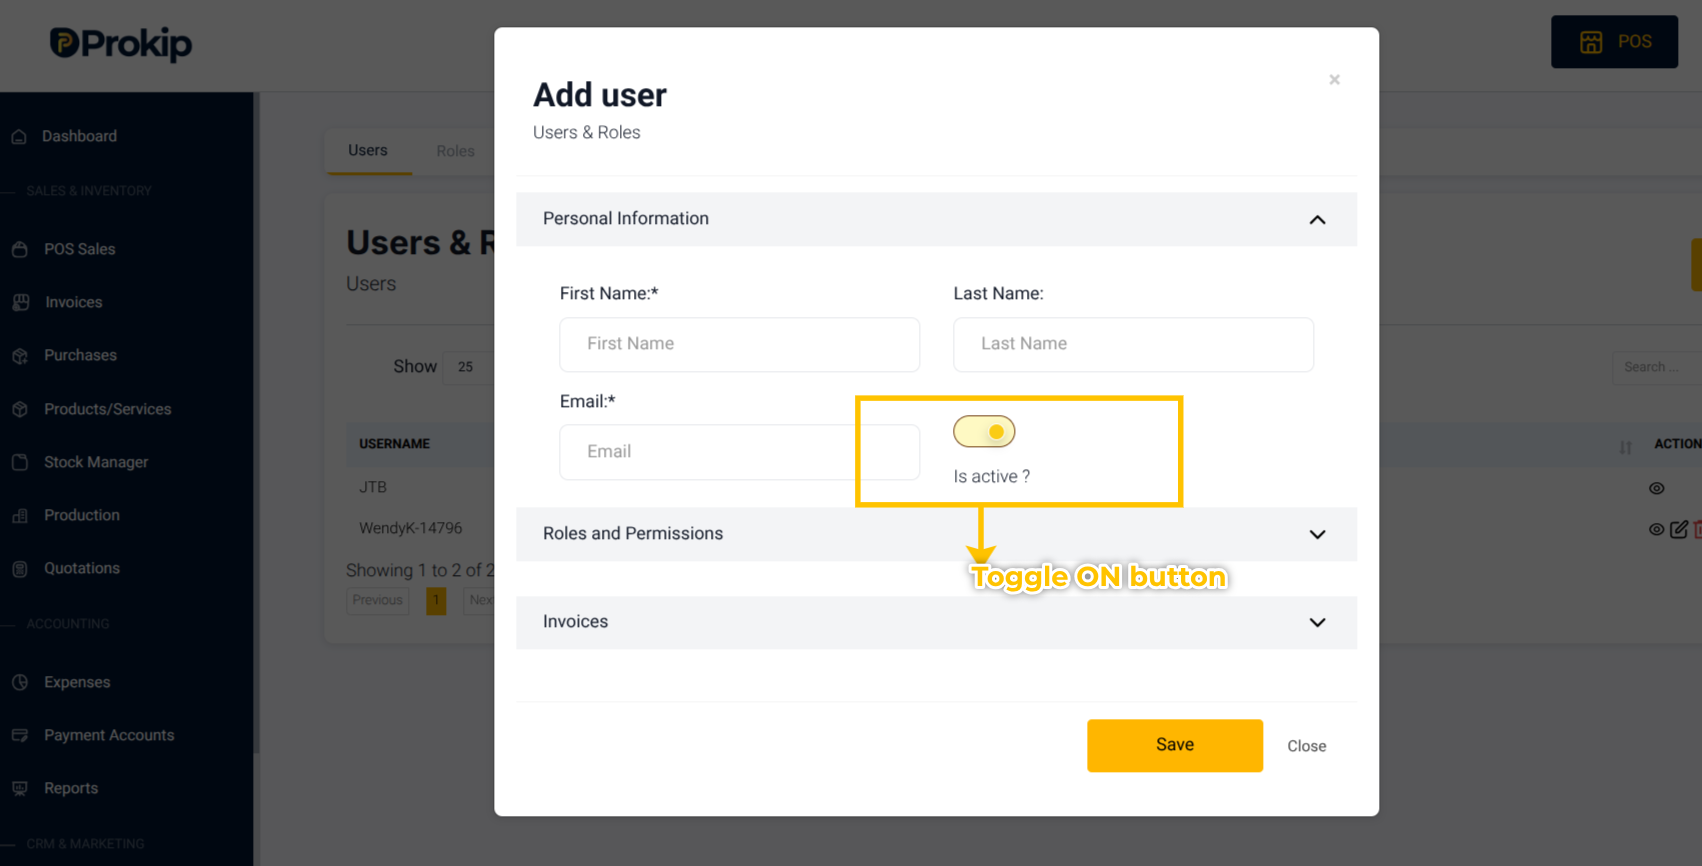
6. Under Roles and Permissions,
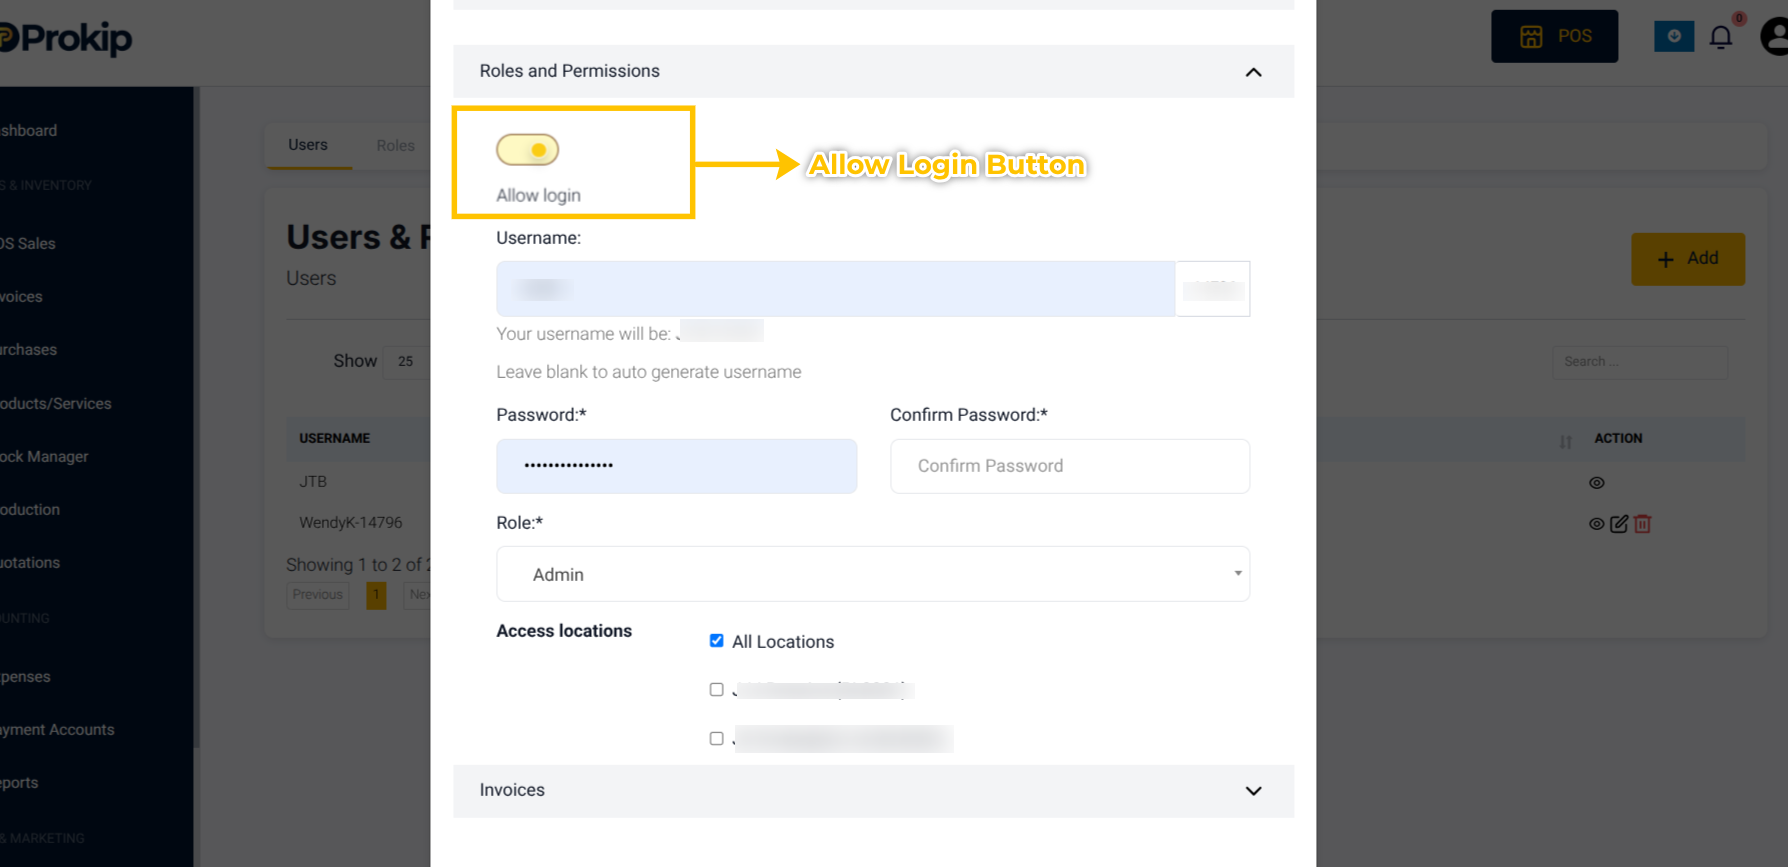
a. Toggle ‘Allow login’ ON to enable login for a user you would like to be able to login on their own.
If you allow login, ensure to input username and password.
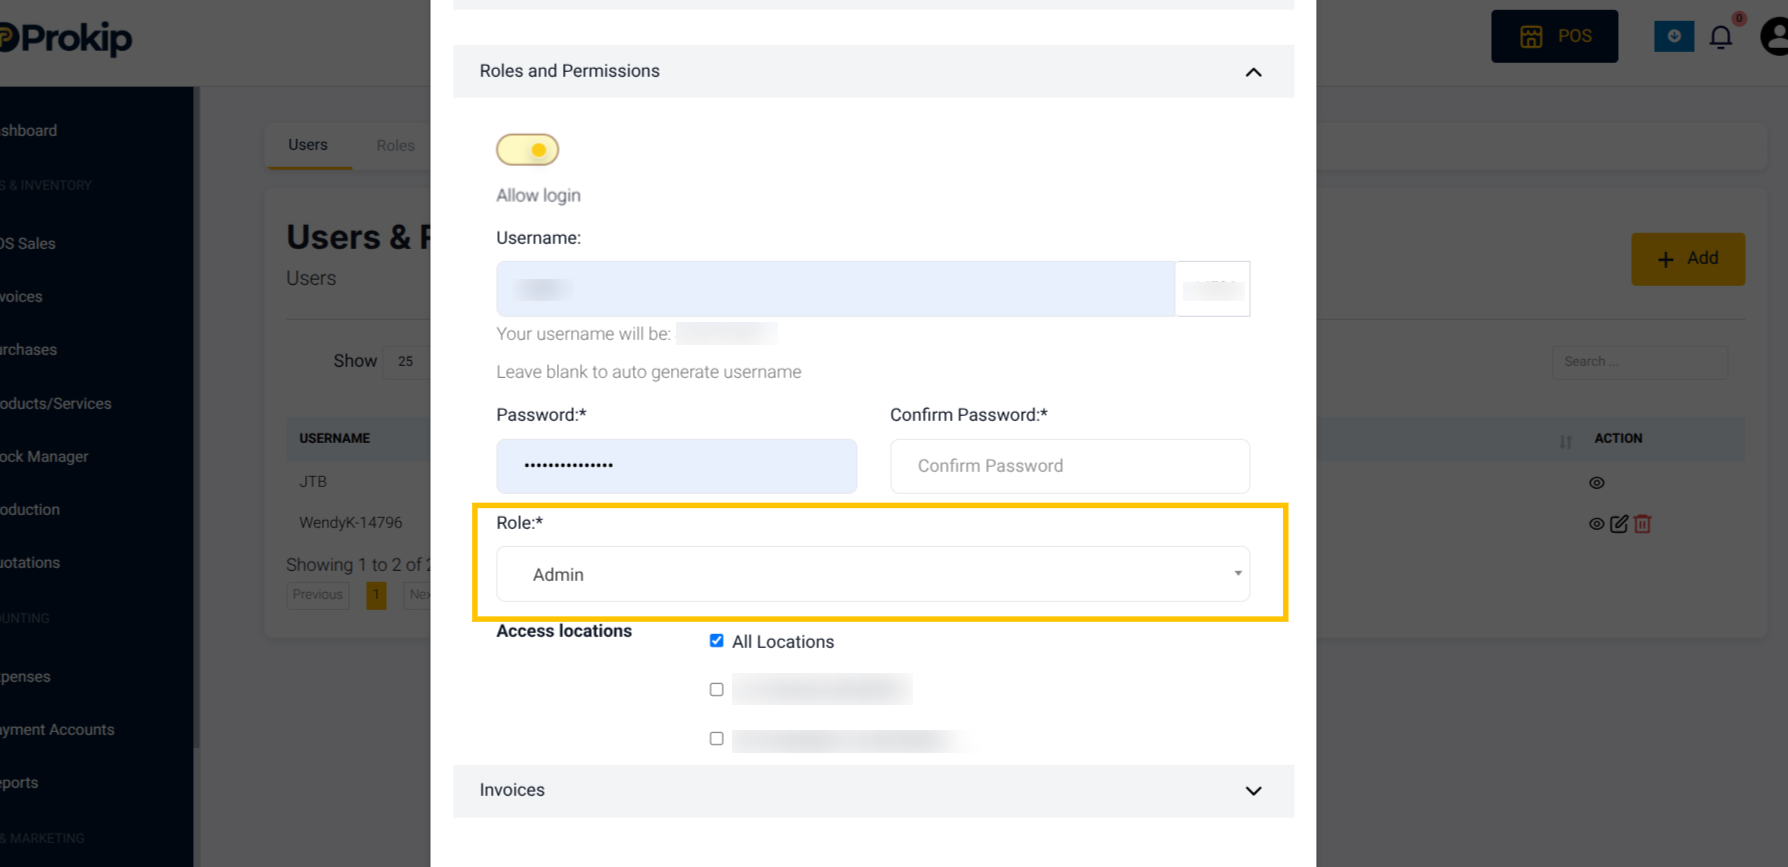
b. Assign a role to the user choosing the role for the user (e.g., Admin, Sales, Accountant).
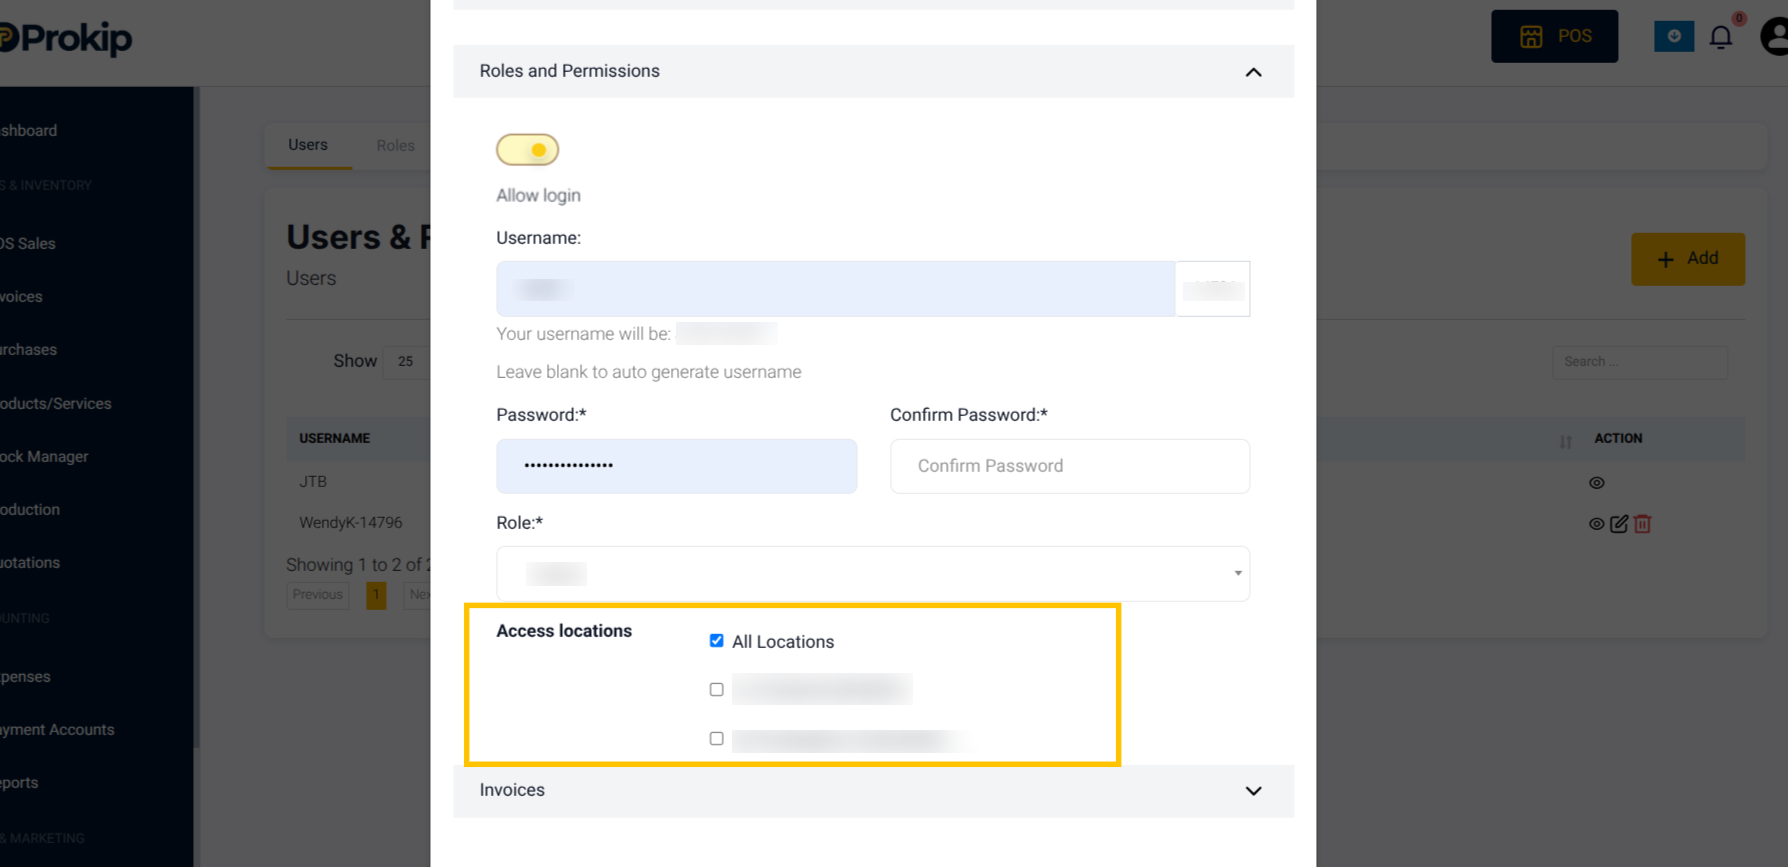
c. Assign the business location(s) they can access.
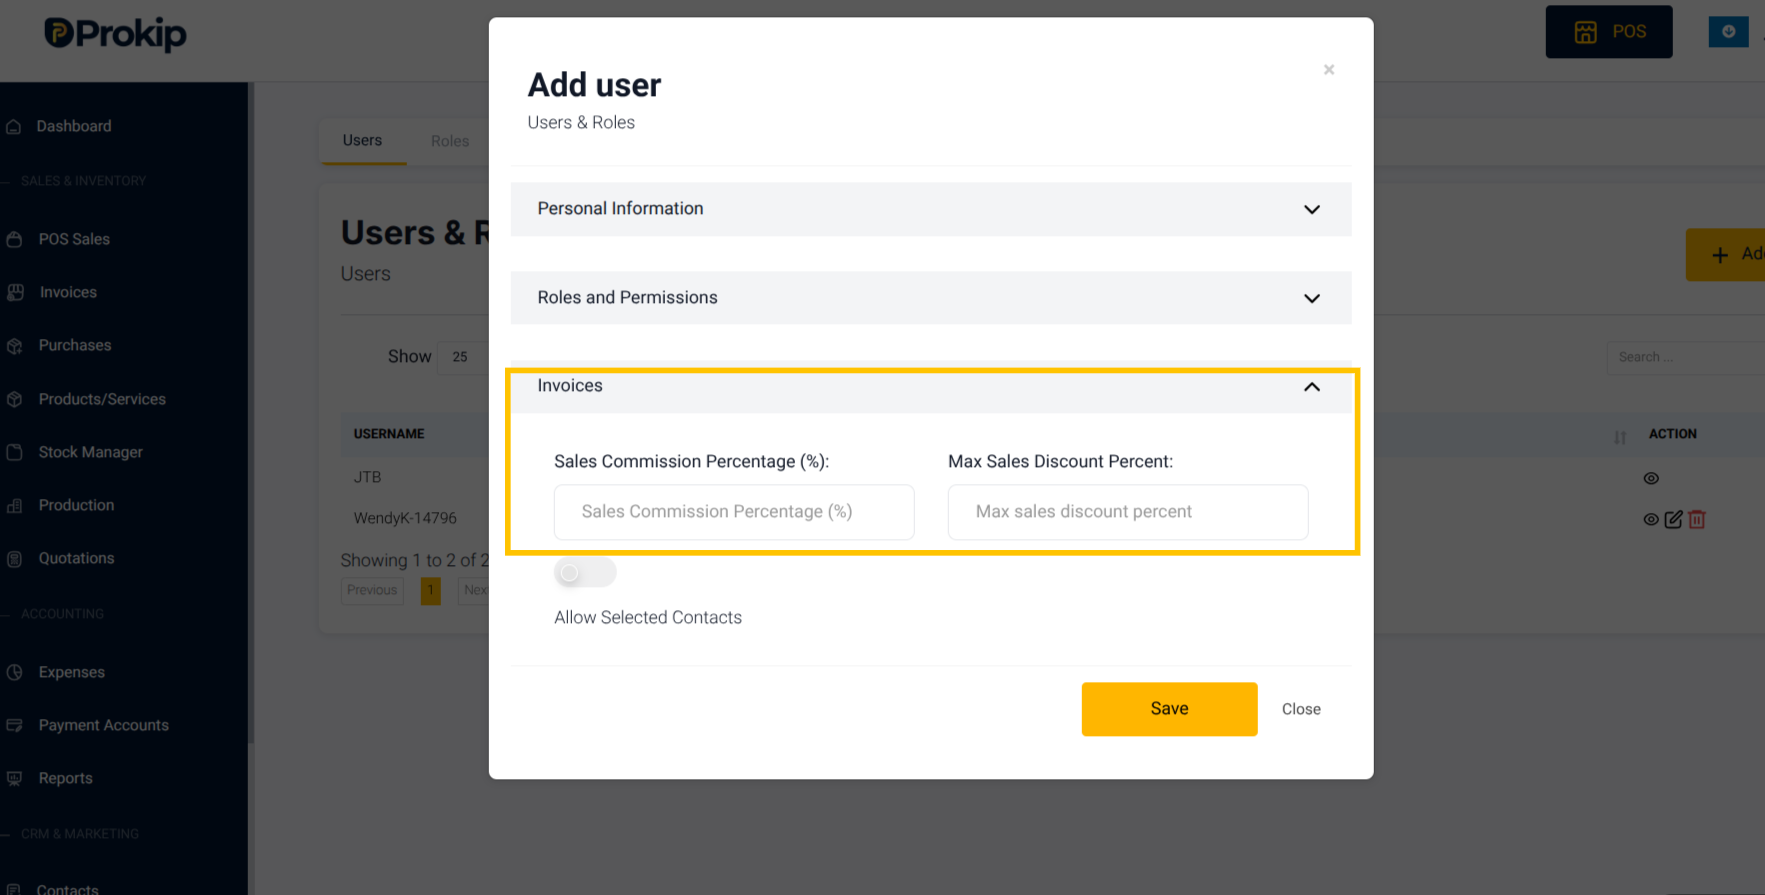
d. Under Invoices Set:
- the amount of Sales Commission Percentage(%) that a user is eligible to.
- Max Sales Discount Percent.
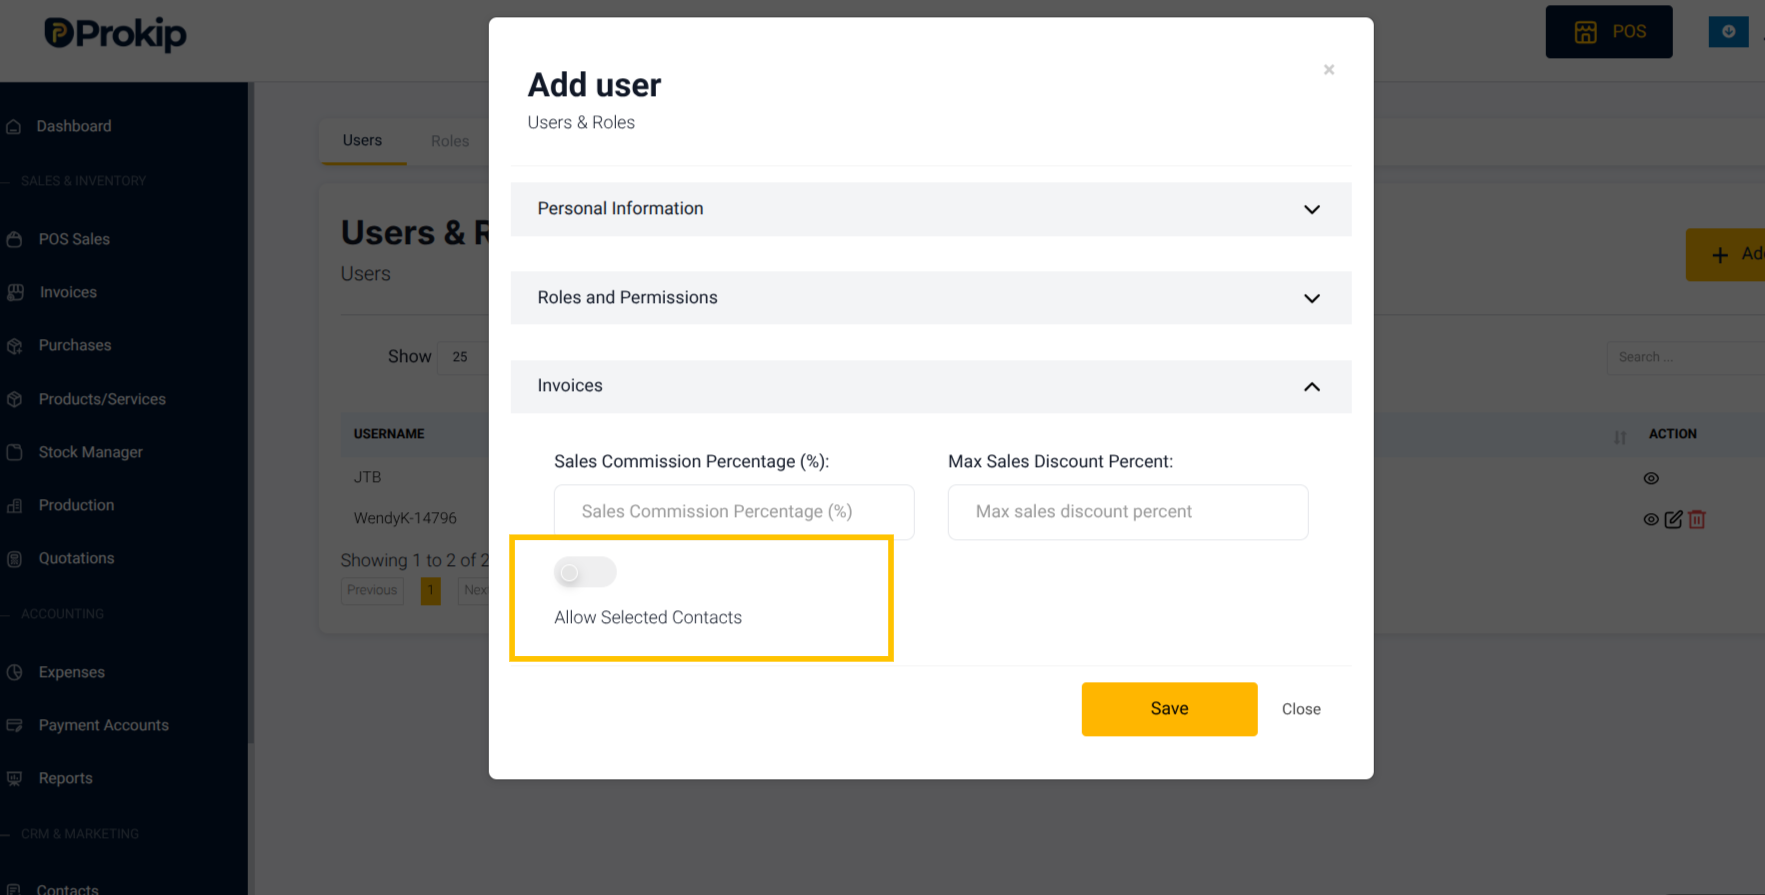
e. Toggle Allow Selected Contacts ON if this user should handle only specific customers.
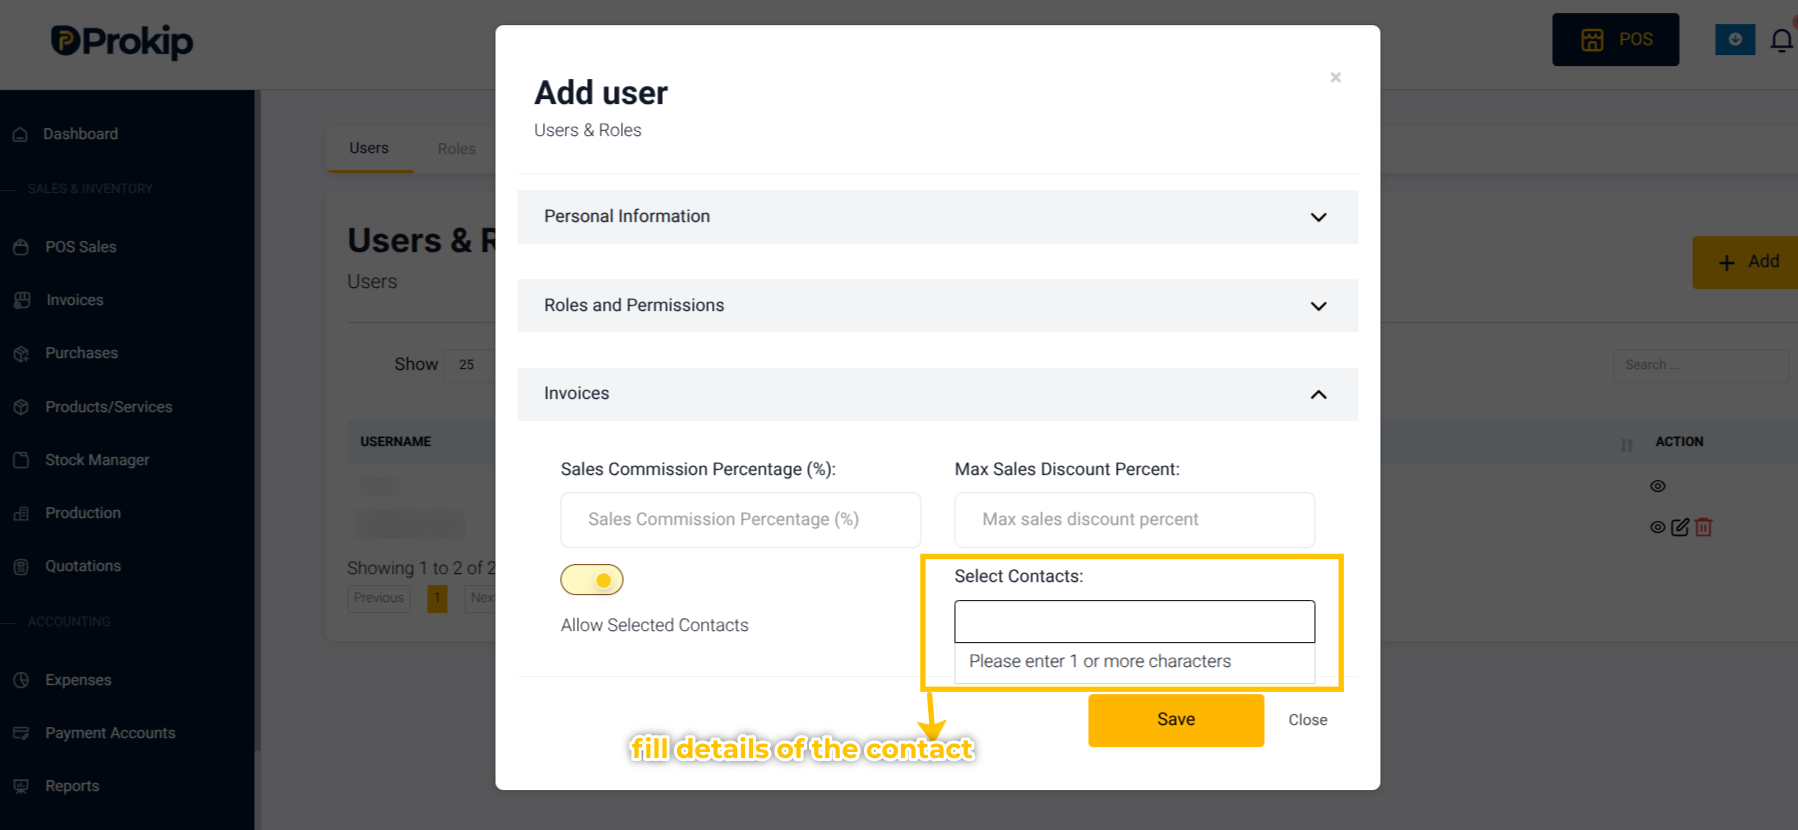
f. Then Select Contacts in the Select Contacts Table.
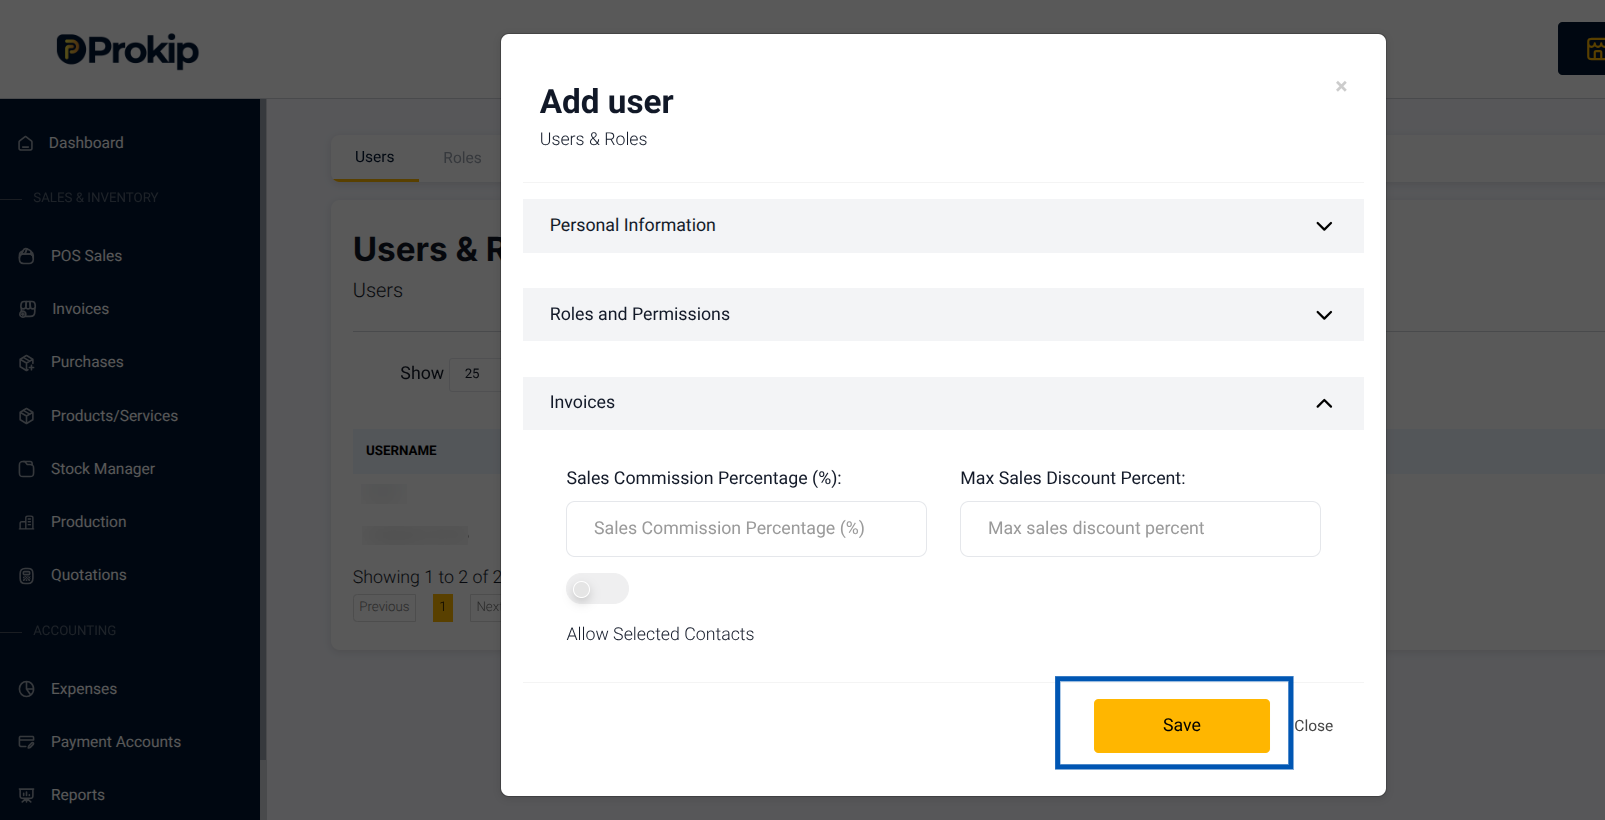
g. Click Save.
What Happens Next
The admin can share the login credentials with the new user. This allows the new user to access Prokip according to their assigned permissions.
Tips & Troubleshooting
For new staff, start with limited permissions (e.g., Sales only), then expand later as needed.